Ask Proxima DP9250 User Manual
Page 40
Attention! The text in this document has been recognized automatically. To view the original document, you can use the "Original mode".
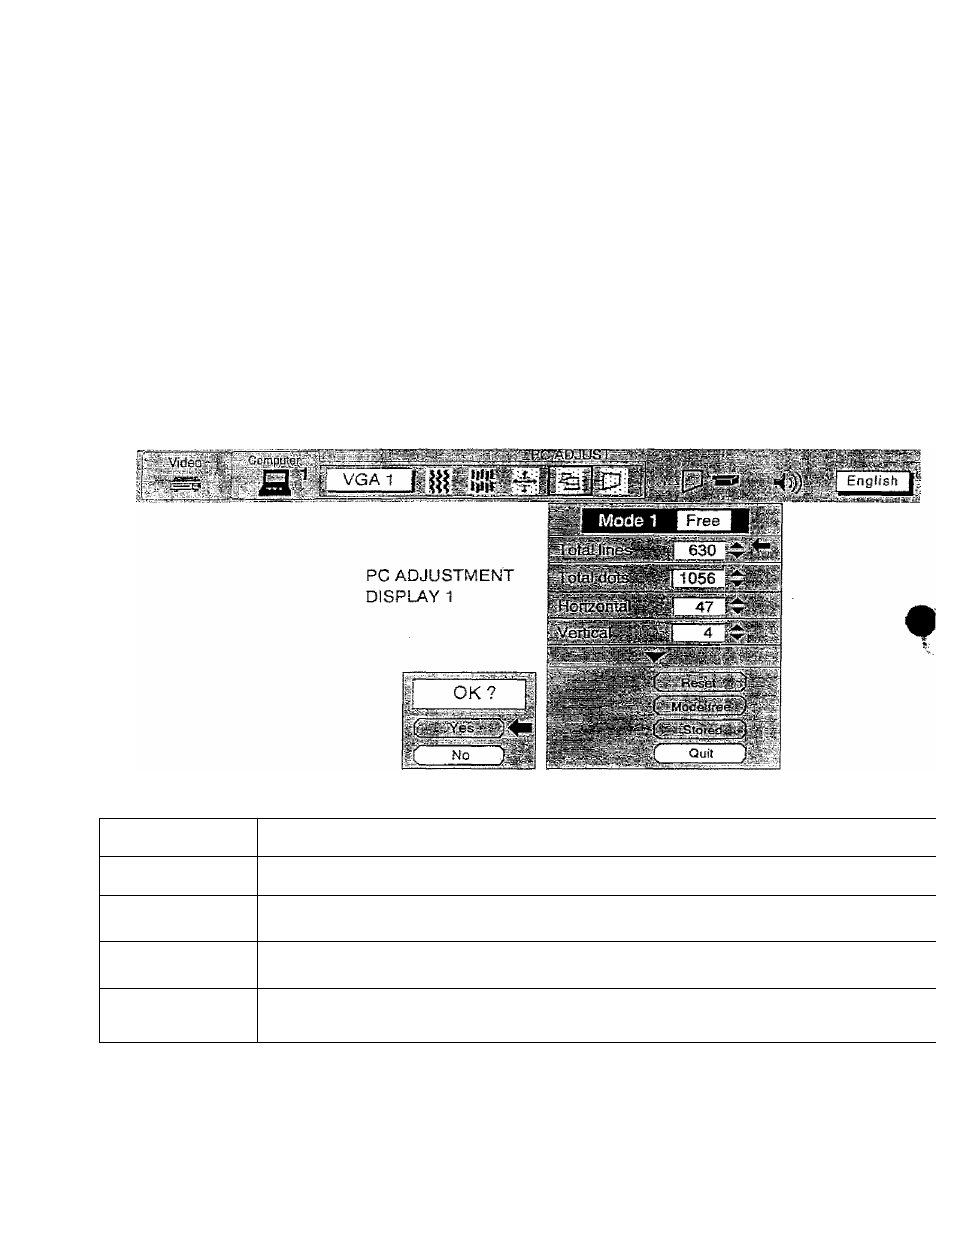
6. Another dialog box ”PC ADJUSTMENT DISPLAY 1” will appear and the parameter data for the Mode you ha
selected is shown in this dialog box.
7. The parameters will be filled with the data determined by the projector according to the present signal input,
8. The function of the parameters and their values are summarized in the table below.
||fe
9. Move the arrow to an item that you want to adjust by pressing the POINT UP/DOWN BUTTON(s).
10. To increase the level, point the arrow to and then press the SELECT BUTTON. To decrease the level, point t;
arrow to
V
and then press the SELECT BUTTON.
11. If you want to store the settings in the memory, move the arrov/ to Stored and press the SELECT BUTTON. Whi
you have stored the settings, ”OK ?” is displayed for confirmation. Move the arrow to Yes and then press ti
SELECT BUTTON .
12. To recail the parameter data before setting, move the arrow to Reset and then press the SELECT BUTTON. Wh<
you have reset the settings, ”OK ?” is displayed for confirmation. Move the arrow to Yes and then press ti
SELECT BUTTON . You can adjust the settings again if needed.
13. To quit the MENU, move the arrow to Quit and then press the SELECT BUTTON.
14. If you quit the MENU without storing the settings in the memory, the parameter data you changed will not be kept
15. The stored settings are permanently held even if the MAIN ON/OFF is switched off,
16. Adjust the data such as a "Clamp”, "Display area”, Horiz. scale” and "Vert, scale” if needed, move the arrow
pressing the POINT UP/DOWN BUTTON(s) to select (▼). Press the SELECT BUTTON.
ITEM
TOTAL UNES
The number of the total vertical lines. Adjust the number to match your PC image.
TOTAL DOTS
The number of the total dots in one horizontal period. Adjust the number to match your PC
image.
HORIZONTAL
Adjustment of the horizontal picture position. When the image is not centered on the
screen, adjust this.
VERTICAL
Adjustment of the vertical picture position. When the image is not centered on the screen,
adjust this.
•