Ask Proxima DP2300 User Manual
Page 19
Attention! The text in this document has been recognized automatically. To view the original document, you can use the "Original mode".
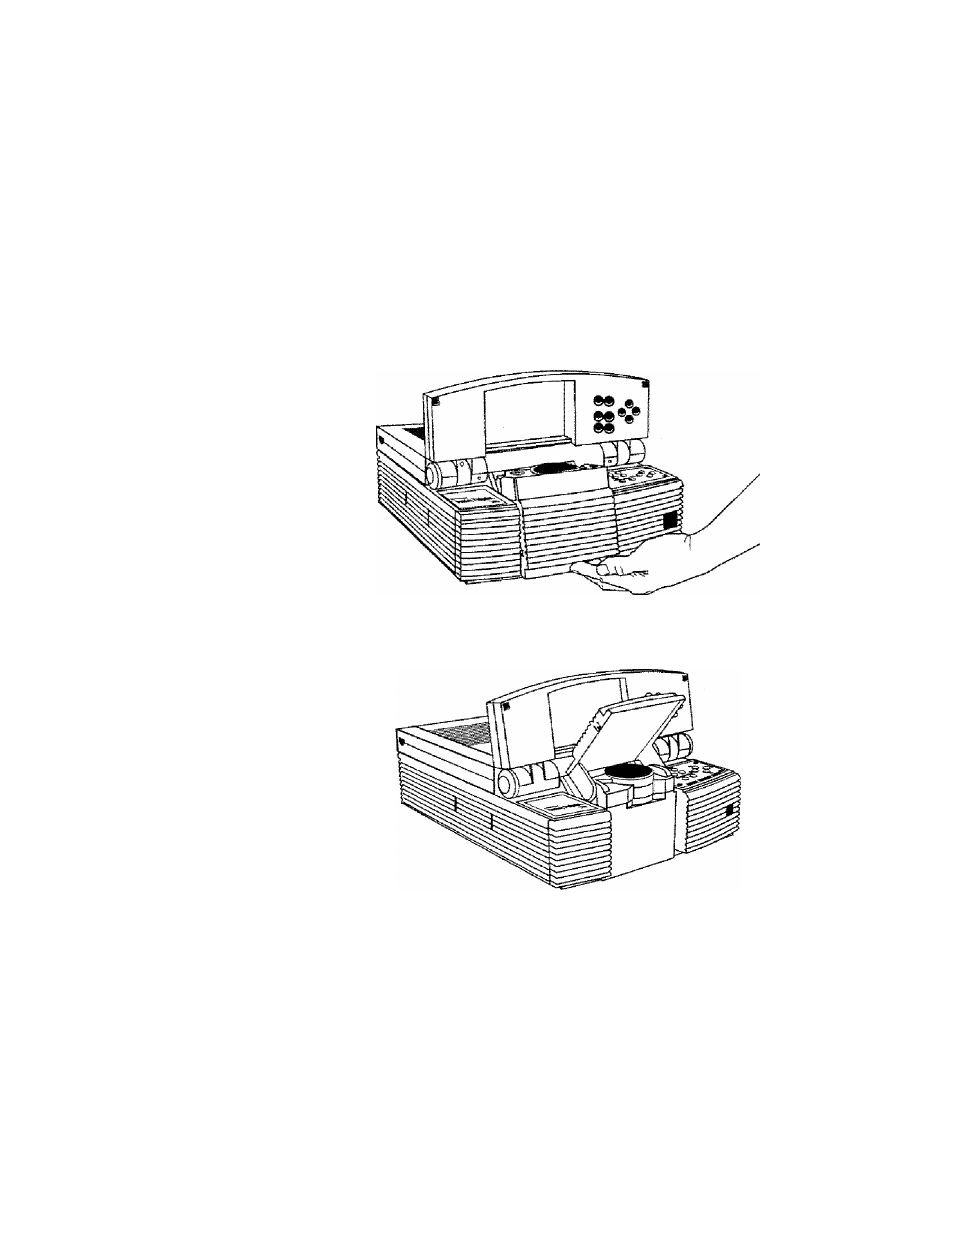
3. Place your fingers beneath the mirror assembly (located at the
lower center of the front panel) and raise it into place until it
reaches a 45“ angle (approximately) relative to the top of the
lens assembly-
Figure 6
Raising the mirror assembly
Figure 7
The Desktop Projsccor in the open position
Your projected image should fill the projection screen. If you
want to raise or lower the projected im^e, simply adjust the
mirror assembly to the appropriate angle.
2-^ » User's Guide
See also other documents in the category Ask Proxima Projectors:
- Ultralight LS2 (1 page)
- C130 (50 pages)
- DP2000s (2 pages)
- DP2800 (83 pages)
- IN42 (49 pages)
- DP6810 (1 page)
- ASK M3 (32 pages)
- DP9240 (1 page)
- DP6105 (2 pages)
- C410/C420 (50 pages)
- + DP6850 (1 page)
- DP6150 (1 page)
- C420 (DP8200X) (1 page)
- C90 (11 pages)
- 700 (29 pages)
- C440 (13 pages)
- M5 (1 page)
- Pro AV 9410 (2 pages)
- Pro AV 9310 (2 pages)
- Ultralight SV1 (19 pages)
- DP5610 (1 page)
- C105 (DP6155) (1 page)
- DP9250 (52 pages)
- Campus 300 (2 pages)
- Pro AV 9350 (2 pages)
- C300HB (3 pages)
- DP6100 (4 pages)
- DP5600 (45 pages)
- Pro AV 9300 (2 pages)
- DP9260 (1 page)
- C5 (1 page)
- DP5800 (5 pages)
- 9100 (103 pages)
- C40 (DP2000s) (3 pages)
- C420 (1 page)
- C1 (1 page)
- 21 (1 page)
- C160 (1 page)
- Ultralight DS2 (1 page)
- Impression 860 (46 pages)
- C440/C450 (61 pages)
- Ultralight LS1 (49 pages)
- A9+ (8 pages)
- Pro AV 9310L (49 pages)