Assembly of hitch plate (see figure 9), Tire pressure – Bolens 130-527-000 User Manual
Page 10
Attention! The text in this document has been recognized automatically. To view the original document, you can use the "Original mode".
8. Assemble the grass catcher to lawn tractor as
—follows. See figure 8. Lift the grass catcher aii the
way up. Have someone hold grass catcher up or
block up. Then with two 1/2" wrenches, tighten
hinge bracket boits securely.
Two 1/2" Wrenches
FIGURE 8.
Hitch
Plate
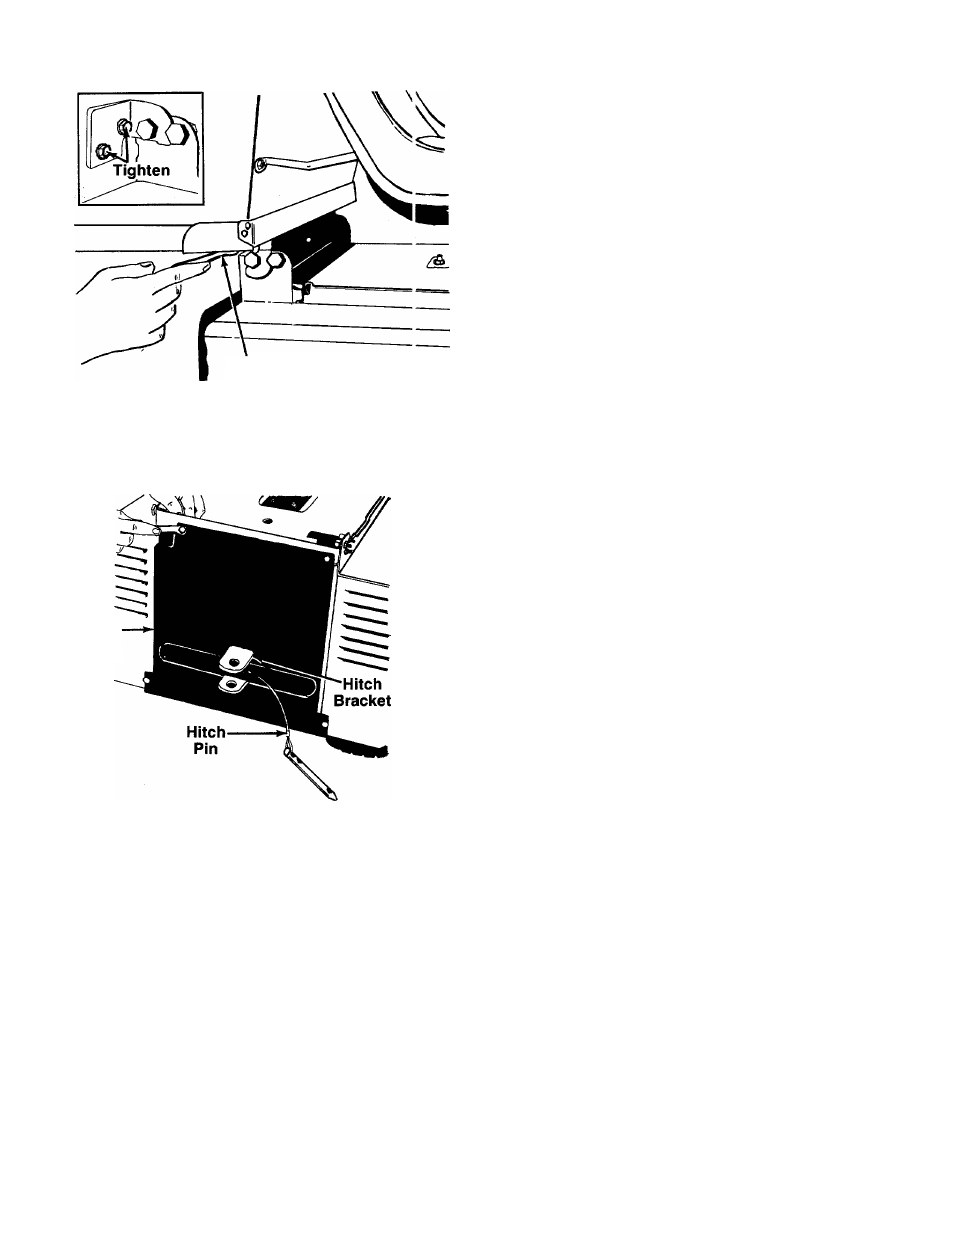
ASSEMBLY OF HITCH PLATE (See figure 9)
The hitch plate is used in place of the grass catcher
when towing a traiier.
1. Remove the grass catcher.
2. Place the hitch bracket through the hitch plate.
Secure with hex boit (K), lock washer (L) and hex
nut (M). The looped end of hitch pin (O) goes under
head of bolt.
3. Remove the rear chute baffle (if so equpped) by
removing the two hex bolts, lock washers, and hex
nuts used to secure the rear chute baffle to the
grass catcher adapter. See reference number 102
on page 27.
—4. Place the rear hitch piate against the discharge
opening of the lawn tractor. Attach with four 5/16"
boits (H), lock washers (I) and nuts (J).
Use the hitch pin to secure your attachments to the
iawn tractor.
FIGURE 9.
TIRE PRESSURE
The tires on you unit may be over-inflated for shipping
purposes. Reduce the tire pressure before operating
the unit. Recommended operating tire pressure is ap-
proximateiy 12 p.s.i. (check sidewali of tire for tire
manufacturer’s recommended pressure).
A
WARNING: Maximum tire pressure under
any circumstances is 30 p.s.i. Equal tire
pressure should be maintained on all
tires.
10