Ment, Total lines, Total dots – Ask Proxima Ultralight LX User Manual
Page 25: Horizontal, Y ^vertical, Qamp, Display area, Horiz. scale, Scale, Reset
Attention! The text in this document has been recognized automatically. To view the original document, you can use the "Original mode".
COMPUTE!
MENT
This Projector can automatically detect display signals from most personal computers currently distrit
However, some computers employ special signal formats which are different from the standard ones anc
not be detected by this projector. If this happens, the projector cannot reproduce a proper image and the i:
is recognized as a flickering picture, a non-synchronized picture, a non-centered picture or a skewed pictun
This projector has PC ADJUSTMENT function, to enable you to precisely adjust several parameters to match with the
signal format. The projector has eight independent memory areas where you can store the parameter you have set.
enables you to recall the setting for a specific computer whenever you need it.
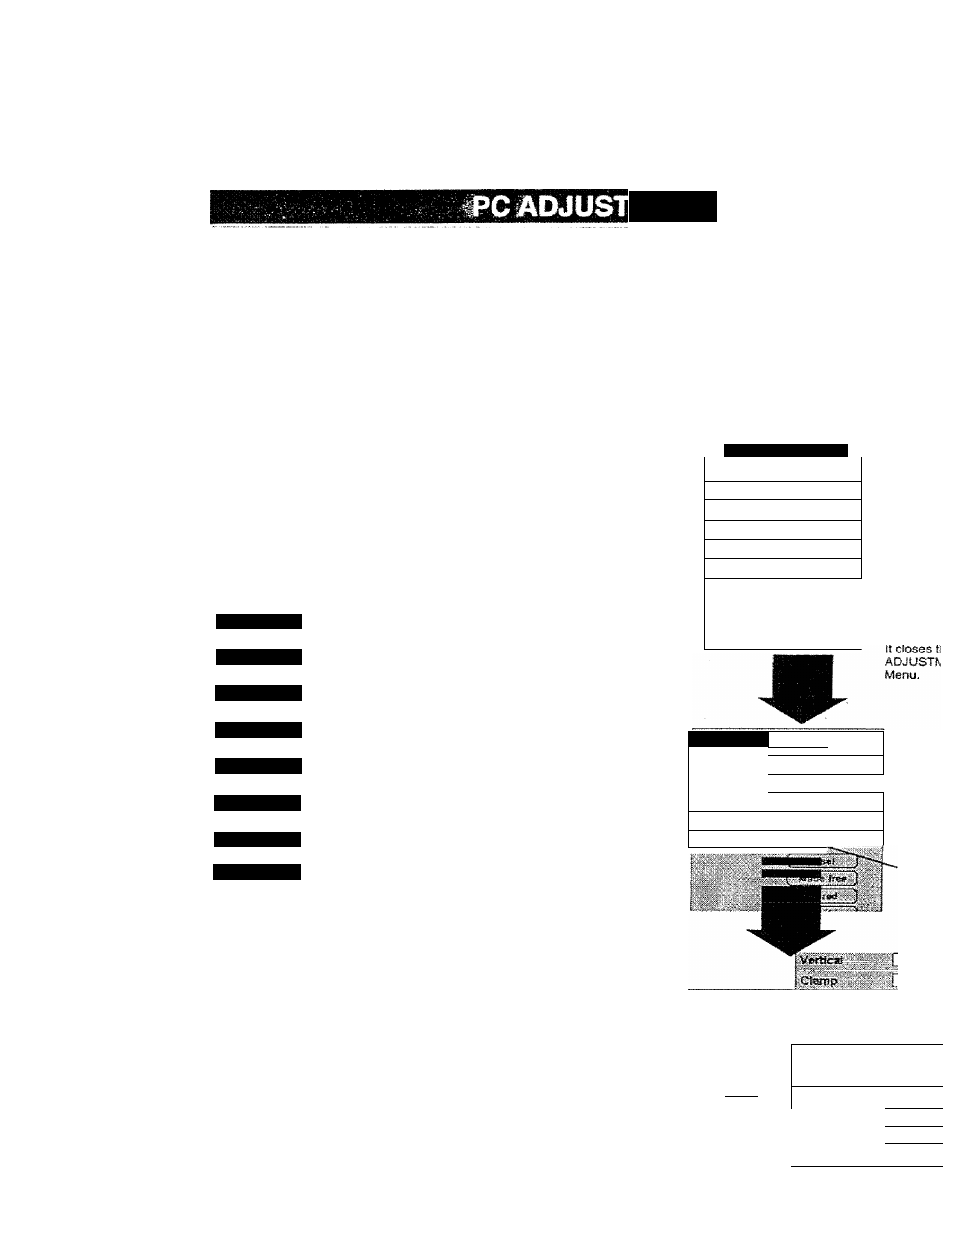
Press the MENU button and the ON-SCREEN MENU will appear.
Press the POINT LEFT/RIGHT buttons to select PC ADJUST ^
and press the SELECT button. Another dialog box "Where to
reserve" Menu wit appear.
In this dialog box, you can store the parameter into the area from
"Mode 1“ to “Mode
8
.“ When memorizing the new computer
parameter, select the Mode with the message of ’Free* by
pressing the POINT UP/DOWN buttons and SELECT button. To
change the parameters of the Mode previously set, select the
Mode with “Stored."
When the Mode is selected. Parameter adjustment dialog box
appears. Adjust the each item to match with your computer.
Total lines
Total dots
Horizontal
:'y ^Vertical
Qamp
Display area
Horiz. scale
scale
The
number
of
the
total
vertical
lines.
Adjust
the
number
to
match your PC image.
The
number
of
9te
total
dots
in
one
horizontal
period.
Adjust
the number to match your PC image.
Adjustment
of
the
horizontal
picture
position.
When
the
image
Is not centered on She screen, adjust this item.
Adjustment
of
the
vertical
picture
position.
When
the
image
is
not centered on the screen, adjust this item.
Adjustment
of
Bte
clamp
level.
When
the
trrtags
has
a
dark
barjs), try this adjustment
Adjustment
of
the
display
area
to
match
your
PC.
The
data
of
the selected mode is displayed in “H' and "V boxes.
Adjusting the height of the picture image.
Adjusting (he width of the picture image.
^
When the parameter data adjustment finishes to be set, select
^ “Stored" and press the SELECT button. "OK?" dialog box is
displayed for confirmation.
Each of the keys operates as follow,
... it recall the parameter data that previously adjusted.
Reset
Mode free
Stored
Quit
St
clear
the
parameter
data
previously
set
the
selected
Mode.
It stwas the paiameters in tiia memory.
!t doses the PC ADJUST Menu,
C
To select the Mode manually adjusted in PC ADJUSTMENT
Menu, select the mode at the SYSTEM SELECT Menu. (Refer to
page 24.)
f'C .‘t JL'St '
*<•))
Wriere to r«s«rve
Med«
1 1 stored
¡Mode
2
i Stored
F
Mo«
3 i
f
É
Ij Free
Veci«
6 1^,
Mod«
B
1 Free
7
Med« 8
Cl.
IFree
V
Ui-tt .'i
, .V“.'n !■
= -■> r: •
1
dialog bo
'This
Mod
páramete
stored.
'"The Vaca
■Manual S
i
Mode (11
1 Mod« 1
lFree_
■ Totat'nes
jpL,rr"L
■"cte: rfsts
Hortzontal
M...........
'
i
Verl-cîL
'Move
!:
A, or "V
SELEC
Press
Í
button;
to
adjui
“Dispia;
“Horiz,
“Vert s
720 ■
-iO-3
jSOOs* >.»
■o.
'
ica
;
I t Z ï
J d 4
':>f- ^ irj;"t
(
'~-"l.... Ì
I sii
V
t'e-r.z scale
Vert, tc-sle
-ì/;.
f SliMfaft
l^sssimpY
(
'Stari*
ÍSliátíiwiilife
f
■
'