Assembly, Hitch assembly, Column support assembly – Bolens 13067 User Manual
Page 7: Specifications (coni.)
Attention! The text in this document has been recognized automatically. To view the original document, you can use the "Original mode".
SPECIFICATIONS (Coni.)
Fuel Capacity.............. ......1 U.S. Gai. (3.7 Liters)
Turning Radius.............. ...23* (58.4 cm)
Electrical System....
......12v./160cca
Height............................... ...38.5* (98 cm)
Speed............................ ......High Gear: 4.0 MPH (6.5 Km/Hr)
Width (at rear tires)... ...32* (81 cm)
Low Gear: 1.2 M PH (1.9 Km/Hr)
Cutting Width................ ...36* (91 cm), side discharge mower deck
Reverse: 1.5 MPH (2.4 Km/Hr)
No. of Blades................. ...2
Tires................................ ......Front: 11 x 5.00x5.00
Rear: 1 6 x 6 . 5 0 x 8
Cutting height range..
Weight.............................
...1* to 3’(2.5 cm to 7.5 cm)
...360 lbs (163 Kilos)
ASSEMBLY
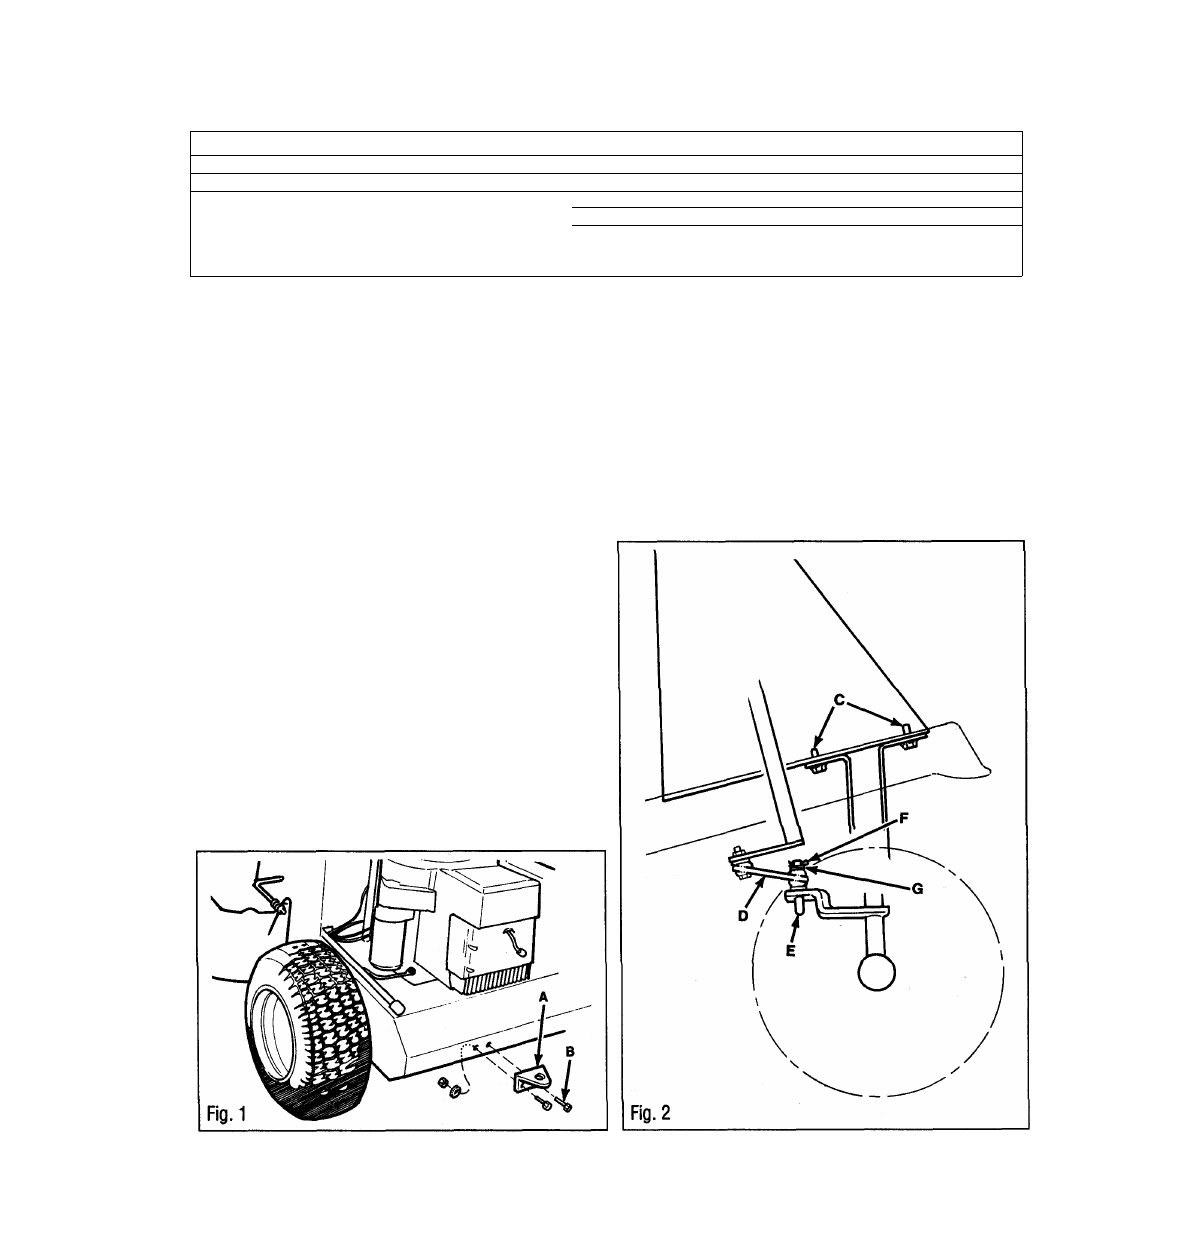
Hitch Assembly
1. Cut the ties holding the hitch to the
ignition key (No hitch on Model 13000).
Secure the hitch (A, Fig. 1) to the rear ot
the frame with two 1/2-13 x 1 hex screws,
lock washers and hex nuts (B). Install the
washers and nuts on the inside of the
frame.
Column Support Assembly
1. Remove the three boits (C, Fig. 2) from
the bottom of the column support.
2. Secure the column support to the
forward end of the frame with bolts
removed in Step 1.
NOTE: The column support shown in
Fig. 2 is one of two different support.
Your unit may have a different style of
column support.
3. Attach the rod end assembly (D, Fig. 2)
on the bottom of the steering column to
the tie rod (E) as follows:
A. Remove the top cotter pin (F) and
all but one flat washer from the tie rod.
B. Place the rod end assembly (D) over
the tie rod.
C. Re-install the remaining flat washers
(G). Re-insteill the cotter pin.
Battery
1. Lift seat support and disconnect first
the negative (-) and then the positive (+)
cables from the battery terminals.
3. Remove two lock
nuts and washers
from the two "L"
bolts and remove
battery.
4. Fill battery with
electrolyte to the
level indicated on
the battery case.
5. Charge battery
using a trickle type
charger. If a trickle
type charger is not
available, have the
battery initially
charged at an
outdoor power equipment shop, battery
store or service station.
DO NOT USE AN
AUTOMOTIVE-TYPEBAUERYCHARGER OR
ELSE THE BATTERY COULD BE DAMAGED!