Controls and operation (cont.), Fig. 32 – Bolens 13067 User Manual
Page 21
Attention! The text in this document has been recognized automatically. To view the original document, you can use the "Original mode".
CONTROLS AND OPERATION (Cont.)
POSITION OF CONTROLS IN MOWING POSITION
Fig. 32
desired gear. Do not mow in R (Reverse).
Here are some general gear selection
guidelines:
1st gear;
Going up or down
moderate hills, travelling on slippery
surfaces, high grass.
2nd/3rd gear:
Level terrain to mild
slopes, normal grass.
4th gear;
Level terrain, light
mowing.
5th gear;
Travel from storage site
to work location.
Reverse:
Moving out of storage
site, maneuvering in tight areas.
7. Slowly depress the drive pedal (E, page
17) to begin moving.
NOTE: AFTER YOU BEGIN MOVING.
YOU CAN SHIFT TO ANY OF THE
HIGHER OR LOWER GEARS "ON THE
GO". YOU DO NOT HAVE TO COME TO
A COMPLETE STOP—ALL YOU HAVE
TO DO IS LET UP ON THE DRIVE PEDAL
WHEN YOU SHIFT. HOWEVER, YOU
MUST COME TO A COMPLETE STOP
WHENEVER YOU SHIR FROM A
FORWARD GEAR TO REVERSE OR
FROM REVERSE TO A FORWARD GEAR.
Testing Height of Cut
After mowing a small area, it is
recommended that the mower be stopped,
the parking brake set, and the height of the
cutting area inspected (Make sure there
are no small children or inattentive
persons around you when this is done).
The area can be inspected from the
operator's position. If you wish to leave
the operator's position, disengage mower
blade drive and stop engine before doing
so (See
Stopping,
on next page).
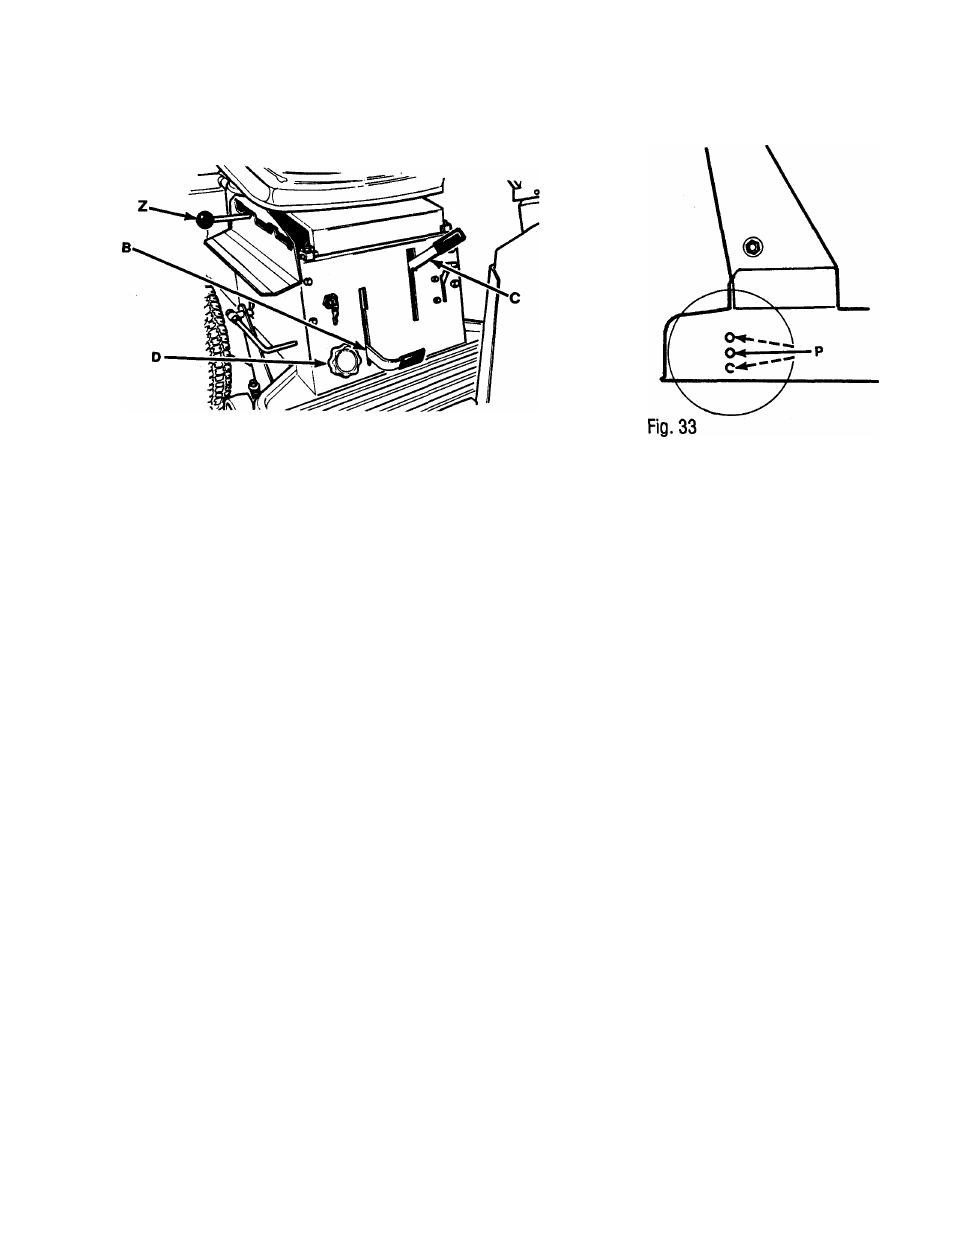
Twist the mower height adjusting knob (D,
Fig. 32) or clockwise to raise the mower
(higher cut), counter-clockwise to lower
the mower (shorter cut). A good cutting
height to begin with is 2-1/2".
Generally, if the mower is set too low, the
grass tends to mat and clump. (This can
also happen if the grass is wet. See
Mowing Tips,
on the following page.)
If this does happen, raise the mower about
1/4" and test the cut again. Repeat until a
clean cut is achieved.
If you have a unit equipped with a 33"
mulching deck, cutting height is a very
important factor in mulching performance.
Set the cutting height high enough so that
the deck is not overloaded. Too much
grass in the cutting chamber at one time
limits the amount of circulation inside the
deck and impairs mulching action. An
"overloaded" deck will leave grass clumps.
Generally, a mulching deck that is set at a
slightly higher cutting height will give
better performance than one that is set too
low. (See also
Mowing Tips,
on the
following page.)
GAGE WHEEL ADJUSTMENT
After proper cutting height has been set,
the mower deck gage wheels should be
adjusted as well. Before doing this, stop
the tractor. (See
Stopping,
Next
page.)
The gage wheels are primarily an anti
scalp device. Adjust so they are just off
the ground. If several cutting heights will
be used during a cutting session, set the
gage wheels while the mower deck is in
the lowest cutting position that will be
used.
While mowing extremely rough, uneven
or hilly terrain, it is best to allow the
mower deck to ride directly on the gage
wheels. In this case, set the gage wheels
so they contact the ground when the
mower deck height has been selected.
Rear Gage Wheel Adjustment,
28" Decks
Remove the nuts securing the gage
wheels. Place the gage wheels in the
desired position (P, Fig. 33) and secure
with nuts. Set both gage wheels to the
same height.
33"
a
36" Decks
Remove spring pin and washer and
position swivel (M, Fig. 34, following
page) into desired hole. Replace spring
pin. Set both gage wheels to the same
position.
21