SINGER 251 User Manual
Page 42
Attention! The text in this document has been recognized automatically. To view the original document, you can use the "Original mode".
42
THE ARM SHAFT
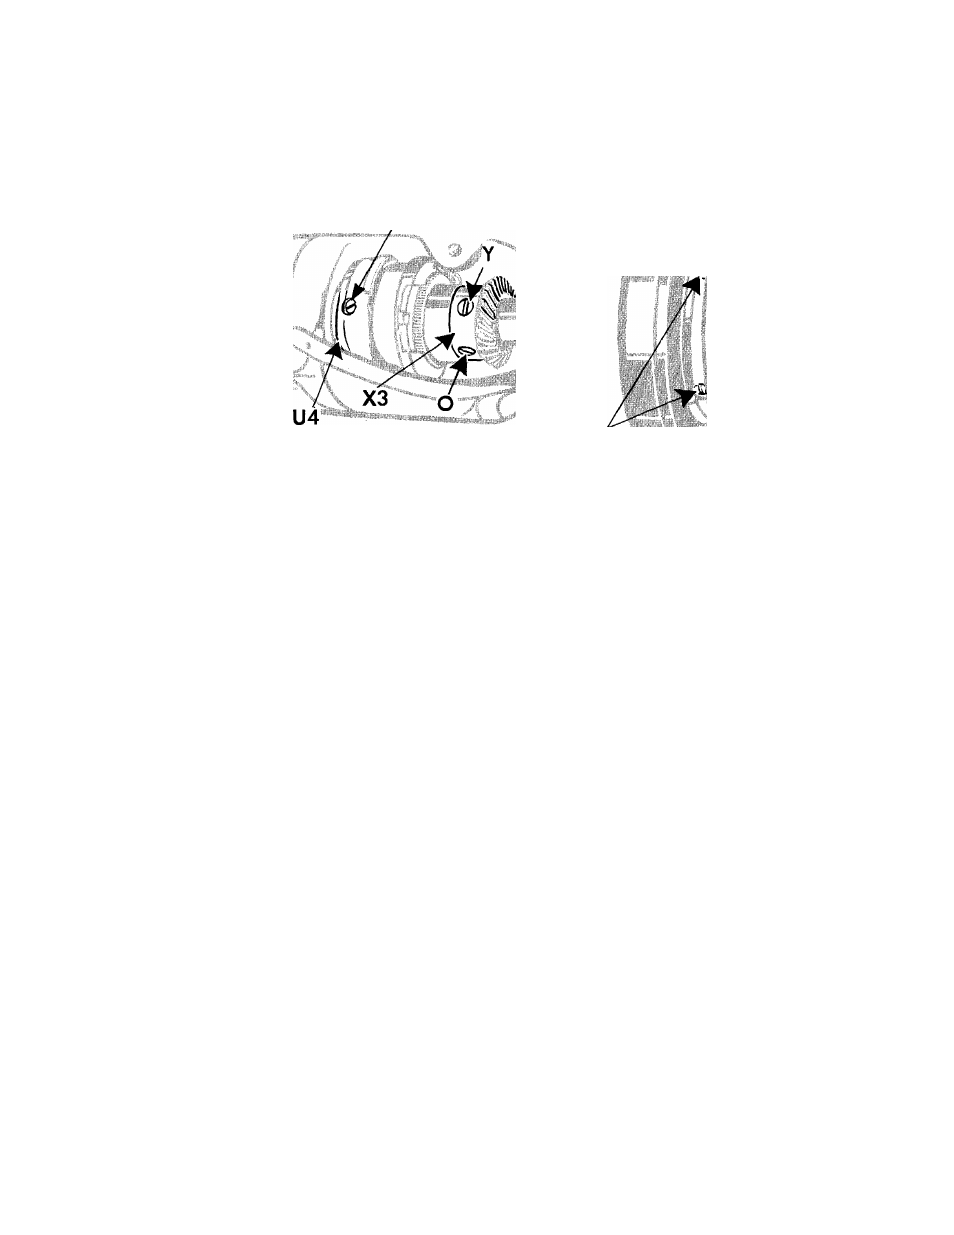
T4
Fig. 67. Loosening the Feed Eccentric
REMOVAL-
(See Figs. 67 to 69)
7.
Loosen the four screws in the arm top cover and
remove the arm top cover.
1.
Remove the face plate.
2.
Remove the arm side shield and wick and the
thread
take-up
oil
guard,
as
instructed
on
page 36.
3.
Remove the needle bar, upper needle bar bush
ing, presser foot and presser bar, as instructed on
page 33.
8.
Remove the oil lead that is fastened to the casting
just beneath the arm top cover.
9.
Remove the feed timing screw
Y, Fig. 67
and
loosen the set screw
O, Fig. 67,
in the feed-lifting-
eccentric-and-bevel-gear,
X3, Fig. 67.
10.
Remove the timing screw
Z
and loosen set screws
in the feed eccentric
U4, Fig. 67.
4.
Remove entire thread take-up lever assembly, as
instructed on
page 34.
11.
Remove arm shaft screw
R4, Fig, 67
from ma
chine pulley end of arm shaft.
5.
Remove the oil-removing wick, as instructed on
pages 38
and
39.
12.
Loosen the two set screws
T4, Fig. 67
and remove
the machine pulley.
6.
Set the machine at any stitch length
except the
longest
or
the
shortest
(see
instructions
on
page 16)
to
prevent binding
of the arm shaft
during removal and replacement.
13.
Turn the needle bar crank until it is in the position
shown at
M4, Fig. 69,
to prevent crank from dis
turbing the three wick loops in holder
W4, Fig. 69
during removal of arm shaft.