Hold gears in mesh – SINGER 251 User Manual
Page 30
Attention! The text in this document has been recognized automatically. To view the original document, you can use the "Original mode".
30
TO REMOVE AND REPLACE THE HOOK SHAFT
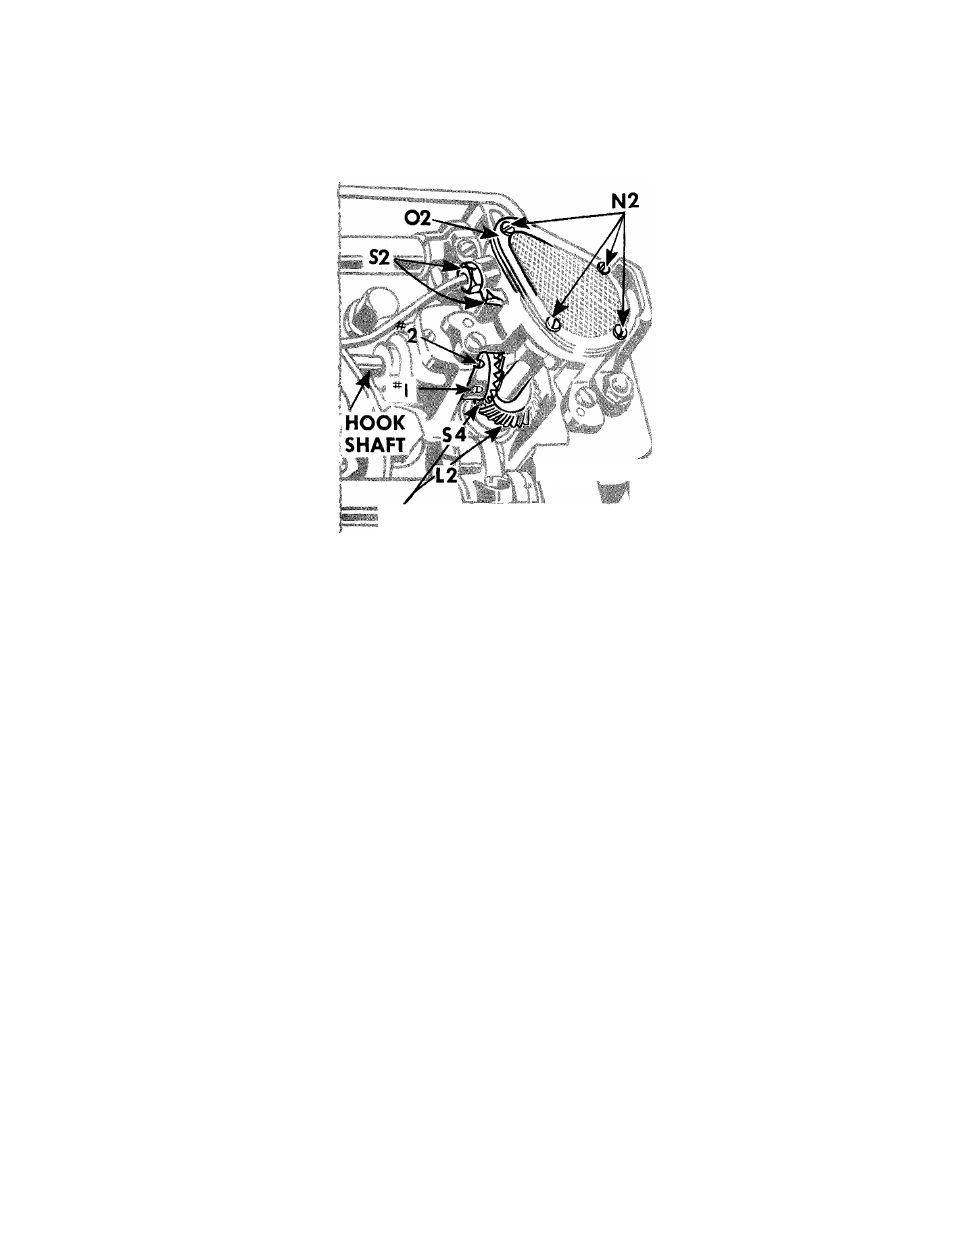
HOLD GEARS IN MESH
Fig. 48. Removing and Replacing Hook Shaft
Remove and replace the hook shaft
in the follow
ing manner:—
1.
Remove
the
sewing
hook,
as
instructed
on
page 28.
2.
Mark the two lower bevel gears
L2
and
S4,
Fig. 48,
with chalk or crayon, on one tooth of one
gear and the corresponding space for that tooth
in the other gear.
This is important,
as these gears
may
become
separated
during
removal
of
shaft.
These marks will then make it possible to obtain
the original mating position of the gears.
3.
Loosen the two set screws
#1
and
#2
in hook
shaft bevel gear.
While holding the two gears
L2
and
S4 in mesh,
as instructed in
Fig. 48,
with,
draw the old hook shaft and
INSERT THE NEW
SHAFT.
NOTE:
Set screw
#1
is the
first
of the two set screws
to appear on the hub of the bevel gear
S4
as the
machine pulley is turned over toward operator.
4.
Replace the sewing hook, as instructed on
page 29.
Make
certain
that
set
screw #T
seats
over flat
on the hook shaft. Remove all end shake from
hook shaft, by pushing hook firmly against front
hook shaft bushing and, at the same time, push
ing gear
S4, Fig. 48
toward the hook on the
shaft.
Securely
tighten
first
set
screw
#1,
then
securely tighten the second screw
#
2
.
6.
Time the sewing hook as instructed on
page 21.