SINGER 251 User Manual
Page 22
Attention! The text in this document has been recognized automatically. To view the original document, you can use the "Original mode".
2 2
TO SET THE SEWING HOOK SIDEWISE
IN RELATION TO THE NEEDLE
...cl
f®
É
'"-/ ^ " •■ .■ •
m
:
POINT
|S3Sff
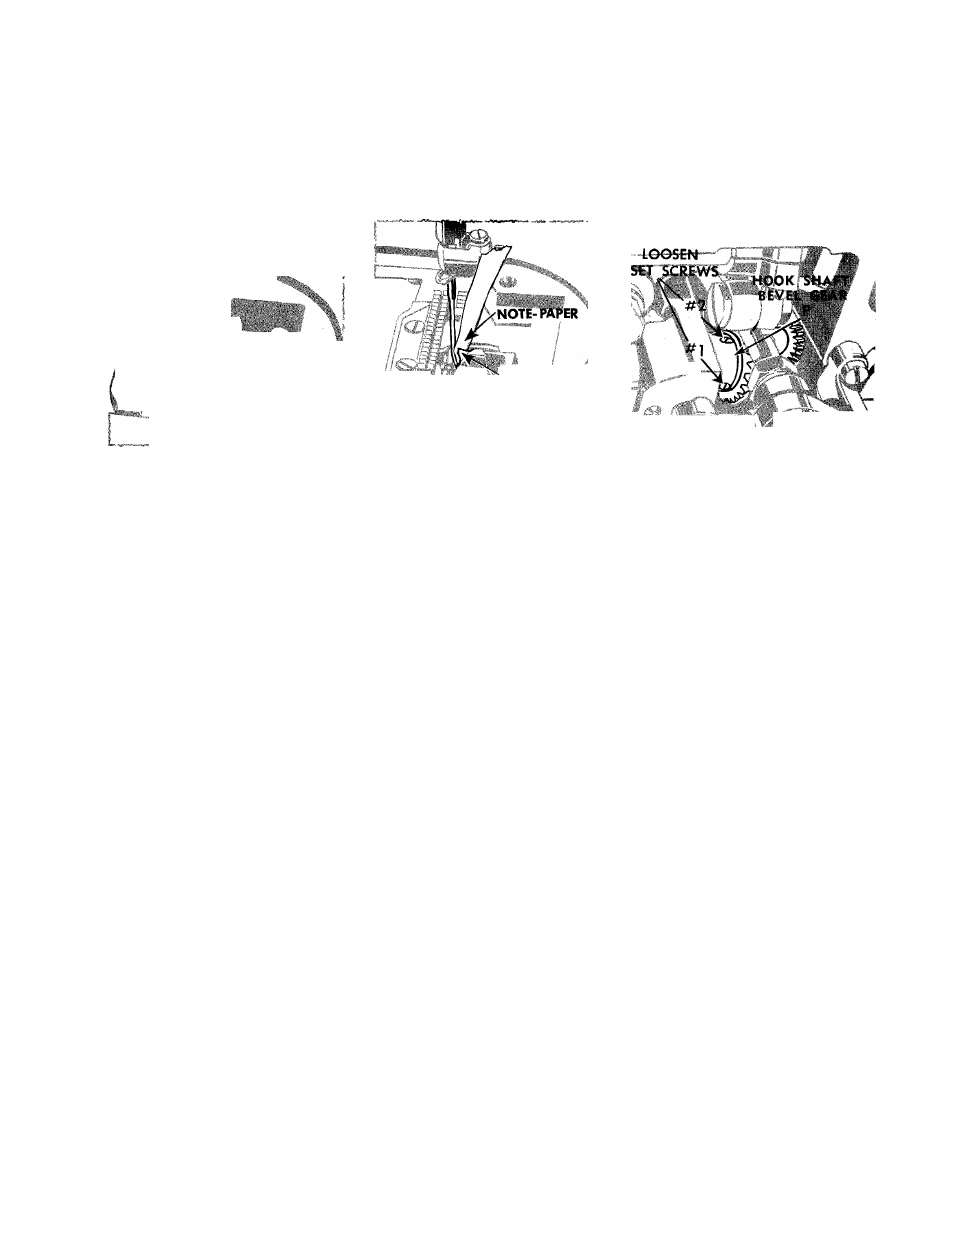
Fig. 36. Hook Point
Passing thè Needle
FLAT OF ,/
HOOK POINT
Fig. 37. Flat of Hook
Point Clearing the
Needle Scarf
I'WKlEP GEARS
IN ME!
Fig. 38. Preparation
for Setting:
Loosening Bevel Gear
PREPARATION;
Remove
slide
plate,
throat
plate
and
bobbin
còse.
Seat needle correctly in needle bar, as instructed on
page 8.
Time the sewing hook as instructed on
page 21.
CAUTION:
MAKE CERTAIN THAT THE TWO BEVEL GEARS ARE
KEPT IN MESH UNTIL SET SCREWS #1 AND #2 ARE
SECURELY RETIGHTENED.
CHECK;
When point of sewing hook passes needle, clearance
between hook point
M, Fig. 36
and needle should be
approximately equal to thickness of a piece of ordinary
notepaper
(about .005 inch),
as shown in
Fig. 37.
NOTE;
Not only point of sewing hook but entire ''FLAT" of
hook point should clear scarf on needle blade.
SETTING:
Loosen screws #1 and #2 in hub of hook shaft
bevel gear
P, Fig. 38.
Loosen hook shaft bushing set screw
N, Fig. 40,
page 23.
Using a light mallet and a 1/4 inch brass drift pin,
as shown in
Figs. 39
an d
40,
move hook assembly
either toward or away from needle, as required.
TAP VERY LIGHTLY
on drift pin to avoid injury to
hook assembly.
Securely tighten screw
N, Fig. 40.
Remove all end shake from hook shaft by pushing
the
hook
assembly
firmly
against
front
hook
shaft
bushing
and,
at
the
same
time,
pushing
hook
shaft
bevel gear
P, Fig. 38
toward the hook on the shaft.
Then securely tighten screw
#1, Fig. 38;
then screw
#2.
Replace bobbin case, throat plate and slide plate.