Buttons – SINGER 514 User Manual
Page 47
Attention! The text in this document has been recognized automatically. To view the original document, you can use the "Original mode".
Buttons
SUTCH WiDTH
Pattern Selector: ^ ^
F/exf-Sthch Dial: 0
Stitch WtcHh; as required
Needle Position: [ ^ j
General Purpose Presser Foot
Feed Cover Needle Plato
Rat buttons Cctn be sewn on quickly and
easily using plain zig-?ag.
The space betv\/een the holes the
button determines stitch width settings.
Ensure that stitch length selector dial is
NOT set at any of the four buttonholing
positions,
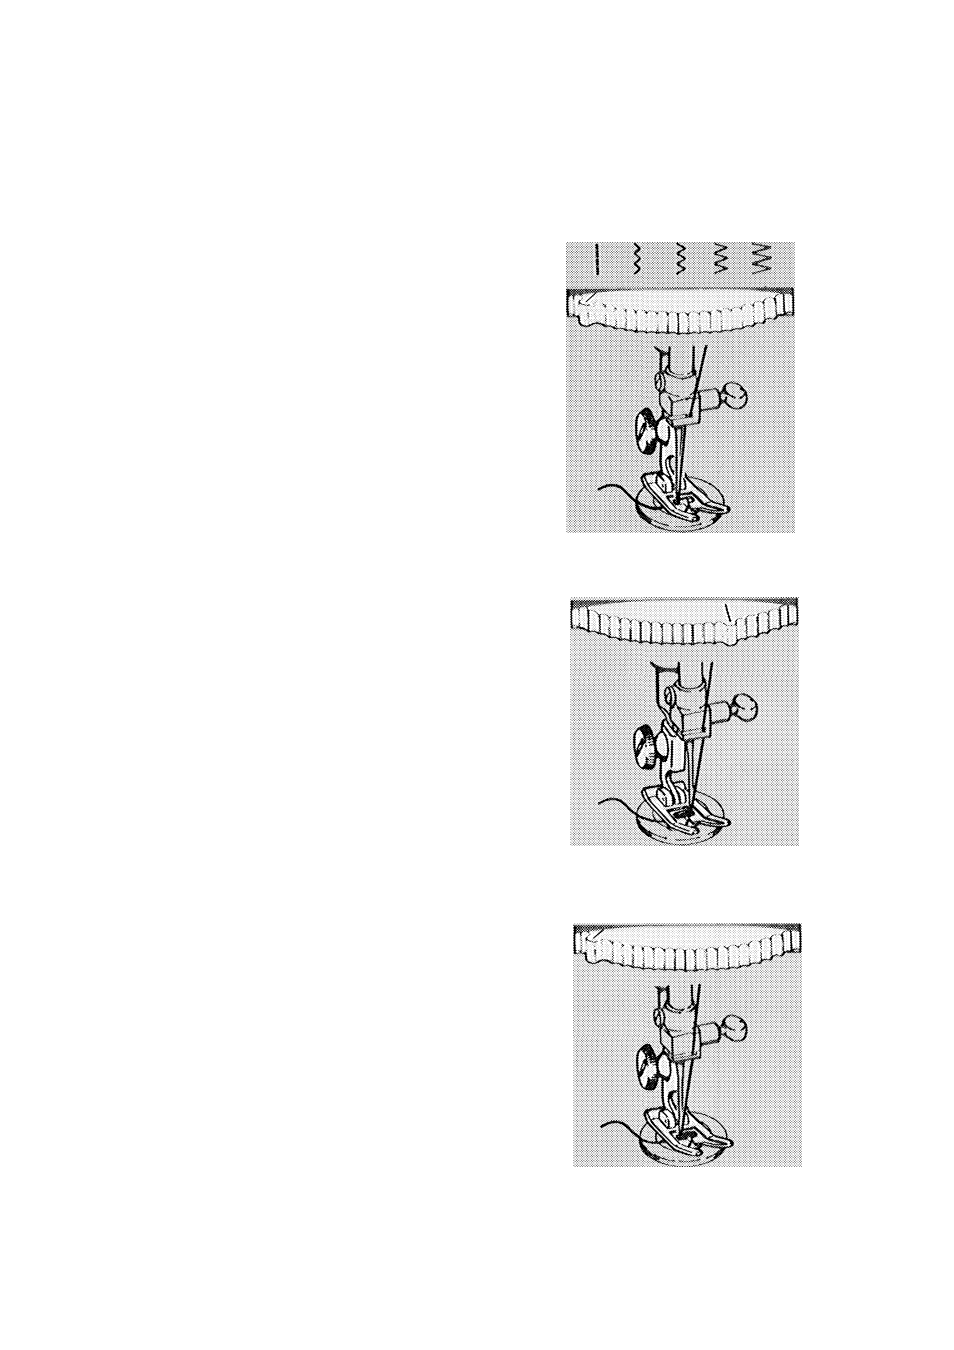
1. Insert feed cover needle plate and turn
ffexi-Stitch dial to 0.
t
2. Set stitch width at \ and needle
position selector at Position button
under foot and lower the needle into
the centre of the left hole> Lower the
foot. Turn hand wheel tow^ard you
until needle rises out of button and
1
$ above the foot.
3. Turn stitch width dial until noodle is
over the other hole in the button. Then,
when you begin to stitch, the needle
should enter into the right hole of the
button. Take six or more zig-zog
stitches to attach button. Lnd on left
side,
4. To fasten stitching, adjust stitch width
to i and take three or four stitches.
45