Changing needle plates, Changing the needle – SINGER 514 User Manual
Page 10
Attention! The text in this document has been recognized automatically. To view the original document, you can use the "Original mode".
ACCESSORIES (Continued)
CHAN6JN<3 NEEDLE PLATl
CHANGING THE NEEOM
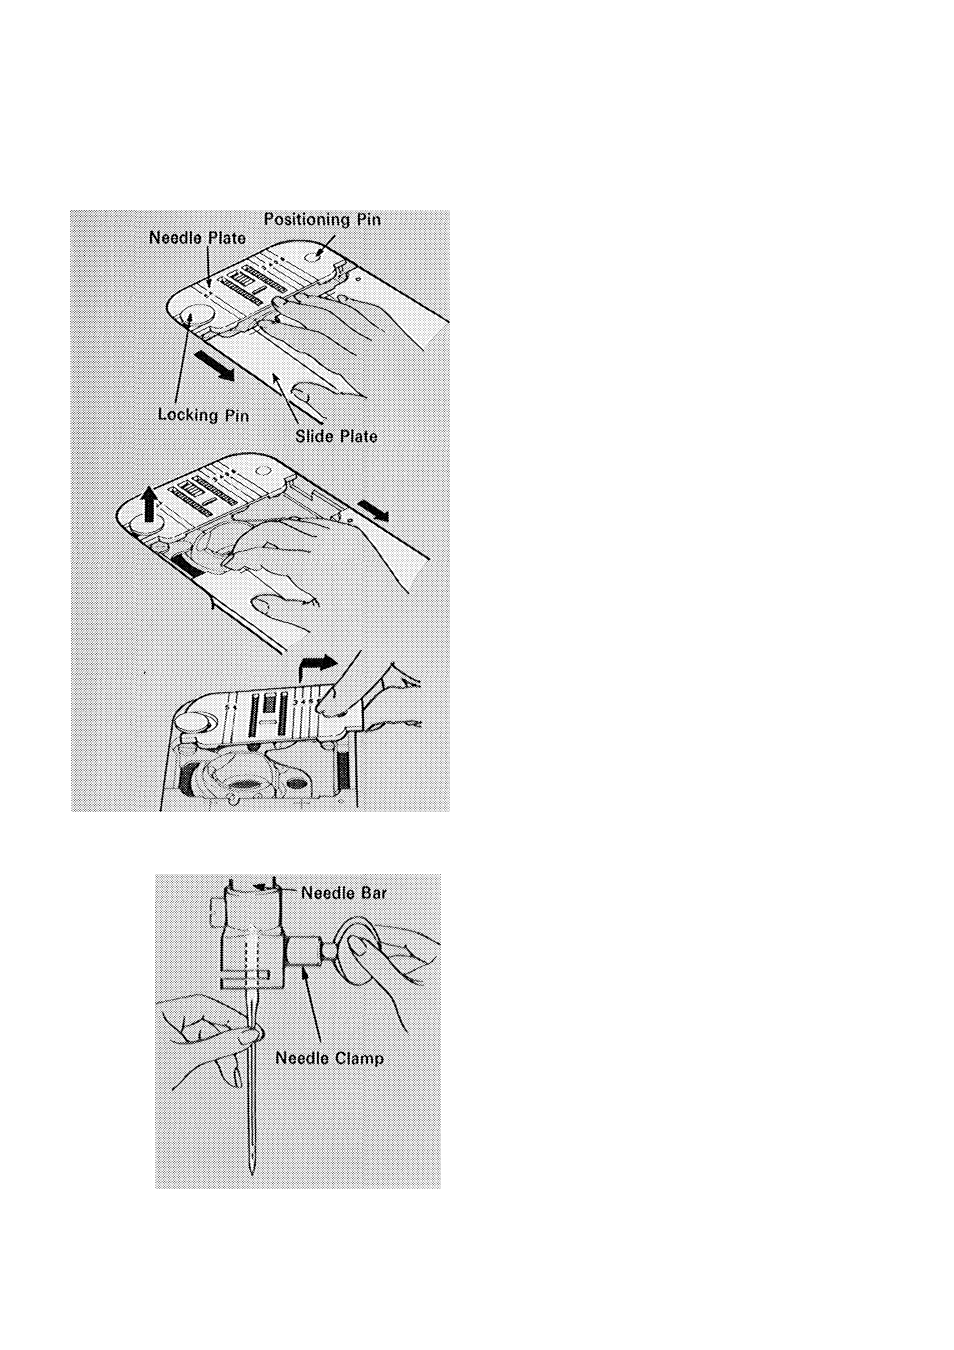
Changing Needle Plates
1 > Raise the pressor foot.
2> Turn hand wheel toward you until the
needle is above the pressor foot>
3. Open slide plate as Illustrated until
bobbin is fully revealed
4. Place fingers on edge of slide plate
as illustrated and apply pressure to
fully open the slide plate and release
the locking pin,
5. Insert thumb under needle plate and
\mth6raw needle plate to the right to
remove.
6. Insert new needle plate under locking
pin and locate on position pin. Fully
close slide plate to lower the needle
plate locking pin and secure the
needle plate.
Changing the Needle
The needle clamp has been designed so
that the needle can only be inserted one
way—the correct vv^ay, with the flat side
of the shank to the back.
1. Turn hand wheel toward you until
needle is at highest position.
2. Loosen needlC'Clamp screw and re
move needle.
3. Insert new needle in clamp with the
fiat side of the needle to the back and
the long groove toward you; push it
up as far as it will go.
4> Tighten needle clamp screw.
For regular sewing, this machine uses
SINGER needles Catalogue 2020 (15x1).
available in sizes 9. 11. 14. 16 and 18,
a