Creative applications, Satin stitching, Adjusting stitch length for satin stitching – SINGER 2001 TouchTronic User Manual
Page 60: Adjusting tension for satin stitching
Attention! The text in this document has been recognized automatically. To view the original document, you can use the "Original mode".
creative applications
Zig-zag stitching has found a soiid place in home sewing. The zig-zag stitch can be used
creatively as well as practically. The following examples are effective uses of the zig-zag stitch.
The results are left up to your imagination and ingenuity.
SATIN STITCHING
• Stitch: zig-zag |
• Stitch width: programmed or to suit appiication
or fabric
• Stitch length: digitaiiy fine tuned at 3 or less
• General purpose needle plate
• Special purpose foot
Note: Other decorative stitch patterns ex
cept stretch stitch patterns, may be sewn at
satin stitch length.
Satin stitching, a series of closely spaced zig
zag stitches that form a smooth, satin-like
surface, is useful for both utility and decora
tive work. It is accomplished by sewing a zig
zag stitch with stitch length digitally fine
tuned at 3 or less depending on fabric and
desired effect. For best results the special
purpose foot should be used.
WIDTH
%
9
¿WVW\
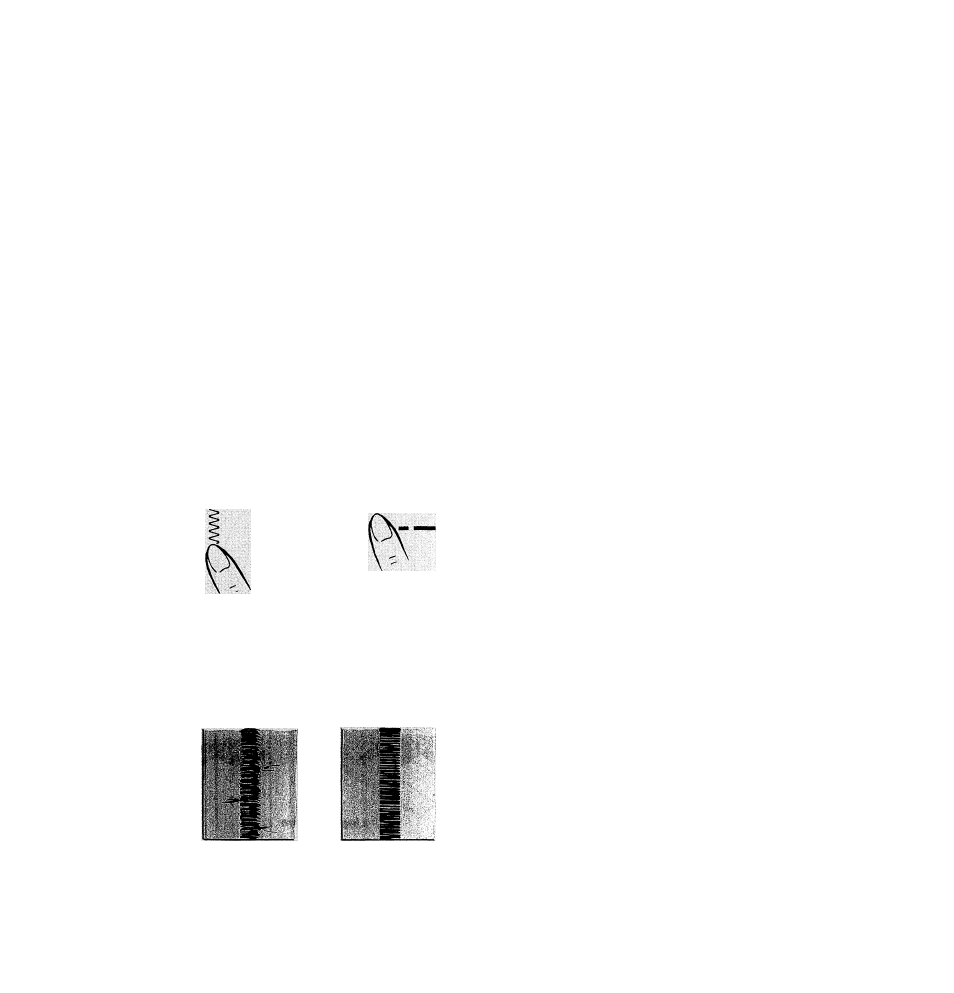
Incorrect
Correct
Tension Adjustment for Satin Stitching
Make a test sample first so that you can ad
just the stitch length and thread tension pro
perly for desired effect.
Soft fabrics may require a backing to insure
firm satin stitching. Crisp organdy, fusible in
terfacing, or lawn is suitable.
Adjusting Stitch Length for Satin
Stitching
Make the following test on two layers of
scraps from the fabric you plan to use, with a
backing if appropriate.
• Touch I zig-zag.
• Touch -------- the four dashes in the center
of the stitch selection panel to activate
Digital Fine Tuning.
• Touch ^ to set stitch lengthens.
• Run the machine at SLOW speed.
• A f t e r sewing approximately 3 inches,
touch V to set stitch length on 2. Sew
a p p r o x i m a t e l y 3 i n c h e s , a n d t h e n
touch ^ to set stitch length on 1, then 0.
• Choose the setting at which stitches are
closely spaced and form a smooth surface.
Stitch width may be varied in a similar man
ner. For additional information on stitch width
see Chapter 3 Electronic Sewing, page 31.
Adjusting Tension for Satin Stitching
Satin stitching generally requires even less
tension than open zig-zag stitching. Further
more, the wider the satin stitch, the lighter the
tension on the thread must be. Thus, a stitch
width setting of 9 requires the least tension;
narrower stitching requires somewhat more.
Notice the stitching on your sample. If the
stitching looks too taut, or if the fabric is
puckering, lower the needle thread tension by
turning the tension dial to a lower number.
54