Chainstitching, Preparation, Adjusting tension – SINGER 2001 TouchTronic User Manual
Page 53
Attention! The text in this document has been recognized automatically. To view the original document, you can use the "Original mode".
CHAINSTITCHING
Single-thread chainstitching looks like regular
straight stitching on top but is a series of in
terlocking loops on the underside of the fabric.
The stitches are produced by the needle thread
alone so you do not need a bobbin thread or a
bobbin. Because the stitches are formed by a
single thread, the interlocked loops ravel
easily, allowing the entire line of stitching to be
removed with just a pull on the thread end.
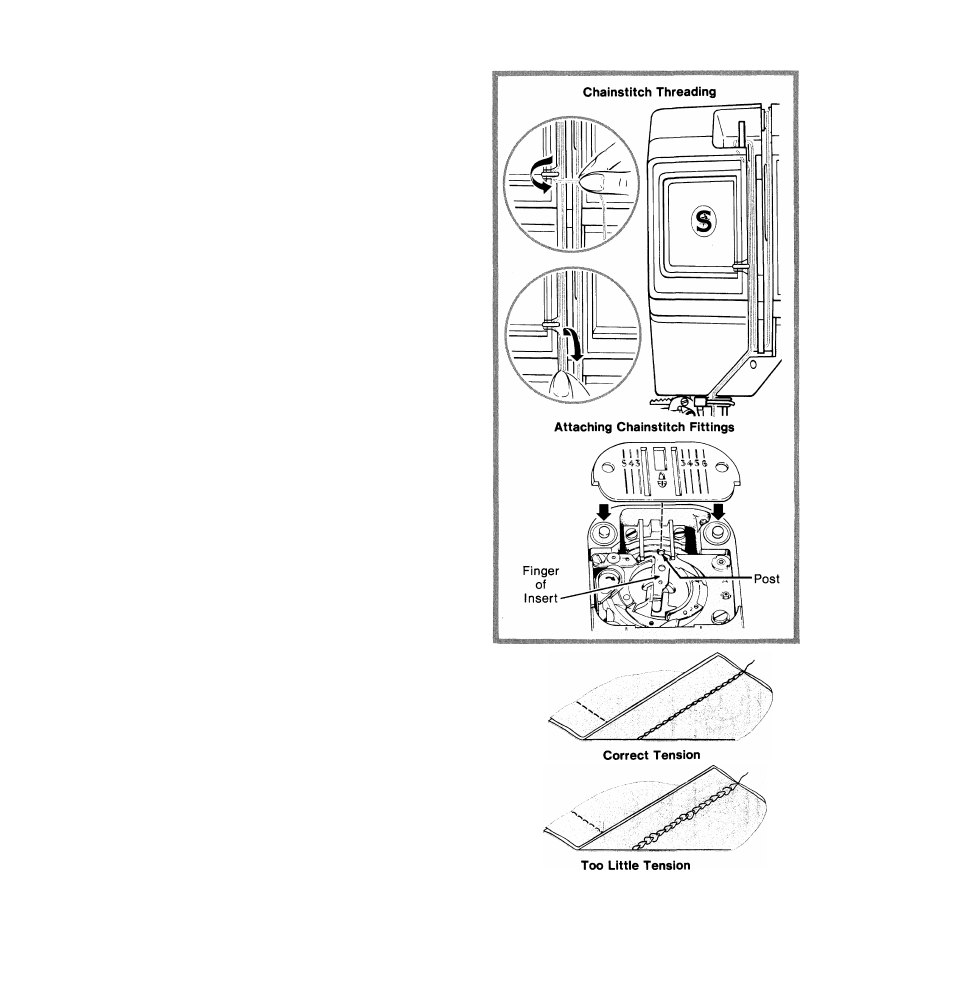
Preparation
Select needle and thread according to your
fabric. A soft mercerized thread is recom
mended for chainstitching. Thread the machine
in the usual way up to the take-up lever. Then
pass the thread through the chainstitch thread
guide, as illustrated, and continue threading in
the usual manner. Then follow the procedure
below.
• Raise take-up lever to highest position and
raise presser foot. Open slide plate.
• Remove needle plate.
• Move bobbin latch to left and remove bobbin.
• Place bobbin case insert in bobbin case as
shown, with finger of insert positioned under
the feed.
• Position chainstitch needle plate over mag
netic pins, making certain that the post of
the bobbin case insert finger enters the hole
in the plate. Close slide plate.
• Touch
I
straight stitch.
Adjusting Tension
To set the tension correctly for chainstitching,
set the tension dial on 3 and make a test sam
ple on your fabric. If the loops in the chain on
the underside of the fabric are loose and ir
regular in size, increase tension. When the
tension is correctly adjusted, the chain will be
flat and smooth and the fabric unpuckered.
• To increase tension, turn dial to a higher
number.
• To decrease tension, turn dial to a lower
number.
47