Chapter 5. basic zig-zag stitching, Zig-zag stitching, Procedure – SINGER 2001 TouchTronic User Manual
Page 56: Changing stitch length & width, Adjusting needle thread tension, Chapter, Basic zig-zag stitching
Attention! The text in this document has been recognized automatically. To view the original document, you can use the "Original mode".
y\AA/VVWVVVVVVV\M/VVVV\AA^VVVv^/VV‘^A/V\/\AA/\AAA/vV\ÀAA/\A/VV'^MAA/\AA/VVv\'0/V\¥\M
"A.
ri.
%
; ^
A-
<
:
AA:
WAWMAAyVV\A/VV\4A/V\AAA/vV\A/VVV\A/\AW'/Vy\AAMAAAAA/\A/\AAVvVVWVV'AAA/W\MMAVvv\^ ^
Chapter 5. Basic Zig-Zag Stitching
Too Tight
ZiG-ZAG STiTCHING
• Stitch: zig-zag |
• Stitch width: programmed or to suit application
or fabric
• Stitch length: programmed or to suit application
or fabric
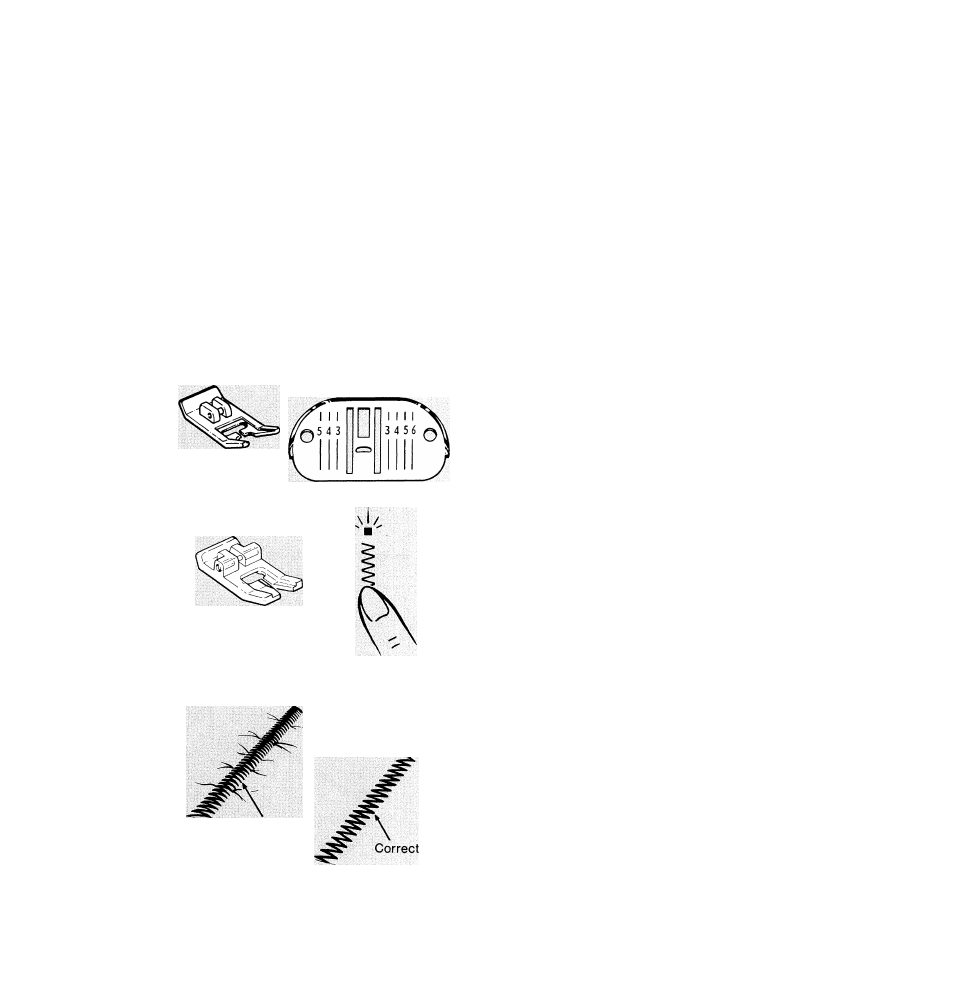
• General purpose needle plate
• General purpose foot or special purpose foot
Procedure
• Touch I on the stitch selection panel of
your machine to turn on the zig-zag stitch. A
beep will be heard and a red light will appear
above the zig-zag symbol to indicate that
the machine is ready to produce a basic zig
zag stitch at maximum stitch width and
stitch length. Maximum stitch width in the
Digital Fine Tuning section of machine is 9.
Changing Stitch Length & Width
To change stitch length or width refer to
Chapter 3 Electronic Sewing, pages 29 & 31.
Adjusting Needle Thread Tension
Zig-zag stitching usually requires less needle
thread tension than straight stitching. Thread
machine correctly and make a test sample
with the same fabric, thread, needle and stitch
pattern combination you plan to use. Stitches
should lie flat without causing fabric to
pucker.
If puckering occurs, lower the tension by turn
ing dial to a lower number. An underlay or
tissue paper backing may be needed.
50