Starting and chaining off, Releasing the chain from the machine – SINGER 2001 TouchTronic User Manual
Page 54
Attention! The text in this document has been recognized automatically. To view the original document, you can use the "Original mode".
Sewing a Chainstitch Seam
I
• stitch: straight stitch I
• Stitch iength: programmed
• Bobbin case insert
• Chainstitch needle plate
• Straight stitch foot
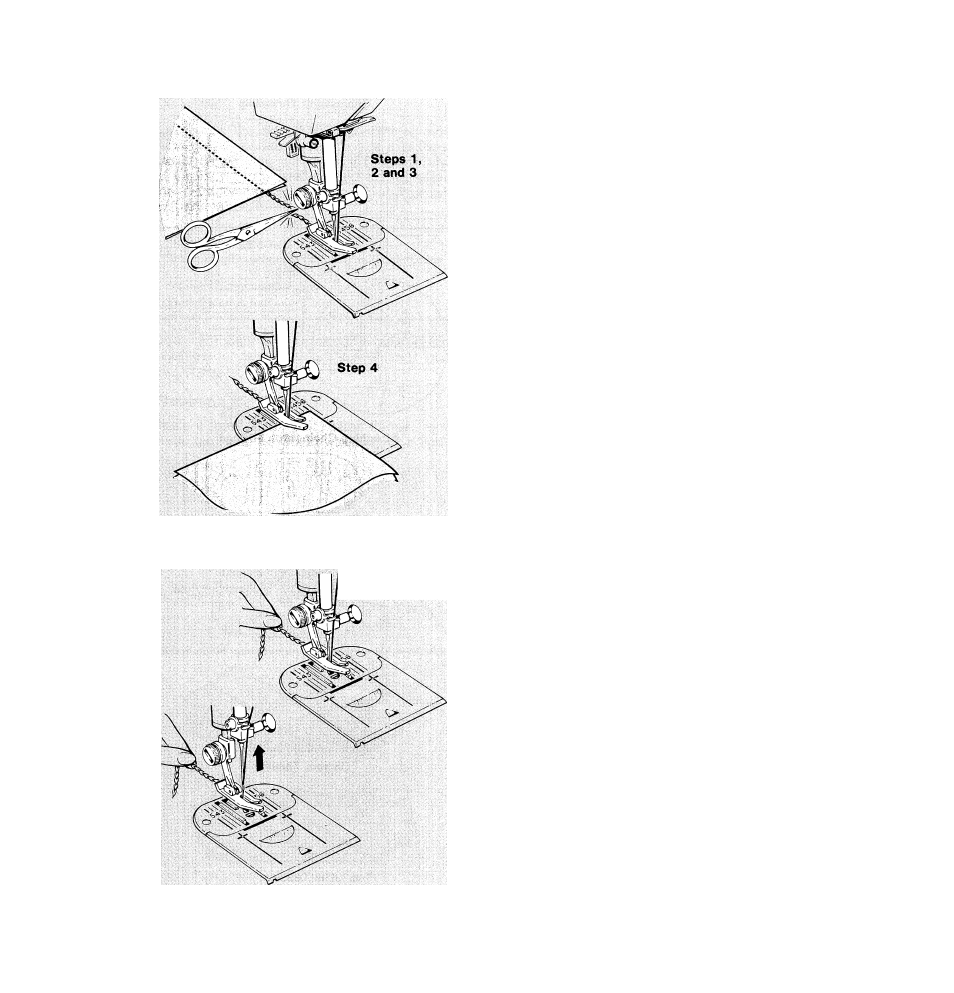
Starting and Chaining Off
1. Turn hand wheel toward you to position
needle in very edge of fabric. Lower the
presser foot.
2. Start the machine, and stitch to end of
seam. Continue stitching beyond edge of
fabric, making a chain from 1 to 2 inches
long (2.5 to 5cm). Chainstitching can be
sewn in a forward direction only. Do not at
tempt to stitch in reverse.
3. Cut chain between fabric and presser foot.
4. After chaining off, start a new line of stitch
ing by raising the presser foot slightly and
positioning the fabric in front of needle.
Lower presser foot and stitch to end of
seam.
Releasing the Chain from Machine
I
Releasing the Chain from the Machine
When you finish chainstitching, the chain can
easily be removed from the machine.
• Raise presser foot.
• Hold end of chain with your left hand.
• Turn hand wheel slowly toward you with your
right hand until needle is all the way down in
the needle hole.
• Then turn hand wheel slowly away from you
pulling gently on chain, which will unravel
as needle rises.
Note: This is the only time you should ever
turn hand wheel away from you.
48