Sewing a seam – SINGER 4022 User Manual
Page 22
Attention! The text in this document has been recognized automatically. To view the original document, you can use the "Original mode".
Sewing a Seam
» Pattern Selector; 1
« Stitch Width: 0
« Stitch l„ength; To suit fabric
® General Purpose Needle Plate
General Purpose Foot
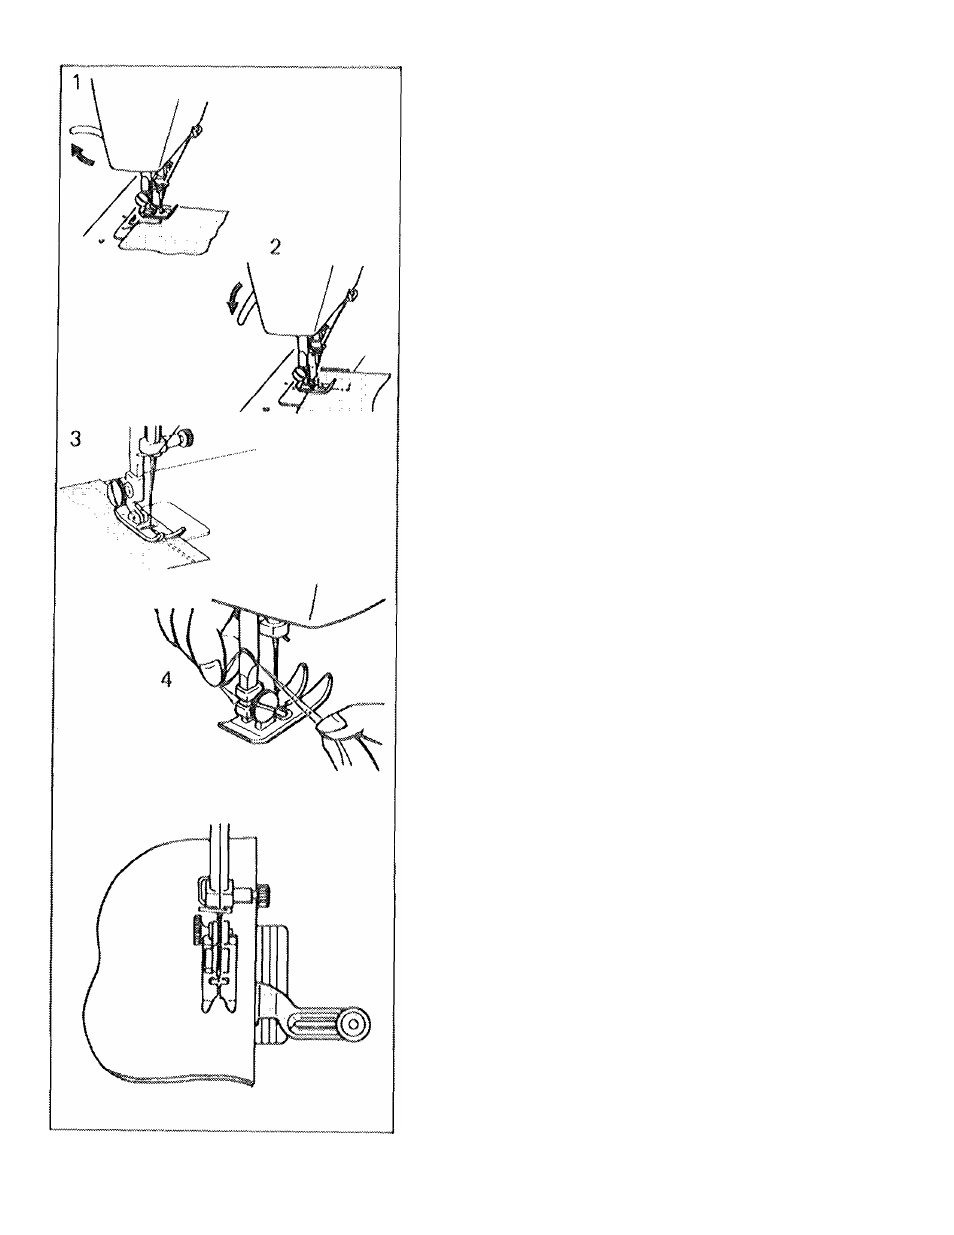
1.
F^aise presser foot. Pull thread back
under presser foot leaving at least 10
cm (4 inches) of thread.
2.
Position needle approximately 1.3 cm
(1/2
inch)
from
fabric
edge.
Then
lower
presser
foot
and
backstitch
almost to the edge of the fabric for
reinforcement by stitching in reverse
direction.
For
additional
information
on reverse stitching refer to page 19.
Stitch forward to end of seam and
stop
machine
before
the
end
of
stitching
line.
(Do
not
sew
beyond
edge of fabric).
CAUTION:
Do
not
pull
the
fabric
while
you are stitching as this may deflect the
noodle causing it to break.
3.
f^aise needle by turning hand vdieel
toward you.
Press reverse stitch push
lever, and back stitch 1.3 cm (1/2
inch) to reinforce end of stitching.
4.
Raise needle by turning hand wheel
toward
you.
Raise
foot
and
remove
fabric by drawing it to the back and
to the left. Cut threads on thread
cutter at rear of presser bar.
Keeping
the
Seam
Straight
For
extra
help
in
keeping
the
seam
straight, you may wish to use the seam
guide, {.because it allows you to guide
stitches
evenly
between
1.3
cm
(1/2
inch) and 3.2 cm (1-1/4 inches) from the
fabric edge, it is particularly useful for
very narrow or very wide seams.
CAUTION: Because of the up and down
movement of the needle, you rriust work
carefully
and
watch
the
sowing
area
when operating the machine.
2 0