Operating the machine, Connecting the machine – SINGER 4022 User Manual
Page 14
Attention! The text in this document has been recognized automatically. To view the original document, you can use the "Original mode".
Operating the Machine
Connecting the Machine
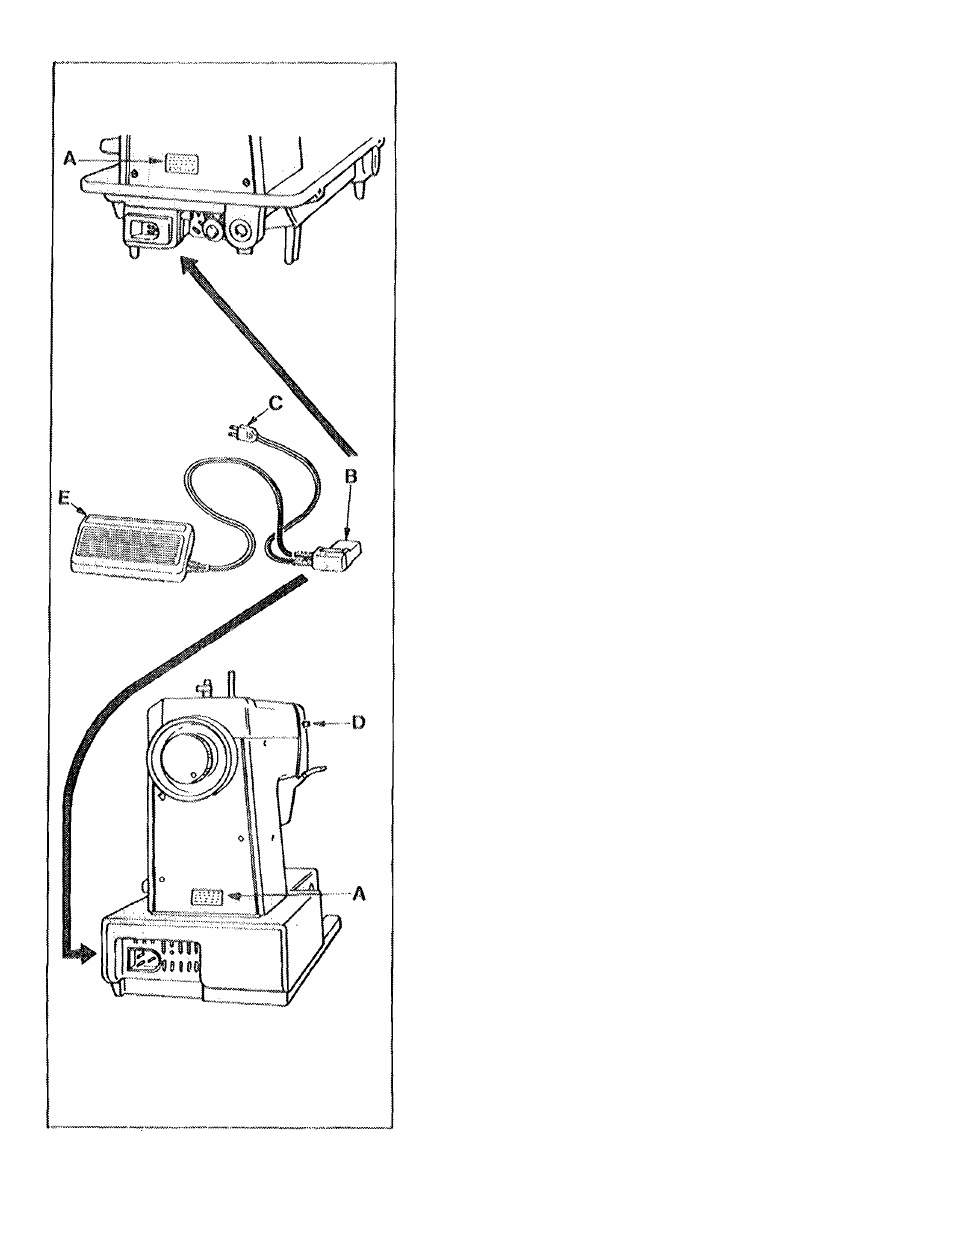
® Before plugging in your machine, be
sure the electrical information on the
side of the machine A, below the
hand
wheel,
agrees
with
the
range
marked
on
your
electrical
meter.
fMPORTANT
Machines
for
Great
Britain and some otfier countries having
similar
wiring
standards
are
shipped
from
the
factory
without
a
plug
for
connection to the mains.
The wires in the main lead are coloured
according to code.
Bfue: Neutral (N)
Brown: Live (L)
As the colours of the wires in the main
lead of this appliance may not always
correspond
with
the
coloured
markings
identifying
the
terminals
in
your
plug,
proceed as follows:
Tlie wire which is coloured blue must be
connected
to
the
terminal
which
is
marked with the letter N or coloured
black.
The wire which is coloured brown must
be connected to the terminal which is
marked with the letter L or coloured red.
If a 13 amp (BS 1363) plug is used, a 3
amp fuse must be fitted, or if any other
type of plug is used, a 5 amp fuse must
be fitted either in the plug or adaptor or
at the distribution board,
e To turn on the machine, conrrect plug
B to machine and plug C to your
socket outlet,
9 To turn on the sewing light, press or
turn
switch
D
as
required.
See
illustration.
9
To
run
the
machine
and
control
speed, press the speed controller E
with your foot, i'he harder you press,
the faster the machine will sew.
CAUTION: Disconnect the powei line plug from the
socket auHot when changing needles, (cot or needle
plates or when leaving the machine imaltended.
This eliminates the possibility ol stading the
machine by accidentally pressing the speed com
Uoitor. Because ol the up and down rnovemerit of
the needle, you must work carefully and watch the
sewing area when operating the machine.
1 2