Smbtin© ¥our tractor with a low battery, Mowir and drive belt iiystallatlow – Sears 917.25591 User Manual
Page 8
Attention! The text in this document has been recognized automatically. To view the original document, you can use the "Original mode".
NEGATIVE
¡BLACK CABLE)
TERMINAL
BATTERY
POSITIVE
(RED CABLE)
TERMINAL
SmBTIN©
¥OUR
TRACTOR
WITH
A LOW BATTERY
If your Battery is too low to start the engine, it should be
recharged. If *'jumper Cables'* are used for emergency starting
follow this procedure: NOTE: YOUR TRACTOR IS EQUIP
PED WITH A 12 VOLT NEGATIVE GROUNDED SYSTEM,
THE OTHER VEHICLE MUST ALSO BE A 12 VOLT NEGA^
TIVE GROUNDED SYSTEM.
A
LEAD-ACID BATTERIES GENERATE EX
PLOSIVE GASES. KEEP SPARKS, FLAME.
AND
SMOKING
MATERIALS
AWAY
FROM BATTERIES. ALWAYS WEAR EYE
PROTECTION AROUND BATTERIES.
FIGURE 10
1. Connect each end of the RED cable to the POSITIVE (+)
terminals of each battery Staking care not to short against
chassis)
(Fig.
IQ),
2. Connect one end of the BLACK cable to the NEGATIVE
(~) terminal of fully charged battery.
3. Connect the other end of the cable to ENGINE BLOCK
Of
good CHASSIS GROUND on tractor (away from Gas
Tank or Battery).
4. Disconnect cables in reverse order;
a. Engine Block or chassis of tractor.
b. Negative termlrral of fully charged bauery.
c. Positive terminajs.
FIGURE 11
MOWIR AND DRIVE BELT
iiySTALLATlOW
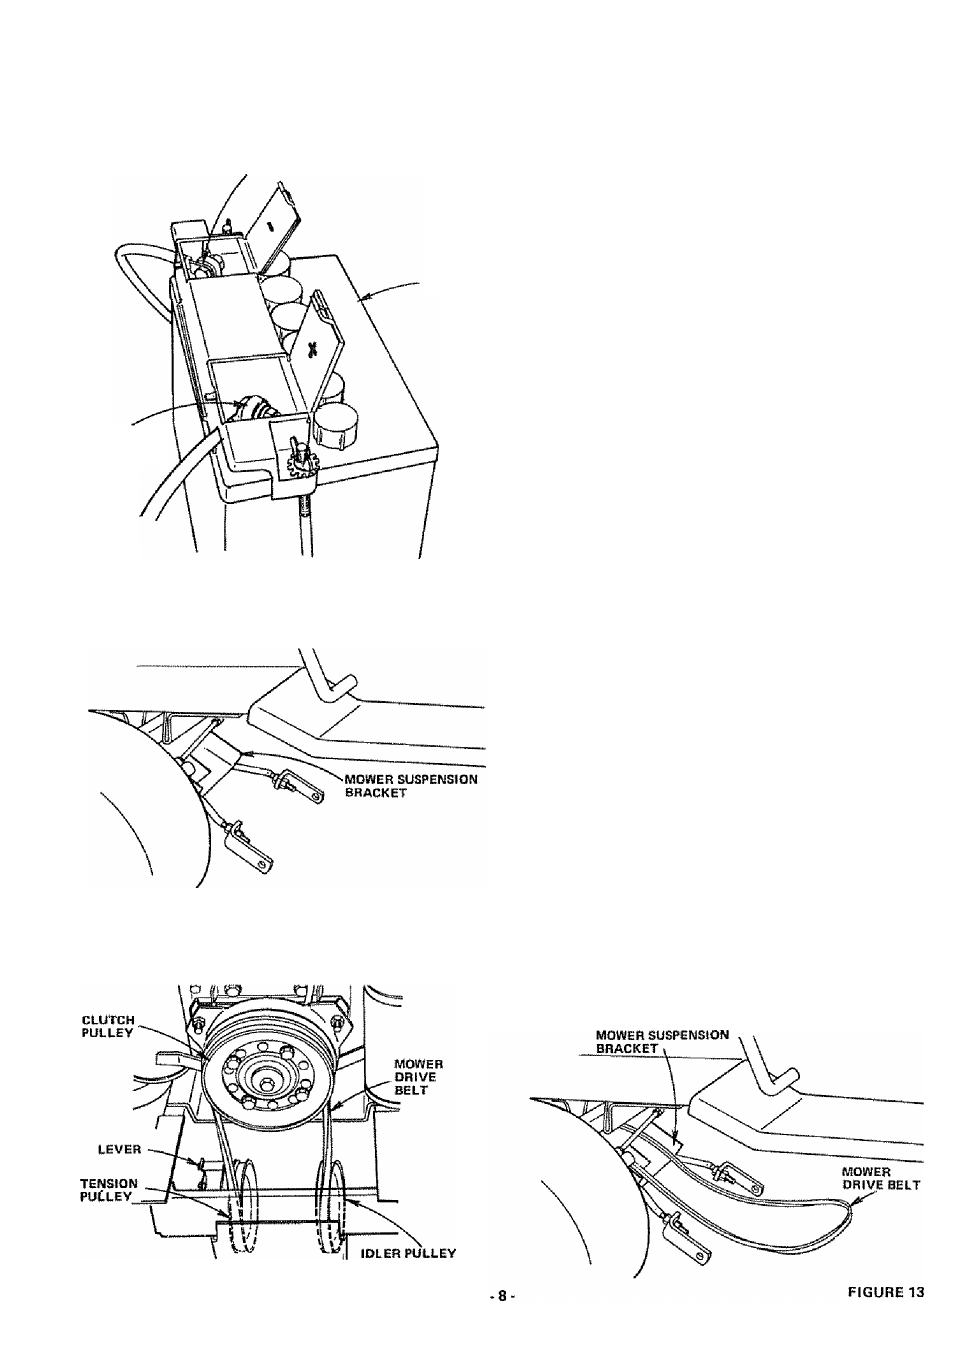
Your tractor has been shipped with the Mower Suspension
Bracket banded to the frame. Remove bands and lower Mower
Suspension Bracket (Fig. 11).
DRIVE BELT INSTALLATIOIM
1„ Remove Hood and Grill (see page 24).
2. Place Mower Drive Belt over Clutch Pulley and under Idler
Pulley and Tension Pulley (Fig. 12), NOTE: PULL LEVER
UP TO SWING TENSION PULLEY FOR BELT CLEAR
ANCE. Make sure narrow **V" side of Beit is engaged with
each Pulley,
3. Pull Movver Drive Belt over Front Mower Suspension Brack
et (Fig. 13),
4. Replace Hood and Grill.
FIGURE 12