Blade сдве, Blade beplacemint, Daily maliytenamce – Sears 917.25591 User Manual
Page 13: Mower maintenance instructions
Attention! The text in this document has been recognized automatically. To view the original document, you can use the "Original mode".
MOWER
MAINTENANCE
INSTRUCTIONS
МОЙЕЙ CLUTCH SWITCH
A
A
BEFORE
IVIAKtNG
ANY
INSPECTION,
ADJUSTMENT OR REPAIR: PUSH TRAC
TOR
CLUTCH-BRAKE
PEDAL
COM
PLETELY INTO BRAKE POSITION. MOVE
SHIFT CONTROL LEVER TO NEUTRAL
POSITION. PLACE PARKING BRAKE IN
"ENGAGED"
POSITION.
TURN
OFF
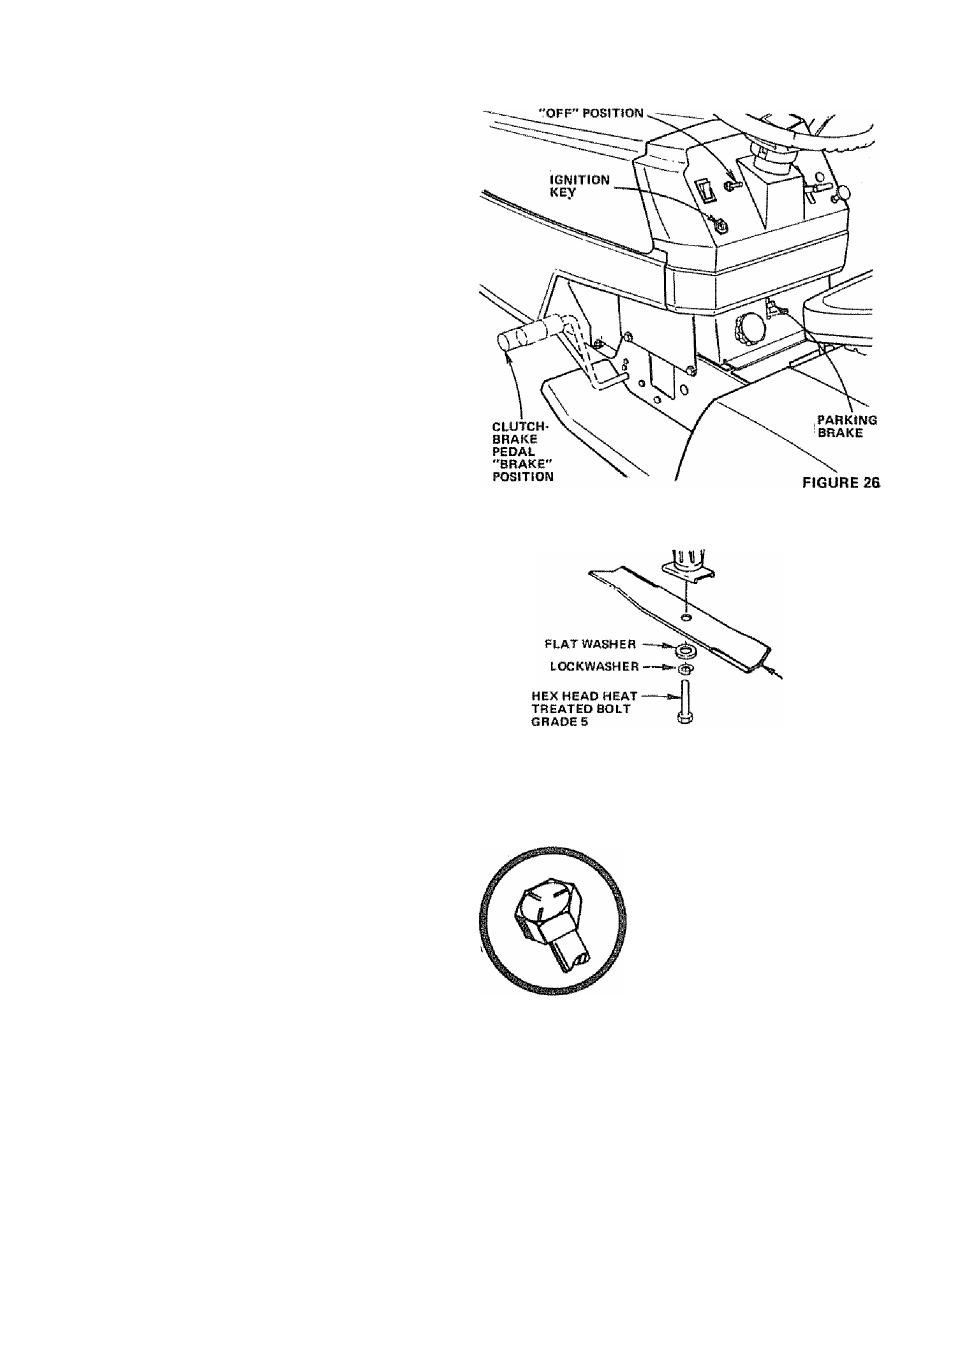
MOWER CLUTCH SWITCH iFIG. 26K
SHUT OFF THE ENGINE. MAKE ABSO
LUTELY SURE THE BLADES AND ALL
MOVING
PARTS
HAVE
COMPLETELY
STOPPED. REMOVE THE IGNITION KEY.
DISCONNECT THE SPARK PLUG WIRES
FROM THE SPARK PLUGS AND KEEP
WIRES AWAY FROM THE PLUGS TO
PREVENT INJURY FROM ACCIDENTAL
STARTING,
BLADE СДВЕ
For best results mower blades must be kept sharp, The blades
can be sharpened with a few strokes of a file or on a grinding
wheel. We suggest they be sharpened after every 15 hours of
mowing. Do not attempt to sharpen while on mower,
1. When grinding, care should be taken to maintain blade bal
ance and the blade should be checked for proper balance
before reinstadation on naower. Unbalanced or bent blade
will cause excessive vibration when running and eventual
damage to mower or engine. Replace bent or damaged
blades,
2. To ensure satisfactory operation, it is recommended that
before the start of each mowing season, the old,blades be
discarded and replaced with new blades. Mower blades can
be purchased at any Sears Service Center/Departments and
most Sears Retail Stores,
BLADE
FIGURE 27
BLADE BEPLACEMiNT
It is not necessary to remove mower from tractor for blade re
placement. By moving Lift Control Lever to up (Rear) posi
tion will permit access to blades
1. Remove the Hex Head Bolt, Lockwasher and Flat Washer
(Fig. 27),
2. Install new blade with SHARP EDGE DOWN and secure
with Flat Washer, Lockwasher and Hex Head Bolt TIGHT
EN SECURELY.
A
ALWAYS USE GRADE 5 HEAT TREATED
BOLTS TO ATTACH BLADES. CHECK
BOLTS IN BLADES OCCASIONALLY TO
MAKE SURE BOLTS ARE TIGHT. TOR
QUE BOLTS 30 ■ 35 FT. LBS.
A GRADE 5 HEAT TREATED BOLT
CAN BE IDENTIFIED BY THREE
LINES INDICATED ON THE BOLT
HEAD AS SHOWN AT LEFT.
DAILY MAliyTENAMCE
Make sure all nuts on bolts are tight, cotter pins and retainer
springs are secure, f^eep blades sharp. Observe all safety pre
cautions. Keep mower well lubricated.
13-