Sears 917.25591 User Manual
Page 5
Attention! The text in this document has been recognized automatically. To view the original document, you can use the "Original mode".
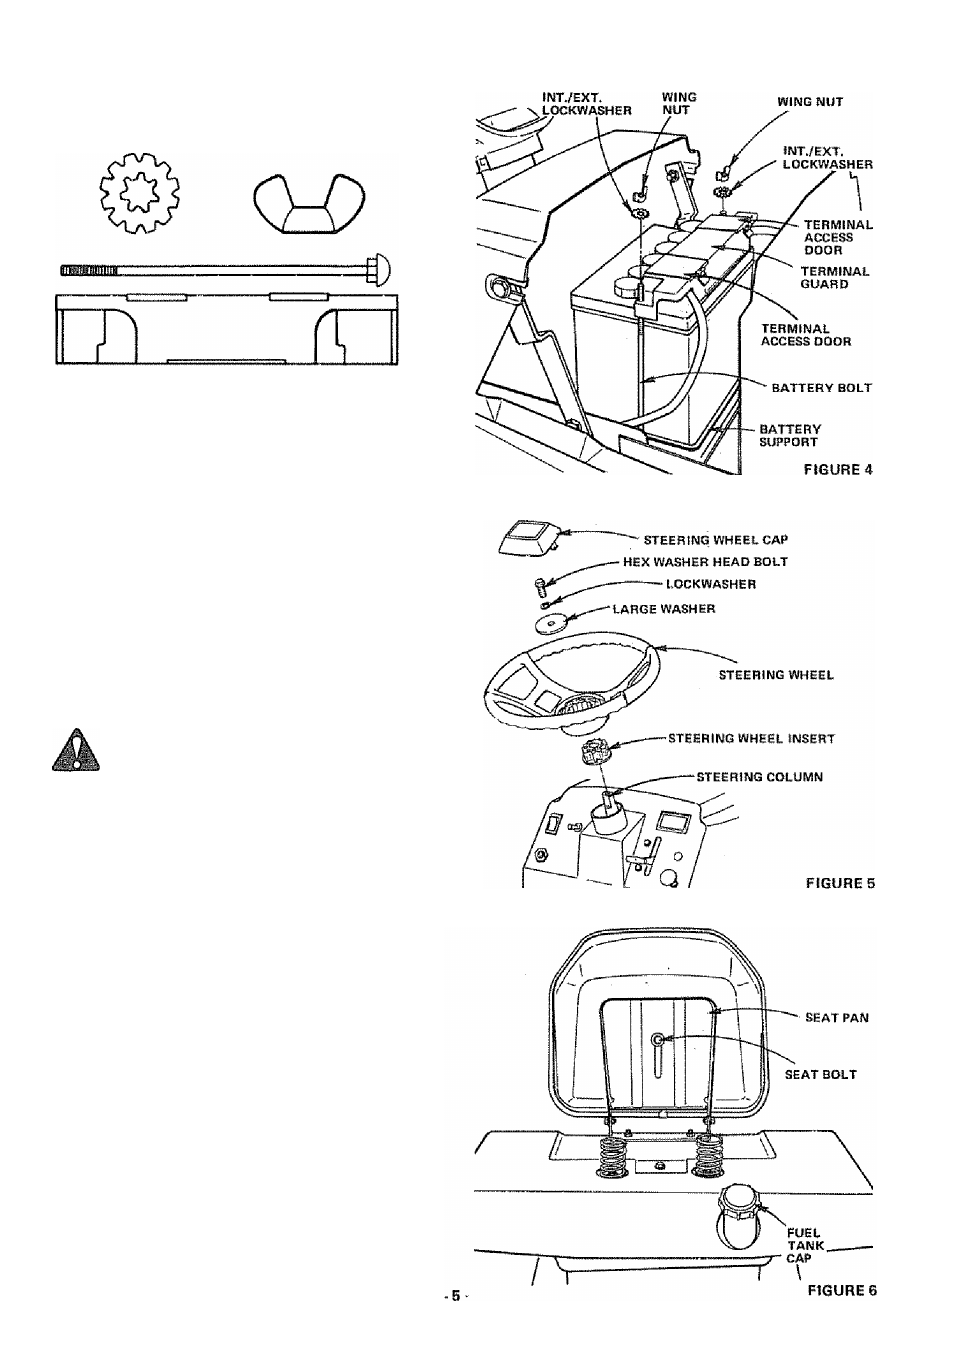
5„ Install Battery using: two lnt./Ext. Lockwashers, two Wing
Nuts (shown full size below) and
two Battery Bolts and one Terminal iSuard found in Bag of
Parts.
a. Using the square hole on one side of the Battery Support
(Fig, 4| insert one Battery Bolt, head of Bolt down.
Fasten the Battery Bolt to the Terminal Guard using
lnt./Ext. Lockwasher and Wing Nut as shown in Fig. 4.
b. Assemble the remaining Battery Bolt to other side of
Battery Support and fasten Terminal Guard to it with re
maining 1nt,/Ext. Lockwasher and Wing Nut. Tighten
Wing Nuts securely by hand (Fig. 4).
NOTE: USE TERMINAL ACCESS DOORS (FIG, 4) FOR:
1. Inspection for secure connections (tighten hardware),.
2 Inspection for corrosion,
3. Testing battery.
4 Jumping (if required).
5. Charging (if required).
WHEN NOT IN USE, KEEP TERMINAL
ACCESS DOORS CLOSED.
DO NOT START ENGINE UNTIL MOWER
SUSPENSION BRACKET HAS BEEN RE
LEASED. SEE MOWER AND DRIVE BELT
INSTALLATION, PAGE 8.
6. Close Hood-
7. Install Steering Wheel.
NOTE; POSITION FRONT WHEELS FORWARD.
a. Remove Hex Washer Head Bolt, Lockwasher and Large
Washer from Steering Column (Fig. 5).
b. Position Steering Wheel over Steering Wheel Insert.
c. Secure Steering Wheel to Steering Column using Hex
Bolt, Lockwasher and Large Washer (Fig, 5).
d. Snap Steering Wheel Cap in place on Steering Wheel,
Steering Wheel Cap found in Bag of Parts.
8. To adjust seat position, pivot seat forward. Use 3/4"
wrench to loosen Seat Bolt artd slide seat to desired posi
tion. Make sure seat sets straight on Seat Pan and tighten
Seat Bolt securely (Fig. 6).