Vermont Casting 36XDV User Manual
Page 11
10009383
11
XDV Direct Vent Gas Fireplace
Optional Top Vent Application
The 33/36/39XDV fireplaces are shipped as rear vent
units. If the layout requires a top vent, convert the unit
following the steps below.
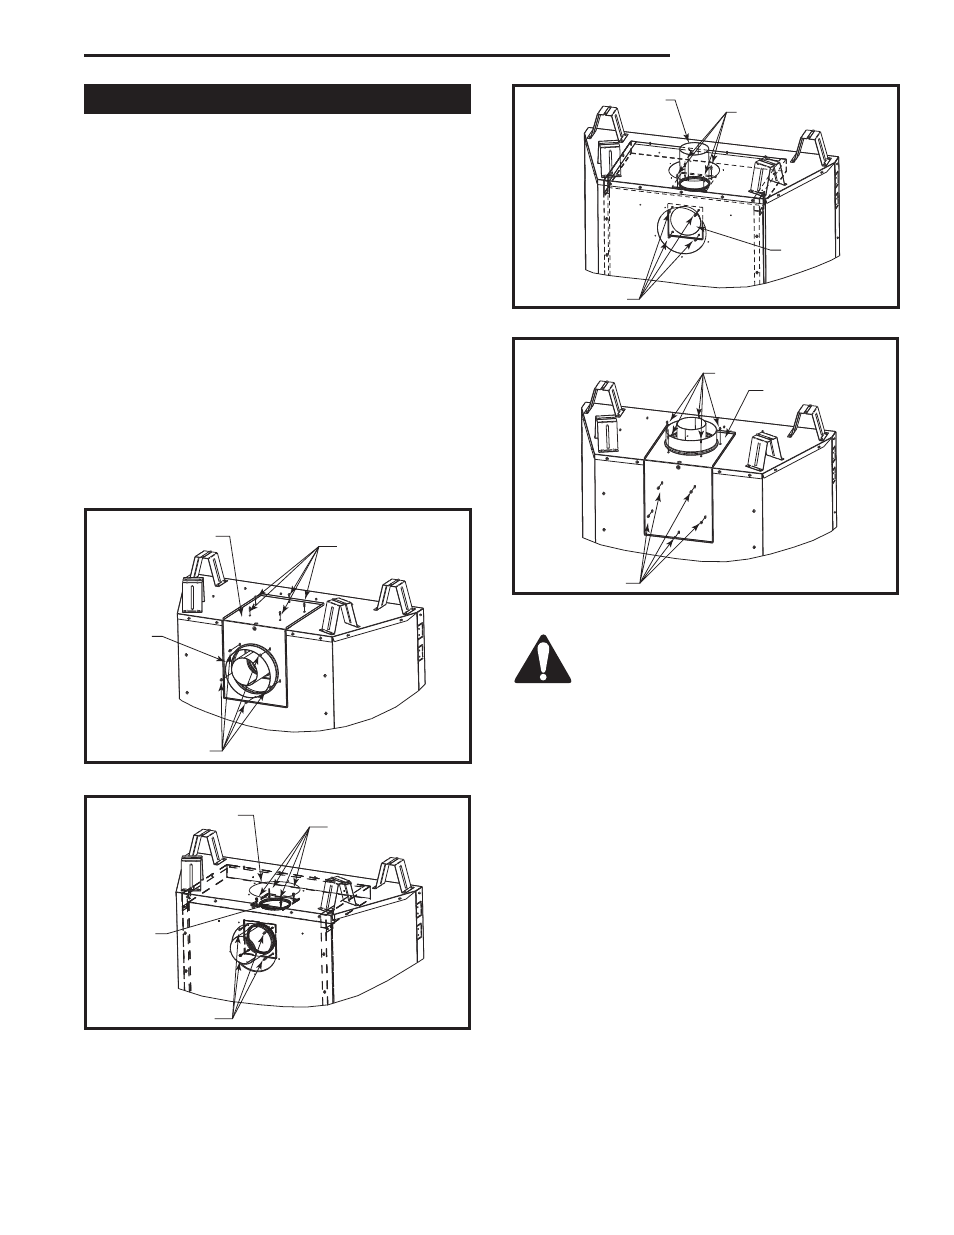
1. Remove the 10 screws securing outer collar adapter
to fireplace. (Fig. 11)
2. Set outer collar adapter aside.
3. Carefully remove and discard the insulation directly
below the 7” hole in the cabinet top. The insulation
is perforated around the hole to aid in its removal.
Remove the four (4) screws securing flue cover to
top of unit and remove flue cover. (Fig. 12)
4. Remove the four (4) screws securing the flue pipe as-
sembly to the appliance. Remove flue pipe. (Fig. 12)
5. Secure flue cover to back of flue outlet. (Fig. 13)
6. Install flue pipe and gasket removed in step 4 to top
of unit with four (4) screws. (Fig. 13)
7. Secure outer collar adapter to unit with the round
collar on top, secure with 10 screws. (Fig. 14)
NOTE: Be sure not to damage any gasket material.
������
�������������
����
Outer Collar
Adapter
Remove Screws
(5)
Remove
Screws (5)
Flue Pipe
FP1458
Fig. 11 Remove screws from outer collar adapter.
������
�����������������
����
Flue Cover
Remove Screws (4)
Remove Insulation 7”
Diameter Notch Out
Remove Screws (4)
FP1549
Fig. 12 Remove flue cover and flue pipe.
������
������������������
����
Flue Pipe
Install Screws (4)
Back in Place
Install Screws (4)
Back in Place
Flue
Cover
FP1551
Fig. 13 Replace flue cover and flue pipe.
������
���������
��������
����
Install Screws (5)
Back in Place
Outer Collar Adapter
Install Screws (5)
Back in Place
FP1550
Fig. 14 Completed conversion.
After conversion to top vent configuration,
the 4” (102 mm) flue pipe should be con-
centric within the 7” (175 mm) outer collar.