Jobs with associated machine settings, Importing/merging profiles from the console, Fieldware – TeeJet Fieldware Link User Manual
Page 31: Link 4.02
27
98-05244-ENUS R1
Fieldware
®
Link 4.02
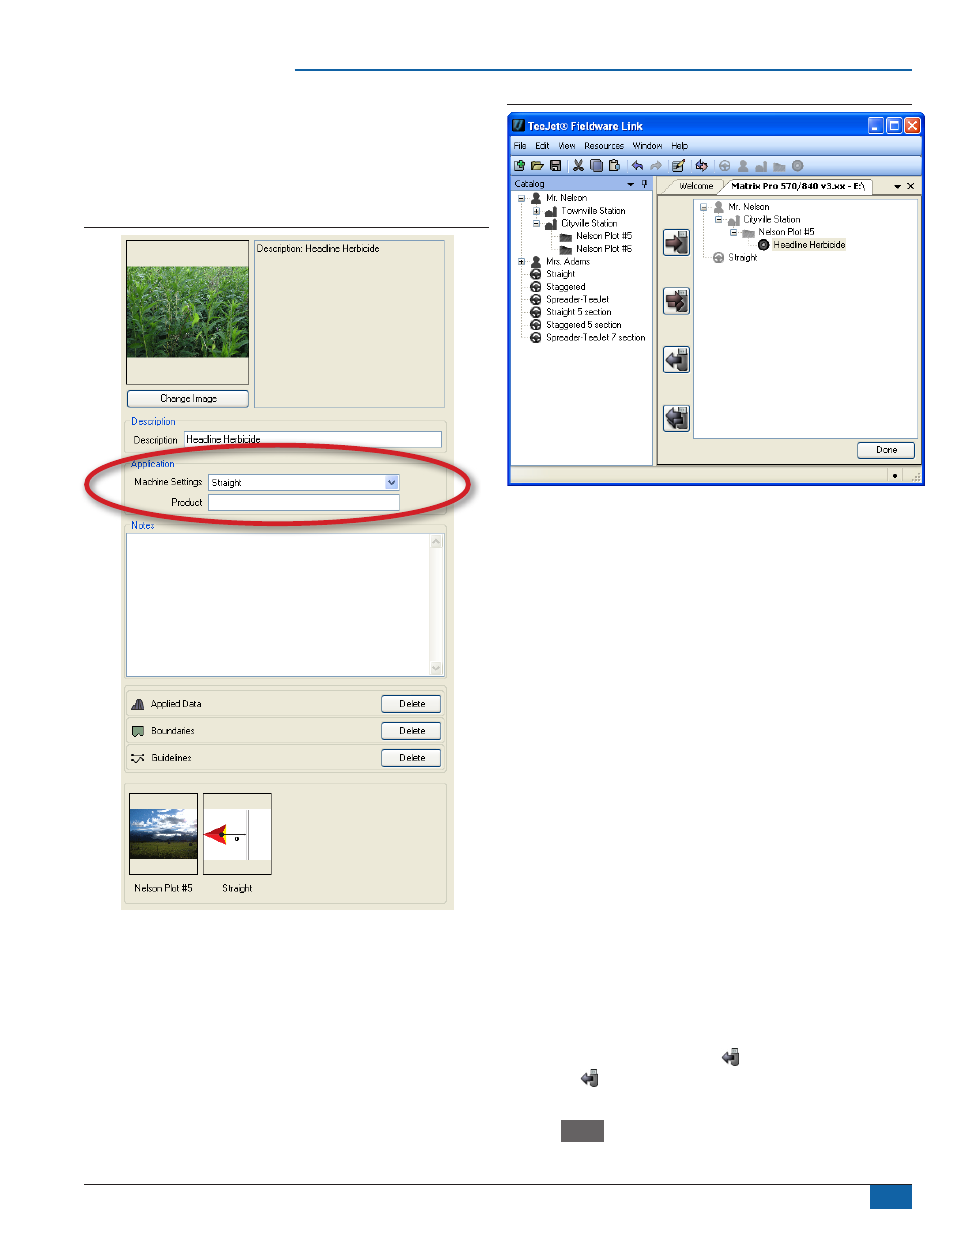
Jobs With Associated Machine Settings
If a Job profile has application settings associated, the Machine
Settings profile will also be exported. Along with transferring the Job
profile to the Matrix Pro GS console, the Machine Settings profile
must be transferred into the Matrix Pro GS under the Data->Machine
Settings->Transfer options.
Figure 61: Job Application Settings
Figure 62: Exporting Job with Associated Machine Settings
Importing/Merging Profiles From the Console
If a Job (or Jobs) being imported/merged has not been created or
edited in Fieldware Link, it will be placed in a new Client (named
“Unknown”) in the catalog. The imported/merged Job(s) can be
manually moved to a different Client, Farm or Field; or the new Client,
Farm and Field can be edited and saved.
Changing the description of a Job or Machine Settings profile does not
change how a particular Job or Machine Settings profile is recognized
by your Matrix Pro or Matrix Pro GS console. If you change the name
and export the profile to import it on to the Matrix Pro or Matrix Pro GS,
it will override or merge the previous profile with the renamed profile.
NOTE: Importing/merging a profile from a USB drive will remove/delete
it from the USB drive.
To import/merge a selected profile back into the catalog:
1. Follow instructions for the specific console software version to
transfer the profiles to a USB drive.
2. Access the Port profiles tab.
3. From the USB drive window, highlight the profiles to be merged.
◄The Machine Settings profile, to move a specific profile.
◄The Job, to move a specific Job.
◄The Field, to move all Jobs associated with the selected Field.
◄The Farm, to move all Jobs associated with the selected Farm.
◄The Client, to move all Jobs associated with the selected Client.
4. Click MERGE SELECTED button , right-click and select
MERGE or click and drag to the catalog*.
5. Repeat steps 1 to 2 as needed for other profiles.
6. Click
DONE
.
7. Remove USB drive.