Swath manager 5 operation, Installation, Starting swath manager 5 – TeeJet CenterLine 2.0 User Manual
Page 63: Centerline, Centerline 57 swath manager 5 operation, Figure 61: installation of swath manager 5, Software version 2.00, Auto boom disengage engage, Spr ayer c ontrol, Auto man
CenterLine
Software Version 2.00
CenterLine 57
Swath Manager 5 Operation
Swath Manager 5 Operation
Starting Swath Manager 5
This section assumes that the setup section (See “Swath Manager 5” on page 15) has been read
and the CenterLine lightbar is properly set up.
Start by reviewing the installation diagrams below to make sure the system is properly connected.
Make sure the controller and Swath Manager 5 switches are all in the proper location See “Swath
Manager 5 Auto Boom Engage:” on page 58.
Create a boundary to lock the area of application. If a boundary is created and closed and the Auto
Boom switch is set to engaged the system will NOT apply outside of the boundary. See “A+ Fea-
ture” on page 39 to learn how to create a boundary.
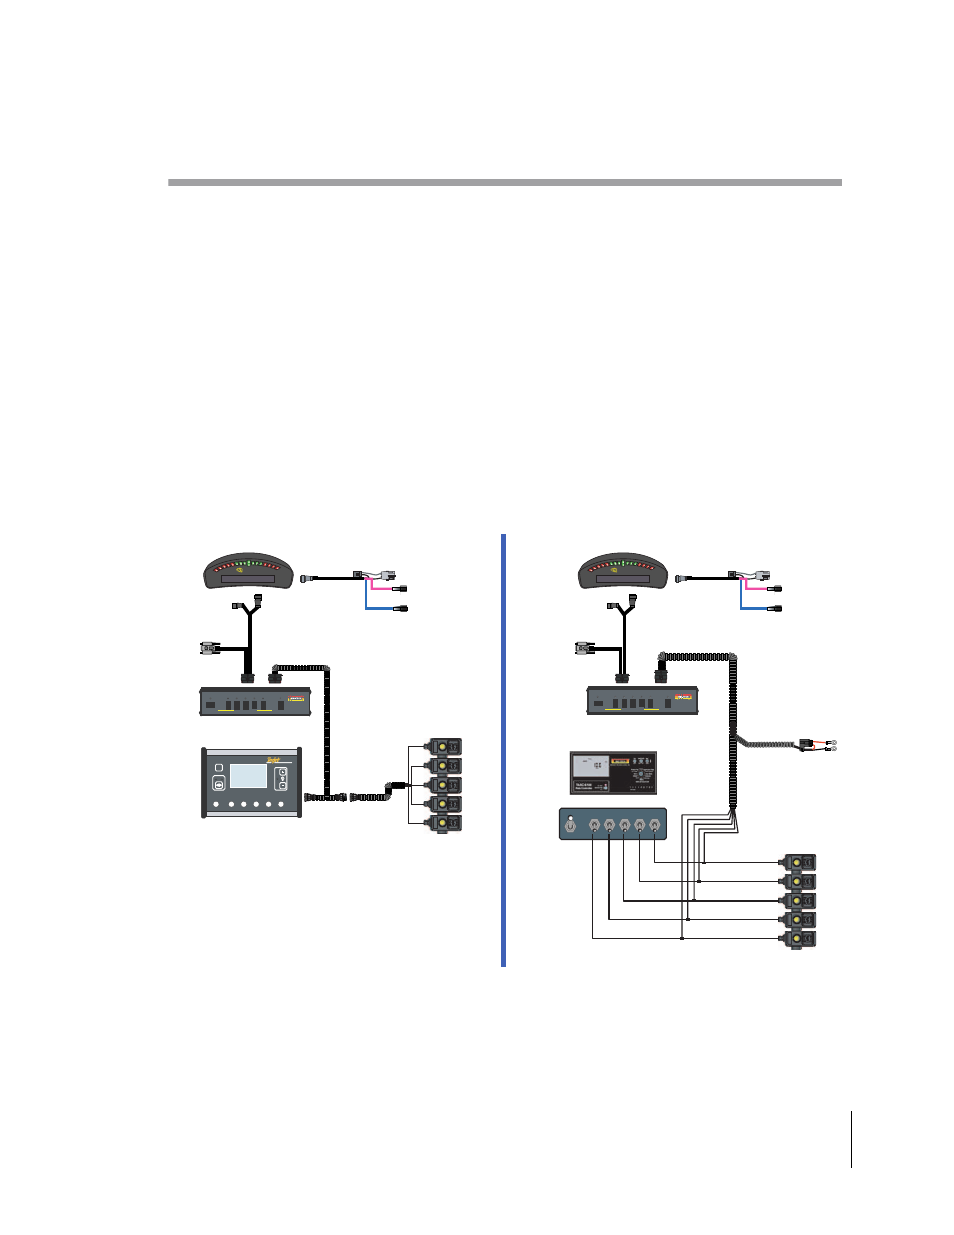
Installation
Figure 61: Installation of Swath Manager 5
SM5 Controller Harness
TeeJet - 45-05462
Raven - 45-05463
Existing
Controller Harness
MASTER
5
4
3
2
1
BOOM CONTROL
AUTO
BOOM
DISENGAGE
ENGAGE
Swath Manager 5
Automated Boom
Section Control
844-x
SPR
AYER C
ONTROL
ON
P
RO
AUTO
MAN
ON
OFF
Rate Controller
Valves
IGN Sense
CenterLine
Status Detect
(Not used)
Power
Cable
45-05324
GPS IN
Cable
SM5 to CenterLine
45-05461
Not Used
Swath Manager 5
78-08065
SM5 Harness,
Exsisting Switches or Switchbox
45-05467
To Acc. Power
or Battery
Existing switches or switchbox
Swath Manager 5
78-08065
IGN Sense
CenterLine
Status Detect
(Not used)
Power
Cable
45-05324
GPS IN
Cable
SM5 to CenterLine
45-05461
Not Used
Valves
MASTER
5
4
3
2
1
BOOM CONTROL
AUTO
BOOM
DISENGAGE
ENGAGE
Swath Manager 5
Automated Boom
Section Control
Wire Splice
50-10097