Switching between standard edid or capturing edid – PRG Mbox Designer Manual 3.8 User Manual
Page 71
MBOX
®
MEDIA SERVER USER MANUAL
63
Switching Between Standard EDID or Capturing EDID
The EDID set can be changed using the Stage Blackout and Preview Dim switches located on the front of the I/O
module. The combination of these switch settings (as either Yes or No) will determine the default EDID set - or, if a
custom EDID will be captured - when the EDID Capture switch is engaged.
To switch between the three standard EDID sets:
Step
1. Place Stage Blackout and Preview Dim switches in one of the following configurations (according to the
desired set):
Step
2. Flip momentary EDID Capture switch to the right and hold in position. The indicator LED will flash rapidly for
four seconds. (During this time, the switch can be released and no capturing action will take place.)
To capture a custom EDID:
Refer to the guidelines on the previous page for more information.
Step
1. Quit Mbox Designer.
Step
2. Open Mac Displays Preference window (Figure 3-2).
Step
3. Connect monitor to preview output of the other output section (not being programmed).
Step
4. Remove all DVI or VGA connectors from output section you wish to program.
Step
5. At output section being programmed, reconnect only the device from which you want to capture EDID data.
Step
6. Set both Blackout and Preview Dim switches to their "Yes" position:
Step
7. Flip momentary EDID Capture switch to the right and hold in position. The indicator LED will flash rapidly for
four seconds. (During this time, the switch can be released and no capturing action will take place.)
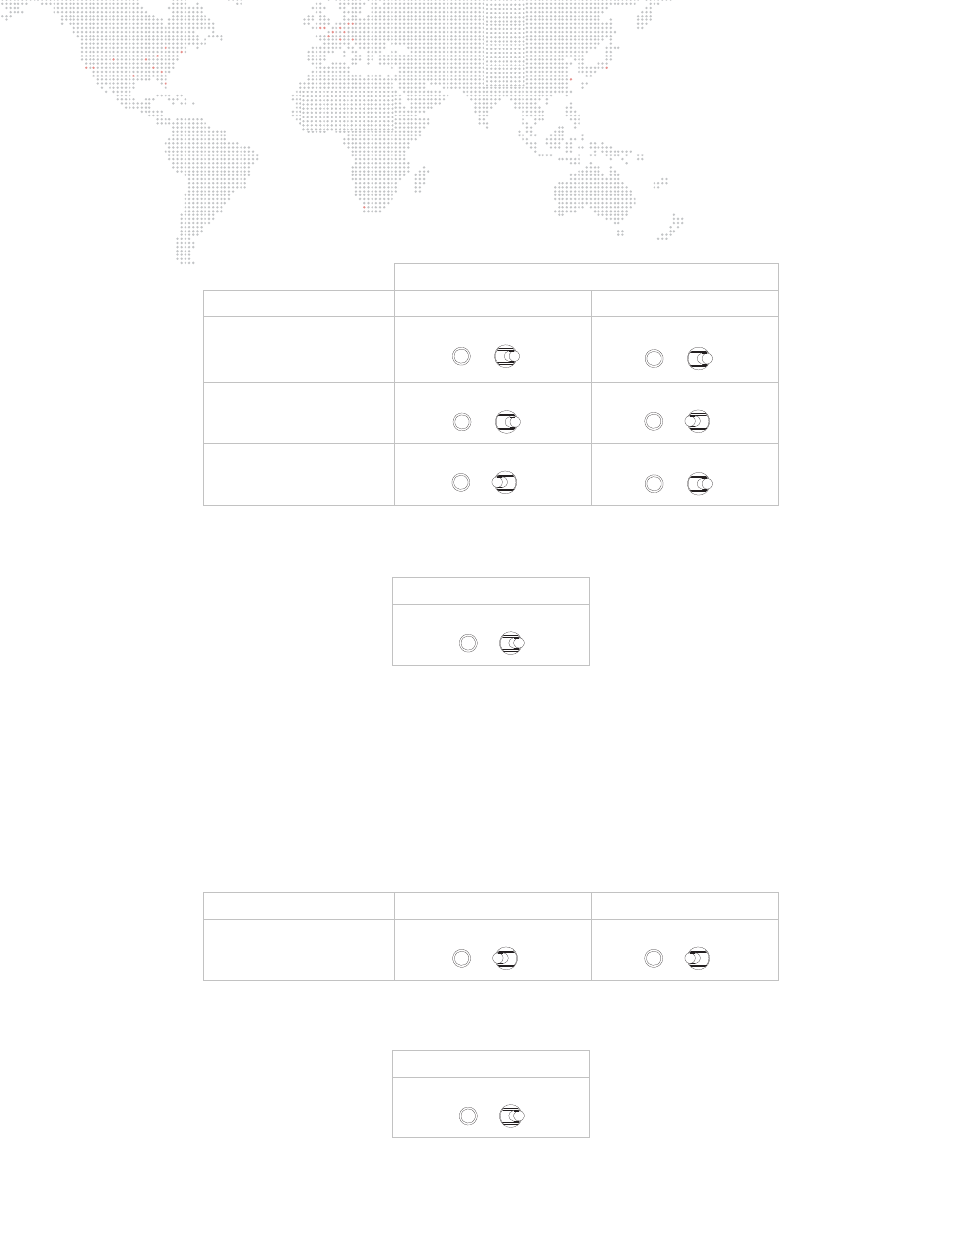
Switch Positions:
Desired EDID Set
Stage Blackout Switch
Preview Dim Switch
Set 1:
60Hz
NO
NO
Set 2:
59.94Hz
NO
YES
Set 3:
50Hz
YES
NO
EDID Capture Switch
To Right
Desired EDID Set
Stage Blackout Switch
Preview Dim Switch
Capture from DVI/VGA
YES
YES
EDID Capture Switch
To Right
YES
NO
YES
NO
YES
NO
YES
NO
YES
NO
YES
NO
YES
NO
YES
NO