Replacing the tip pinch fan (hi-temp version) – PRG Bad Boy Field Service Manual User Manual
Page 73
BAD BOY
®
SPOT LUMINAIRE FIELD SERVICE MANUAL
65
Replacing the Tip Pinch Fan (Hi-Temp Version)
The Tip Pinch Fan has been upgraded in most Bad Boy Luminaires. If the Hi-Temp fan version has
not
been installed
yet, refer to the procedure on the previous page.
Parts:
23.9812.0994
1 EA
ASSY, HI-TEMP TIP PINCH FAN, 12V
Tools:
#2 Philips screwdriver
WARNING:
Remove power from luminaire before performing any maintenance procedures.
To replace the Tip Pinch Fan:
Step
1. Remove power from luminaire and allow components to cool for at least 5 minutes.
Step
2. Remove Head Covers. (Refer to
Step
3. Remove Wheel Stack Assembly. (Refer to
Step
4. Disconnect Tip Fan Cable (labeled TIP FAN J49) and release from twist-lock cable ties.
Step
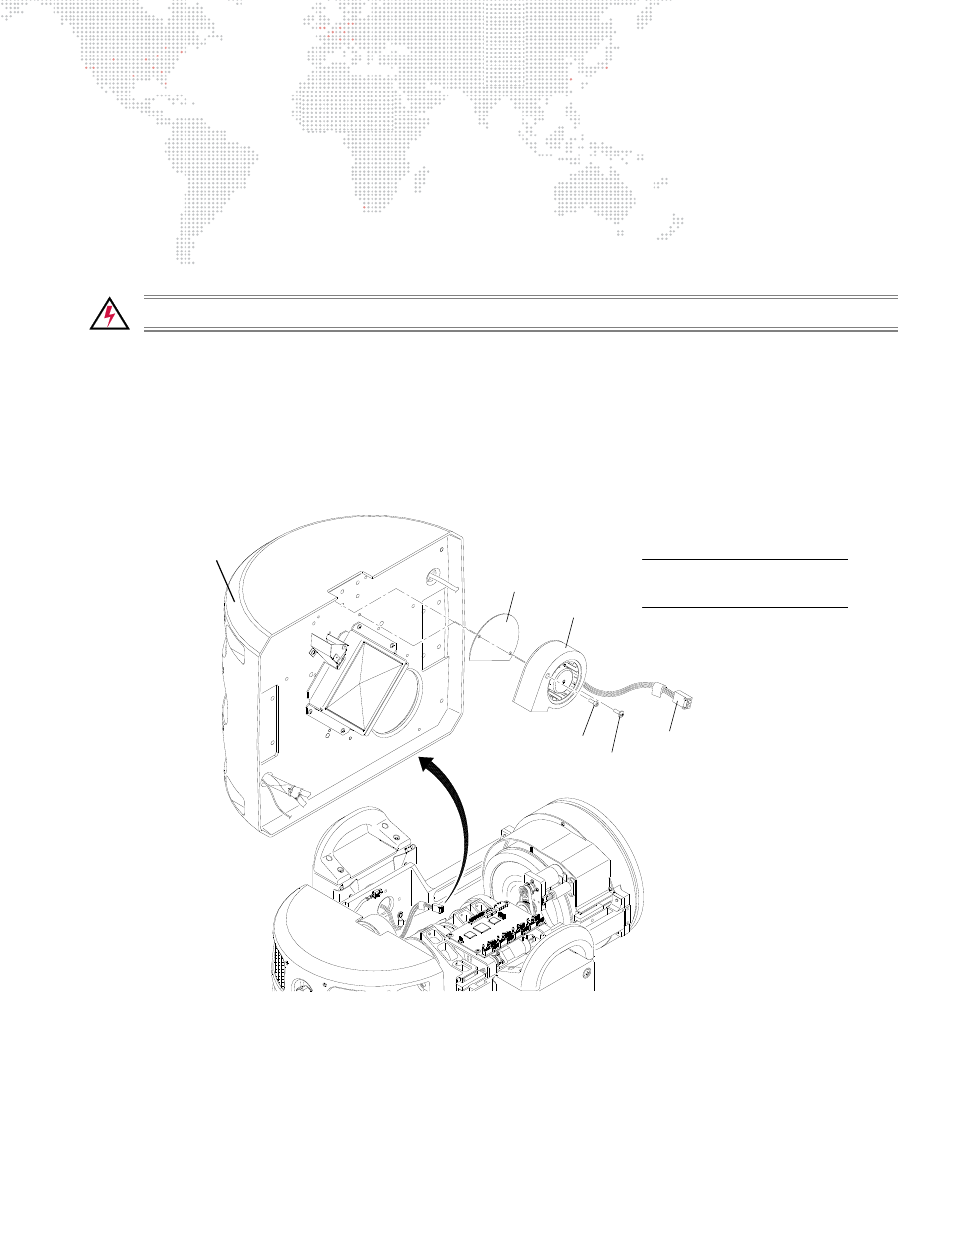
5. Remove Tip Pinch Fan (and Insulator) by removing two 6-32 x 3/8" screws.
Figure 3-29: Removing Tip Pinch Fan
Step
6. Replace fan (and Insulator) by doing steps in reverse.
Tip Pinch Fan
Fan
Cable
Aft Assembly
Insulator
6-32 x 3/8" Zinc
Socket Head Screw
6-32 x 3/8" Zinc
Button Head Screw
Note: An O-ring was added
to replace the aluminum tape.