Etting, Tarted, Rojector – Philips LC3500G199 User Manual
Page 11: Creen, Continued
Attention! The text in this document has been recognized automatically. To view the original document, you can use the "Original mode".
G
etting
S
tarted
- S
etting
up
the
P
rojector
+ S
creen
(
continued
)
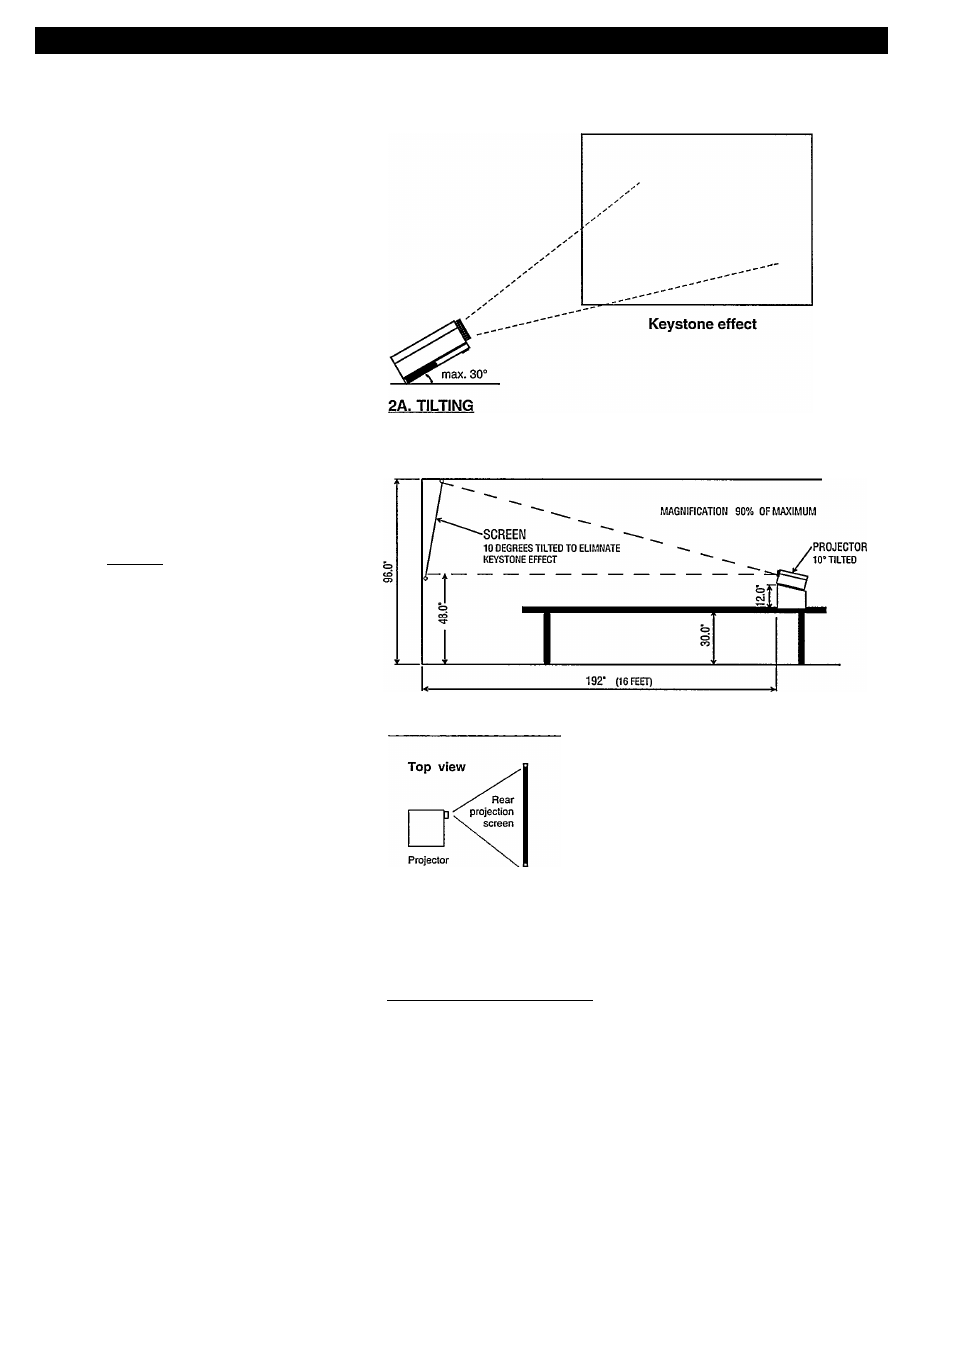
If you cannot put the Projector at the
same height as the bottom of the screen,
but rather lower, you have two choices:
2A. Tlie front of the Projector can be
tilted upwards; the picture will not then be
perfectly rectangular when the screen
hangs vertically. This is called the
“keystone” effect.
By pushing the sides of the handle it can
be turned.
Now the handle can be used for lifting the
front of the projector.
Tlie handle can also be removed by
removing the caps in the sides. The holes
appearing can be closed with the supplied
caps.
Tlie projector has adjustable feet at the
rear. Turn these if you need to point the
projector downwards to the screen.
Note: The Projector should not be tilted
up or down more than 15 degrees from its
normal horizontal position.
2B. If you want to use the Projector with a
rear projection screen or in a ceiling mount
(Projector positioned upside down), you
will need to change the internal mirror.
You do this using the button marked
MIRROR which is behind the swing-out
control door on the front panel. Each time
you press MIRROR, the picture on the
screen changes orientation.
3) Choose the size of screen
Choose a screen size that fits the planned
seating capacity and room dimensions.
A good guide is:
Two times tlie screen width should equal
the distance from the screen to the front
row of seats
Si.\ times the screen width should equal
the distance from the screen to the back
row of seats.
SAMPLE SET-UP FOR TABLE TOP USE
2B. REAR PROJECTION
viewers
3. CHOOSING THE SCREEN SIZE
Top view
6 X screen width ,
■H
.
2 X screen width
Back
row ^
Front
row
screen
width
11