NM Engineering 83.159.4300.72 User Manual
Page 9
S
SS
SStep 2
tep 2
tep 2
tep 2
tep 2
D
D
D
D
Disconnect S
isconnect S
isconnect S
isconnect S
isconnect Stock B
tock B
tock B
tock B
tock Brake Line
rake Line
rake Line
rake Line
rake Line
3541 Unit A, Lomita Boulevard, Torrance, CA 90505 (310) 325-4799
www.stoptech.com 9
W
W
W
W
War
ar
ar
ar
arning: S
ning: S
ning: S
ning: S
ning: Spilled br
pilled br
pilled br
pilled br
pilled brake fluid will damage most painted sur
ake fluid will damage most painted sur
ake fluid will damage most painted sur
ake fluid will damage most painted sur
ake fluid will damage most painted surfaces, and should
faces, and should
faces, and should
faces, and should
faces, and should be cleaned off
be cleaned off
be cleaned off
be cleaned off
be cleaned off
immediately
immediately
immediately
immediately
immediately. T
. T
. T
. T
. Take car
ake car
ake car
ake car
ake care to ensur
e to ensur
e to ensur
e to ensur
e to ensure that the cap is secur
e that the cap is secur
e that the cap is secur
e that the cap is secur
e that the cap is securely installed on the master cylinder
ely installed on the master cylinder
ely installed on the master cylinder
ely installed on the master cylinder
ely installed on the master cylinder. If
. If
. If
. If
. If
it is loose or removed, it is likely that more fluid will drip during brake installation.
it is loose or removed, it is likely that more fluid will drip during brake installation.
it is loose or removed, it is likely that more fluid will drip during brake installation.
it is loose or removed, it is likely that more fluid will drip during brake installation.
it is loose or removed, it is likely that more fluid will drip during brake installation.
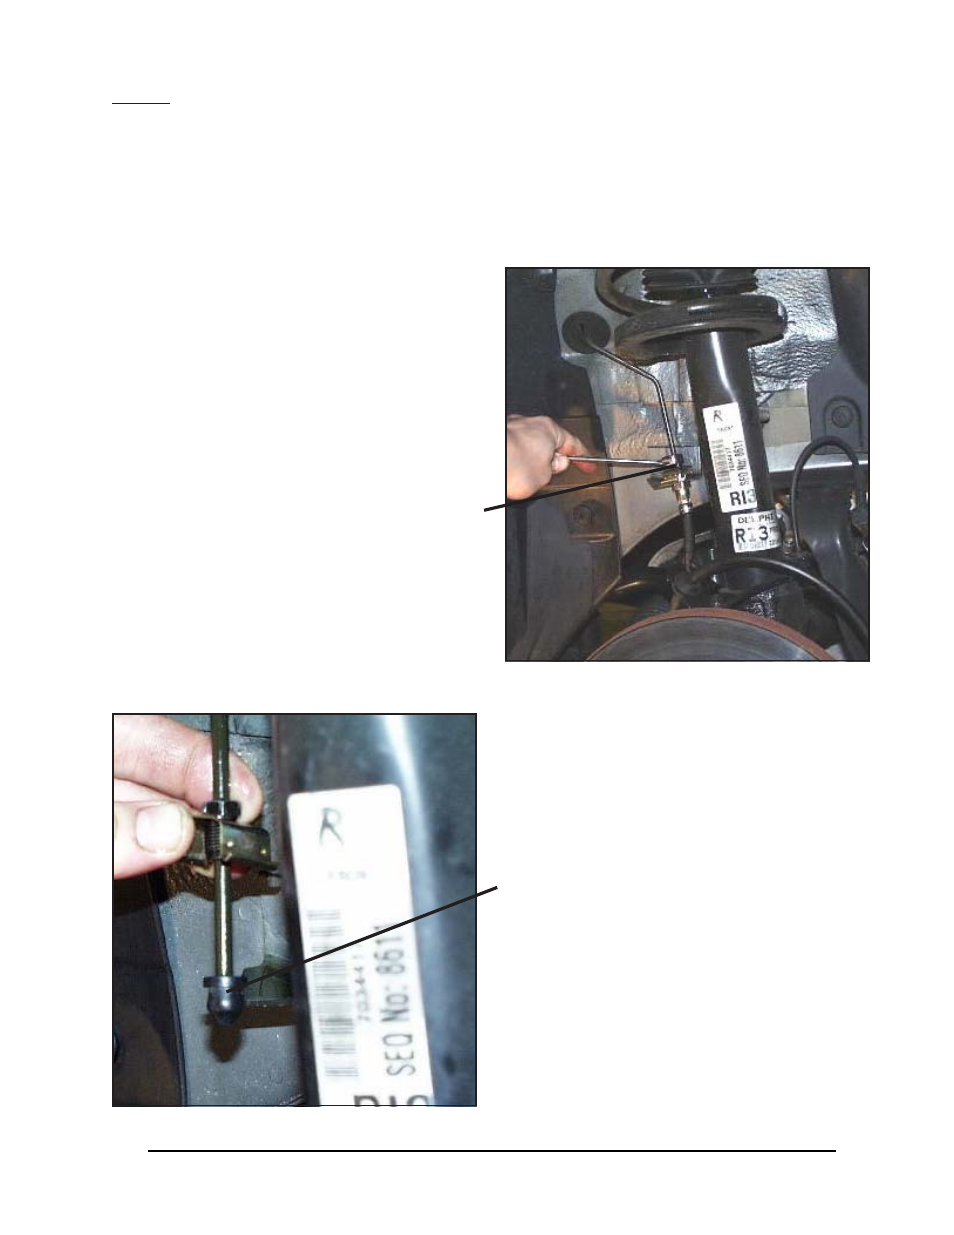
Place a drip tray or several rags directly below
the inboard brake line connection. If the area
around the brake line connection to the chassis
is dirty, clean it using brake cleaner or an ap-
propriate cleaning agent.
Loosen the hard line fitting, using an 11mm flare
wrench.
Remove the hard line fitting, and place one of
the rubber caps over the end of the hard line, to
control fluid loss during the installation.