NM Engineering 83.159.4300.72 User Manual
Page 11
S
SS
SStep 4
tep 4
tep 4
tep 4
tep 4
R
R
R
R
Remo
emo
emo
emo
emovvvvve D
e D
e D
e D
e Dust S
ust S
ust S
ust S
ust Shield, and I
hield, and I
hield, and I
hield, and I
hield, and Install C
nstall C
nstall C
nstall C
nstall Caliper B
aliper B
aliper B
aliper B
aliper Bracket
racket
racket
racket
racket
3541 Unit A, Lomita Boulevard, Torrance, CA 90505 (310) 325-4799
www.stoptech.com 11
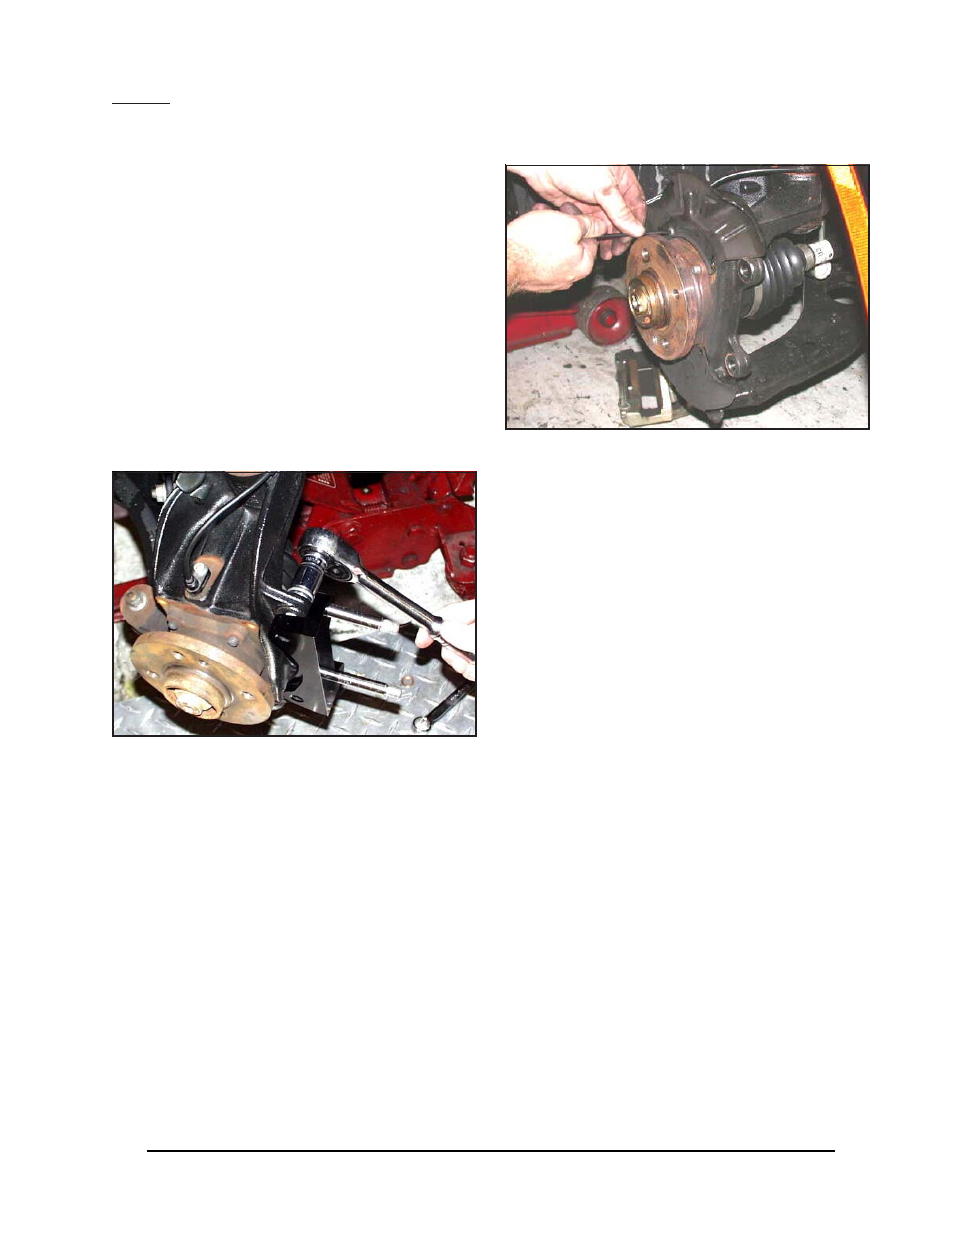
The dust shield must be permanently removed
from each front wheel, to accommodate the
AeroRotors.
Remove the dust shield retaining screws, using
a T-25 Torx wrench, then slide the dust shield off
of the hub.
Install the caliper bracket, using the stock cali-
per mounting bolts, and torque them to 55 lb-
55 lb-
55 lb-
55 lb-
55 lb-
ft
ft
ft
ft
ft, using a 16mm socket.
Remove the Jet nuts and washers from the cali-
per mounting bracket, and put them in a safe
place for later use.
Note: Due to their close proximity to the
Note: Due to their close proximity to the
Note: Due to their close proximity to the
Note: Due to their close proximity to the
Note: Due to their close proximity to the
hub, an L-shaped wrench may be required to
hub, an L-shaped wrench may be required to
hub, an L-shaped wrench may be required to
hub, an L-shaped wrench may be required to
hub, an L-shaped wrench may be required to
remove the dust shield retaining screws.
remove the dust shield retaining screws.
remove the dust shield retaining screws.
remove the dust shield retaining screws.
remove the dust shield retaining screws.