NM Engineering 83.159.4300.72 User Manual
Page 18
S
SS
SStep 6 (Cont
tep 6 (Cont
tep 6 (Cont
tep 6 (Cont
tep 6 (Cont’’’’’d.)
d.)
d.)
d.)
d.)
IIIIInstall C
nstall C
nstall C
nstall C
nstall Caliper and P
aliper and P
aliper and P
aliper and P
aliper and Pads
ads
ads
ads
ads
3541 Unit A, Lomita Boulevard, Torrance, CA 90505 (310) 325-4799
www.stoptech.com 18
Note: The bridge is directional, and should
Note: The bridge is directional, and should
Note: The bridge is directional, and should
Note: The bridge is directional, and should
Note: The bridge is directional, and should
be positioned so that the air-scoop opening is
be positioned so that the air-scoop opening is
be positioned so that the air-scoop opening is
be positioned so that the air-scoop opening is
be positioned so that the air-scoop opening is
located in the top half of the bridge.
located in the top half of the bridge.
located in the top half of the bridge.
located in the top half of the bridge.
located in the top half of the bridge.
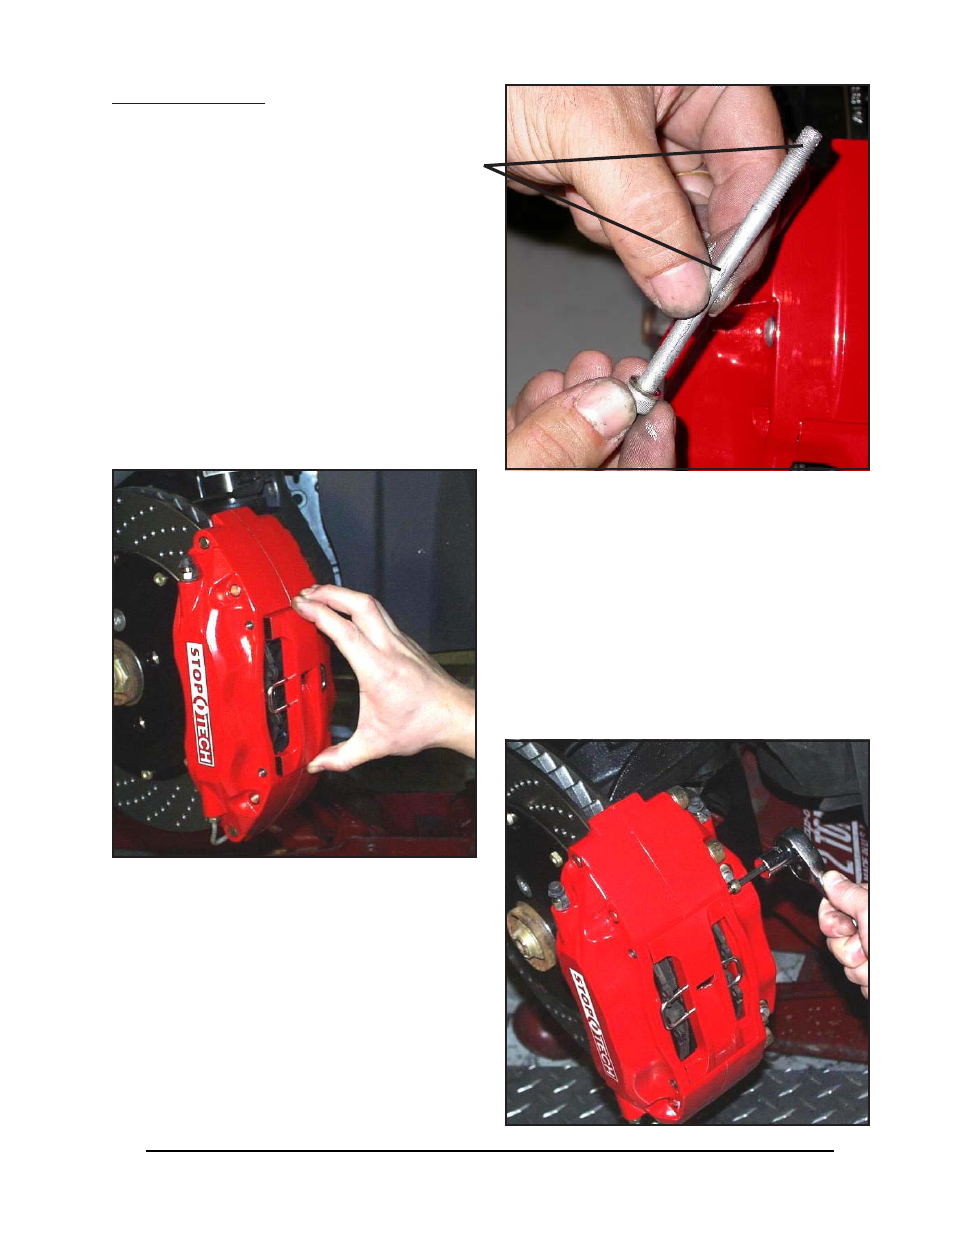
Install the bridge by sliding it into position, and
rocking it until one of the bolt holes lines up.
Take care to ensure that the bridge is slid straight
and parallel into the caliper body opening.
Torque each bolt to appr
appr
appr
appr
appro
oo
o
oximately 8-10 lb-ft
ximately 8-10 lb-ft
ximately 8-10 lb-ft
ximately 8-10 lb-ft
ximately 8-10 lb-ft,
using a 5mm Allen wrench. Do not use a torque
wrench, as the use of anti-seize compound will
cause a false reading. Do not over-torque the
bridge bolts - snug is tight enough.
W
W
W
W
War
ar
ar
ar
arning: D
ning: D
ning: D
ning: D
ning: Do not hammer the bridge bolts
o not hammer the bridge bolts
o not hammer the bridge bolts
o not hammer the bridge bolts
o not hammer the bridge bolts
into place. T
into place. T
into place. T
into place. T
into place. Tap the bridge, not the bolts!
ap the bridge, not the bolts!
ap the bridge, not the bolts!
ap the bridge, not the bolts!
ap the bridge, not the bolts!
Apply a light film of anti-seize compound onto
the bridge bolt shafts and threads.
Start the second bolt, and apply pressure to the
bridge, using the palm of your hand, or by gen-
tly tapping the bridge with a mallet, until the
bolt engages in the hole. Start the first few
threads, using a 5mm Allen wrench.
Insert the first bridge bolt, from the outside of
the caliper, and start the first few threads, using
a 5mm Allen wrench.