Editing scenes in the timeline – Mariner Software StoryMill for Mac User Manual
Page 28
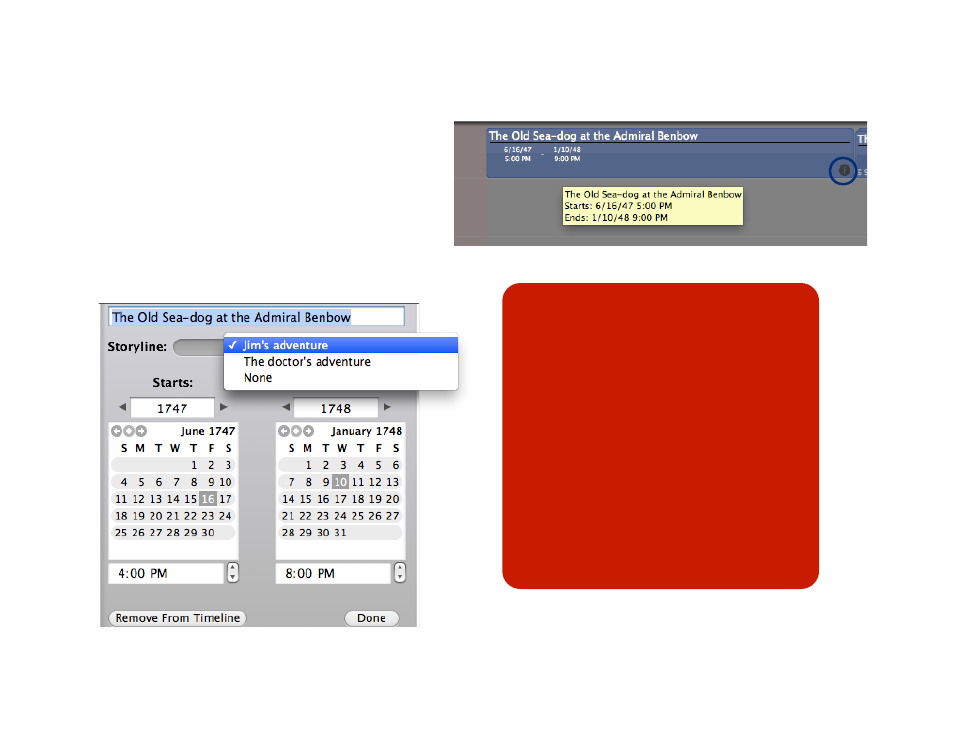
Editing scenes in the timeline
You can easily tell which timeline areas have scenes
assigned to them: those with scenes will show a gray
background, while those without any scenes will show
a red background.
Hover over a scene to see its start and end date and
full name in a tooltip (shown at right). To change
information about the scene, click on the info icon at its
bottom right to launch its timeline window, allowing you
to edit its time and date and assign it to a storyline.
28 of 66
Tips:
If no scenes have a start and end date,
then the timeline will by default start at the
date and time that you view it. So if you
create a new project and open a timeline
on January 7, 2007 at 10:07 AM, your
timeline will start at January 7, 2007 at
10:07 AM. For a more useful timeline,
define a start time in the scenes view for
at least one scene.
Individual scenes have a minimum bar
size! This means that in some cases your
scene bar will appear longer than your
sceneʼs time period.
Timeline editing window