Step 1 - camera setup – Levana LV-TW500 User Manual
Page 9
9
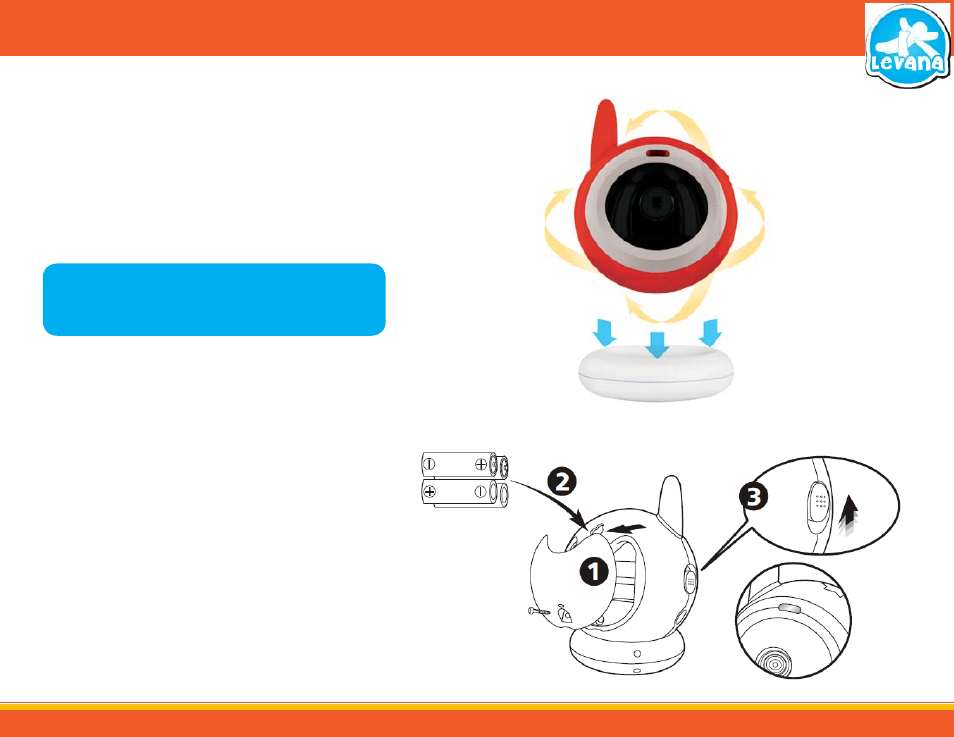
STEP 1 - CAMERA SETUP
Using Batteries:
1. Using a flat-head screwdriver, open the battery compartment cover on the back of
the camera.
2. Insert 4 AAA batteries, make sure to insert the batteries according to the "+" and
"-" signs.
3. Close the battery compartment cover and tighten the screw to hold it in place.
4. Slide the POWER switch (below the antenna) to the ON position. The LED on the
front of the camera will light up (red light).
• The LED on the camera will remain red until the batteries lose power.
Change the batteries when the LEDs are red and blinking. Upon startup,
the LED will be red
NOTE: Use new batteries. Do not mix old batteries with new ones. Remove
the batteries from the camera if you do not plan to use it for an
extended period of time.
Batteries
Using the Magnetic Base:
The camera has an innovative and convenient magnetic base that magnetically holds
the camera securely. This allows you to freely rotate the camera left, right, up and
down with ease:
1. Place the camera and magnetic base on a flat surface.
2. Rotate the camera freely and aim it in the direction you would like to monitor.
Avoid placing at an angle over 30 degrees as the camera may fall out. The
magnetic strength is lower over the battery compartment.
Magnetic Base