Step 8 - software - in depth, Tech sec – Levana LV-TW500 User Manual
Page 34
34
STEP 8 - SOFTWARE - IN DEPTH
TECH SEC
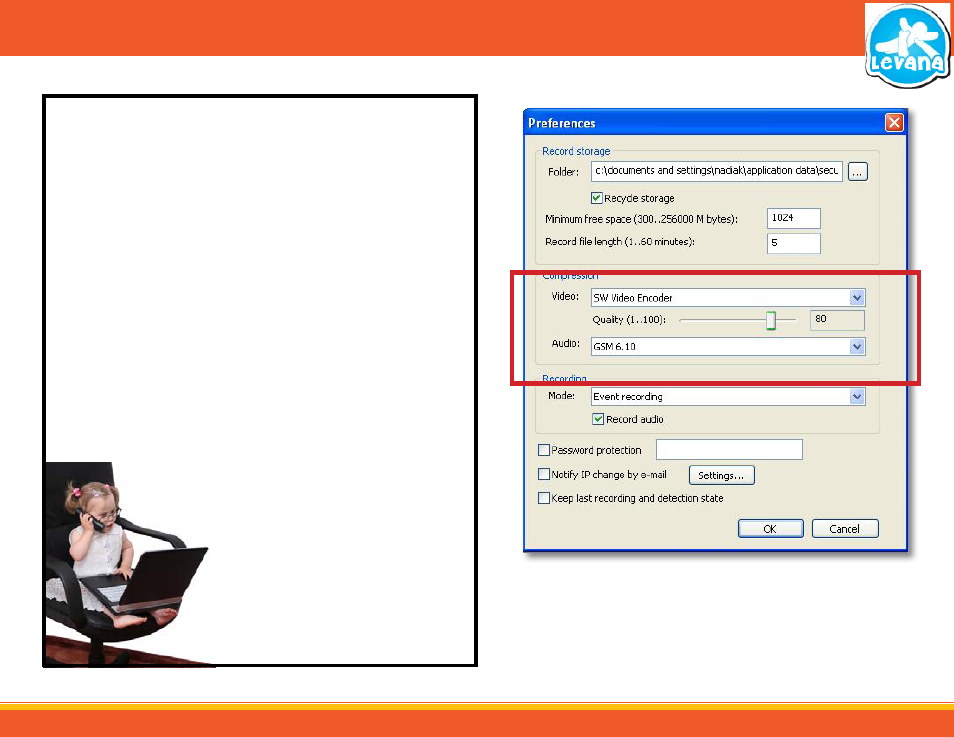
Compression
This option allows you to change the codec used to compress recorded footage and audio as
well as adjust the quality of the compressed footage. We recommend leaving these compression
settings at their default settings. Select “Options”
→”Preferences” to open the dialog box. Certain
compression will give you better or worse audio/video quality but may not be compatible with all
media players. This is why it is best to leave at the default unless you are an advanced user.
To change video encoder:
1. Select the drop down menu next to video compression and a list will pop up.
2. Select the codec you would like to use to compress the video footage.
3. To save changes and exit the preferences box select OK. To exit without saving select Cancel.
To adjust the quality:
1. Select the tab that is located along the quality adjustment bar.
2. Click and while holding the tab down drag it along the bar. The further along the bar the
higher the quality of footage. The higher the quality the more hard drive space will
be used.
3. To save changes and exit the preferences box select OK. To exit without saving select Cancel.
To change the audio encoder:
1. Select the drop down menu next to audio
compression and a list will pop up.
2. Select the codec you would like to use to compress
the audio.
3. To save changes and exit the preferences box select
OK. To exit without saving select Cancel.
Preferences Compression Options