Funcíonamíento/grabacíón de cinta, Fm antenna, Speakers connection – Philips FW-C700 User Manual
Page 19: Front speakers, Optional connections, Line out connection, Connecting other equipment to your system, Digital out connection, Inserting batteries into the remote control, Si se está realizando una grabación
Attention! The text in this document has been recognized automatically. To view the original document, you can use the "Original mode".
Preparations
Funcíonamíento/grabacíón de cinta
FM Antenna
For better FM stereo reception, connect an
outdoor FM antenna to the FM ANTENNA
terminal.
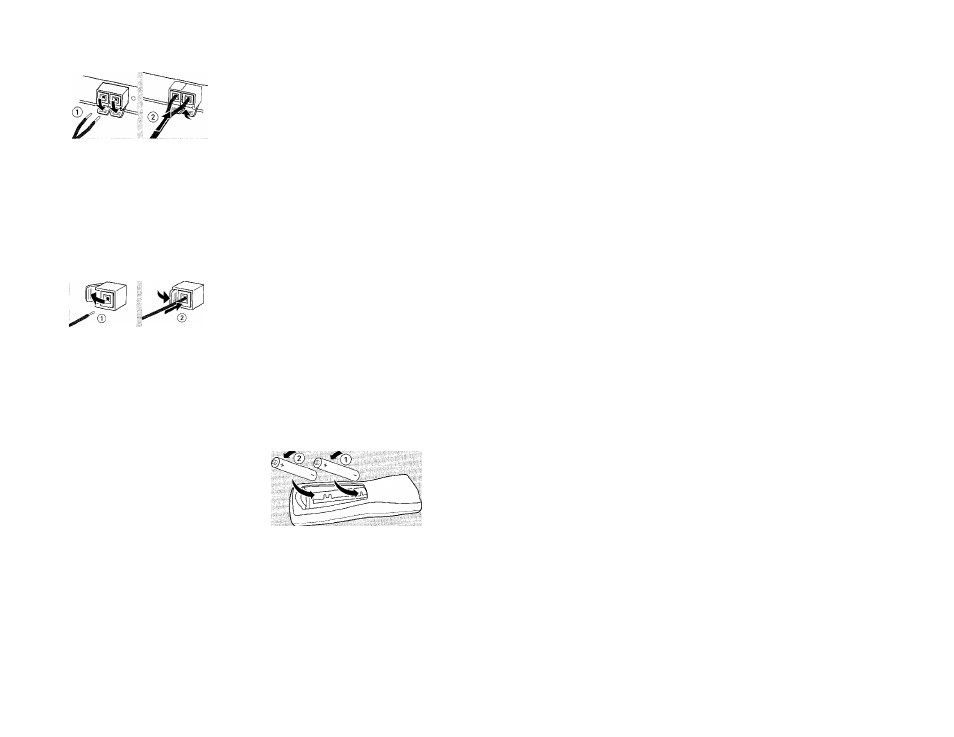
Speakers Connection
Front Speakers
Connect the speaker wires to the SPEAKERS
(FRONT) terminals, right speaker to "R" and left
speaker to "L”, colored (marked) wire to " +"
and black (unmarked) wire to " — ”,
• Clip the stripped portion of the speaker wire as
shown.
Notes;
- For optimal sound performance, use the
supplied speakers.
- Do not connect more than one speaker to any
one pair of +/— speaker terminals.
- Do not connect speakers with an impedance
lower than the speakers supplied. Please refer to
the SPECIFICATIONS section of this manual.
Optional Connections
The optional equipment and connecting cords
are not supplied. Refer to the operating
instructions of the connected equipment for
details.
Line Out Connection
Connect this output to any analog audio
equipment for playback or recording (CD
recorder tape recorder or amplifier for example).
Use a cinch cable to connect the LINE OUT
terminals to the analog audio in terminals of the
equipment
Connecting other equipment to your
system
Connect the audio left and right OUT terminals
of a Ty VCR, Laser Disc player DVD player or
CD Recorder to the AUX/CDR IN terminals.
Notes:
- Do not connect equipment to both the LINE
OUT and AUX/CDR IN terminals at the same time.
Otherwise, noise will be generated and malfunction
might occur.
- If you are connecting equipment with a mono
output (a single audio out terminal), connect it to
the AUX/CDR IN left terminal. Alternatively, you
can use a "single to double" cinch cable (still be
mono sound).
Digital Out Connection
Connect this digital output when recording on
any audio equipment with digital input (CD
Recorder Digital Audio Tape [DAT] deck Digital
to Analog Converter and Digital Signal Processor
for example). Use a cinch cable to connect the
DIGITAL OUT terminal to the digital input
terminal of the equipment.
Inserting batteries into the
Remote Control
Insert two batteries (Type R06 or AA) into the
remote control with the correct polarity as
Indicated by the + and — symbols inside the
battery compartment
CAUTION!
- Remove batteries if they ore exhausted
or not to be used for a long time.
- Do not use old and new or different
types of batteries in combination.
- Batteries contain chemical substances, so
they should be disposed off properly.
Si se está realizando una grabación
133 empieza a destellar
•
No es posible escuchar a otra fuente excepto
durante el doblaje de cinta.
•
No es posible activar la fundón del temporizador
Grabación con una pulsación
1
Pulse CD, TUNER o AUX para seleccionar la
fuente.
2
Inicie la reproducción de la fuente seleccionada.
3
Pulse REC para iniciar la grabación.
Para parar la grabación
•
Pulse ■.
flota:
- La grabación de una pulsación no es posible en
el modo de cinta, y aparecerá ’SELECT
5uLíf?CE'' (seleccionar fuente).
Grabación sincronizada de CD
1
Pulse CD 1 para seleccionare! disco-
•
Pulse M o W para seleccionar la pista deseada
para iniciar la grabación.
•
Puede programar las pistas en el orden en que
quiere que se graben (consulte “Funcionamiento
de CD - Programación de pistas”).
2
Pulse REC para iniciar la grabación.
El disco empezará a reproducirse
automáticamente.
Para seleccionar otra pista durante la
grabación
1
Pulse PAUSE
I I
para interrumpir la grabación,
2
Pulse
M
o
M
para seleccionar la pista deseada.
3
Pulse PLAY ► para reanudar la grabación.
Para parar la grabación
•
Pulse ■.
La grabación y la reproducción del disco se
interrumpirán simultáneamente.
Doblaje de cinta
1
Coloque la cinta pregrabada en la platina 1,
• Puede posicionar la cinta al pasaje donde
empezará la grabación.
2
Pulse DUBBING
La reproducción y la grabación empezarán
simultáneamente.
Aparecerá "SUS OulJ" (doblando).
9
El doblaje solamente es posible en un lado de la
cinta. Para continuar la grabación en el lado de
reversión, al final del lado A, gire las cintas al lado
B y repita el procedimiento.
Para parar el doblaje
9
Pulse ■.
Notas:
- EJ doblaje de la anta solamente es posible
desde la platina 1 a la platina 2.
- Para asegurar que el doblaje sea correcto, utilice
cintas de la misma longitud.
- Durante el doblaje puede escuchar a otra fuente.
Grabación digital mediante
Digital Out
Para grabación de CD digital, consulte el manual
de instrucciones, por ejemplo grabador de CD,
equipo de audio digital.
10
75