3 installation and connections, 1 check unpacked nvr, 2 about front panel and real panel – IC Realtime 4 Channel Forensic Network Video Recorder User Manual
Page 22: 3 hdd installation
13
3 Installation and Connections
Note: All the installation and operations here should conform to your local
electric safety rules.
3.1 Check Unpacked NVR
When you receive the NVR from the forwarding agent, please check whether there is any visible
damage. The protective materials used for the package of the NVR can protect most accidental
clashes during transportation. Then you can open the box to check the accessories.
Please check the items in accordance with the list (Remote control is optional). Finally you can
remove the protective film of the NVR.
3.2 About Front Panel and Real Panel
The model label in the front panel is very important; please check according to your purchase
order.
The label in the rear panel is very important too. Usually we need you to represent the serial
number when we provide the service after sales.
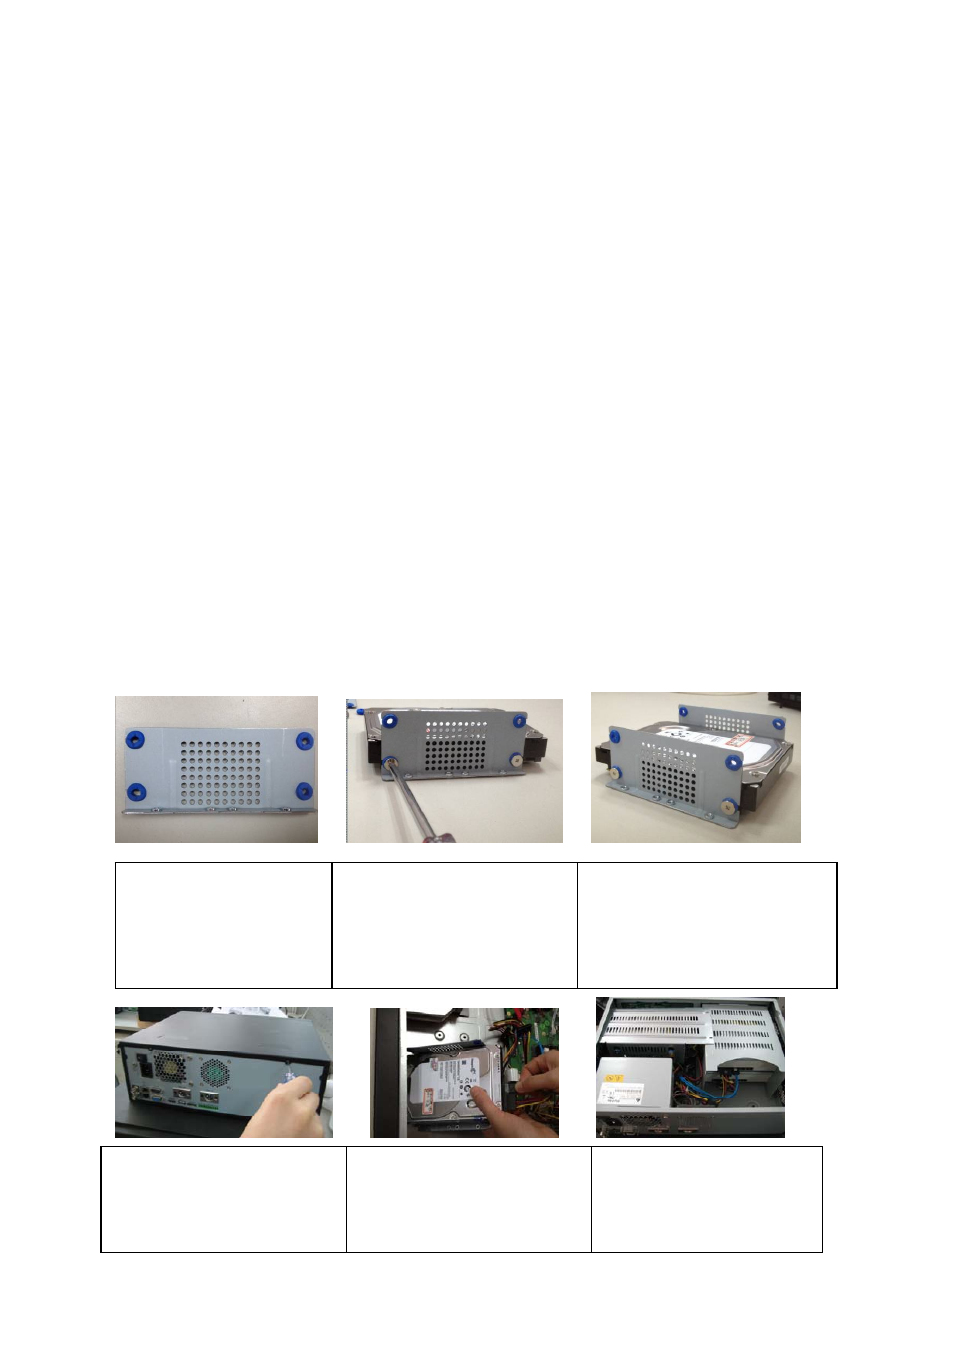
3.3 HDD Installation
You can refer to the Appendix for recommended HDD brand.
Please follow the instructions below to install hard disk.
All figures listed here are for reference only.
This series NVR has two SATA HDDs. Please use HDD of 7200rpm or higher.
1. Take the HDD bracket out
of the accessories bag and
then place the four gaskets to
the four holes. .
2. Place the HDD to the holes of
the bracket and then use the
screws to fix firmly.
3. Secure the brackets of the two
sides on the HDD.
4. Unfasten the screws of the
rear and side panel of the device.
5.
Use special data cable to
connect the HDD cable and power
cable.
6. Place the bracket in line with
the four holes of the device and
then use screws to fix from the
bottom.