IC Realtime Combo Series: 8 Channel DVR with built-in 10 LCD monitor User Manual
Page 49
40
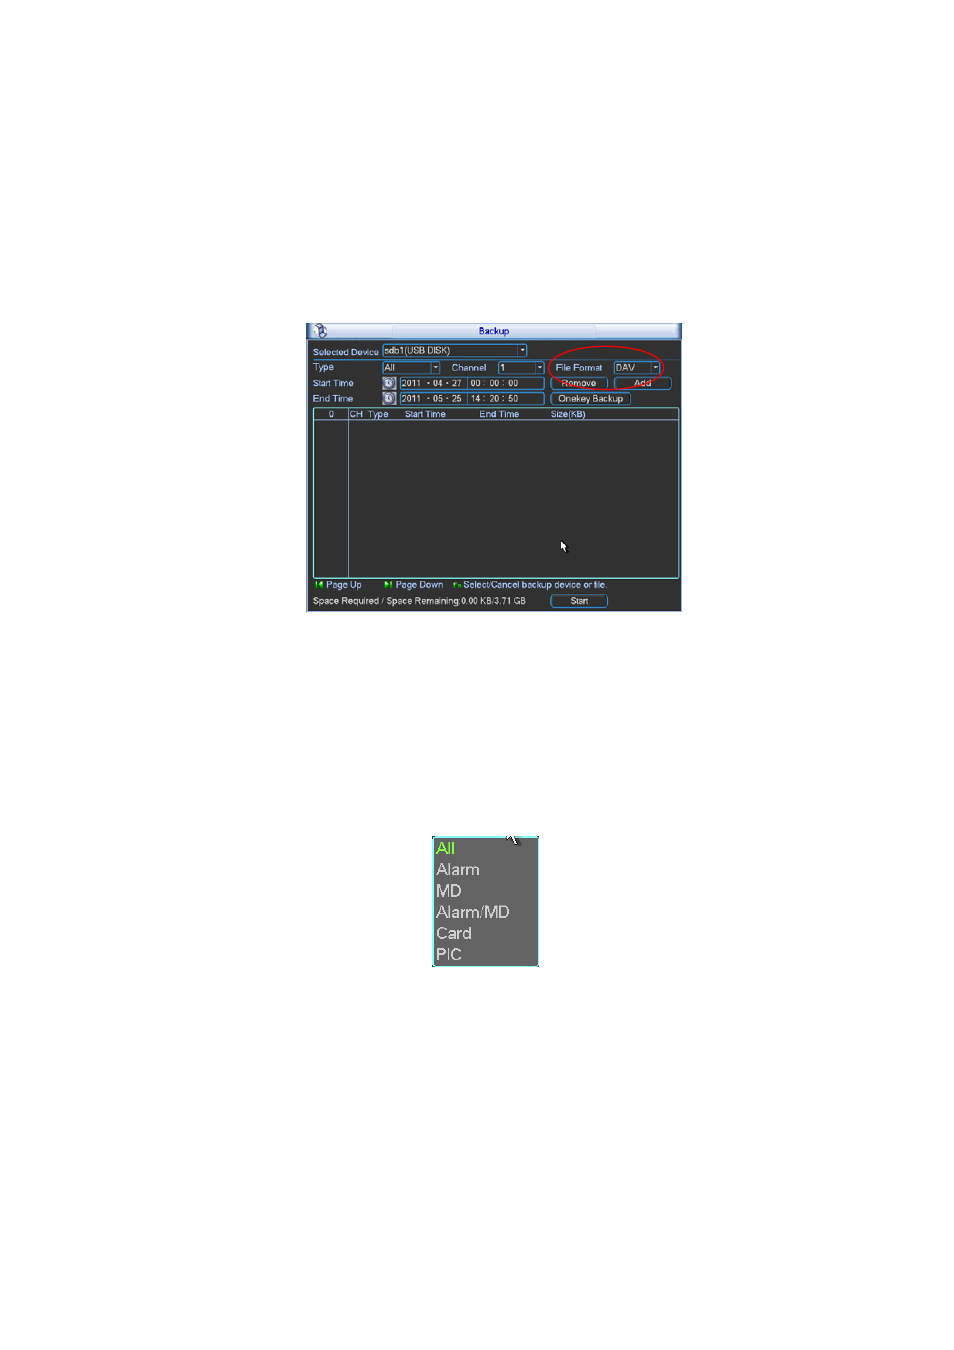
4.7.1 Backup
Select backup device and then set channel, file start time and end time.
Click add button, system begins search. All matched files are listed below. System
automatically calculates the capacity needed and remained. See Figure 4-30.
system only backup files with a √ before channel name. You can use Fn or cancel button to
delete √ after file serial number.
Click backup button, you can backup selected files. There is a process bar for you reference.
When the system completes backup, you can see a dialogue box prompting successful
backup.
Figure 4-30
Click backup button, system begins burning. At the same time, the backup button becomes
stop button. You can view the remaining time and process bar at the left bottom.
z
File format: Click the file format; you can see there are two options: DAV/ASF.
z
Picture backup: Please set the corresponding time, channel and then select the type as
PIC from the dropdown list. See Figure 4-31. Please click the Add button and then select
the pictures. Click the Start button; you can copy the specified pictures to the selected
portable devices.
Figure 4-31
z
One key backup: It includes three steps: the search, select all, start the backup. You can
skip the above three steps and then copy all the searched files directly.
The file name format usually is: SN_CH+channel number+time Y+M+D+H+M+S. In the file
name, the YDM format is the same as you set in general interface. (Main Menu ->Setting -
>General).File extension name is .dav.
Tips:
During backup process, you can click ESC to exit current interface for other operation. The
system will not terminate backup process.