Covering sequence – Dynaflite DYFA1009 User Manual
Page 33
Ul 6. Cover the other bottom stab half the same way.
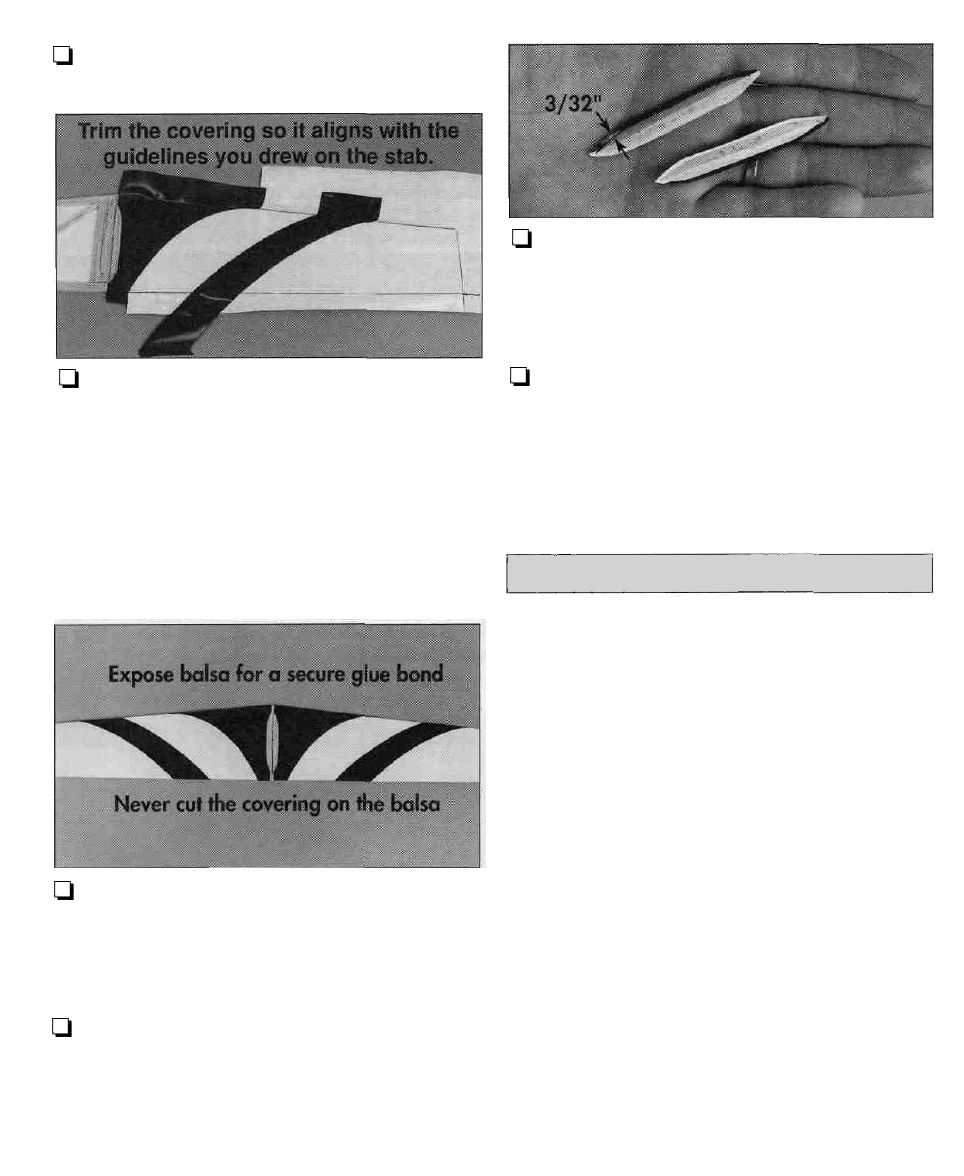
CJ 7. Cut the covering for one half of the top of the
stab so it is approximately 2" oversize. Before you
iron it down, trim the covering so it aligns with the
lines you marked indicating the fin and triangle fin
reinforcement. This will allow you to glue the fin
reinforcements directly to the bare wood and avoid
cutting the covering directly on the wood after you
iron it down.
LJ 10. Cover the triangular fin reinforcements. Trim
the excess so it "overhangs" the edges by
approximately 3/32". Don't iron it down yet. This
way all you have to do is glue the fin reinforcements
to the fin and stab and seal the edges with the iron.
U 11. Use the same methods described above
to cover the rest of the model using the correct
Covering Sequence.
COVERING SEQUENCE
LJ 8. Iron the piece of covering you just "custom cut"
to the top of the stab. Then make the other side the
same way and iron it in position.
Q 9. Align the elevator with the stab, then transfer
the hinge slots from the elevator (since they are
visible and you have not yet covered over them) to
the stab by marking them on the covering with a
felt-tip pen.
Tail Surfaces:
1. Elevator bottoms, then tops
2. Fin right, then left
3. Rudder right, then left
Fuselage:
1. 1 /8" Plywood landing gear mounts on the bottom
of the fuselage
2. Bottom behind the landing gear mounts, then in
front of the landing gear mounts
3. One side, then the other
4. Top forward, then aft of the wing saddle
5. Front windscreen area
6. Hatch
7. Landing gear plate (or you could paint it instead)
Wings;
1. Tips
2. Bottom inner panels
3. Bottom outer panels
4. Top inner panels
5. Top outer panels
33