Join the outer and inner, Finish the wing wingpanels – Dynaflite DYFA1009 User Manual
Page 19
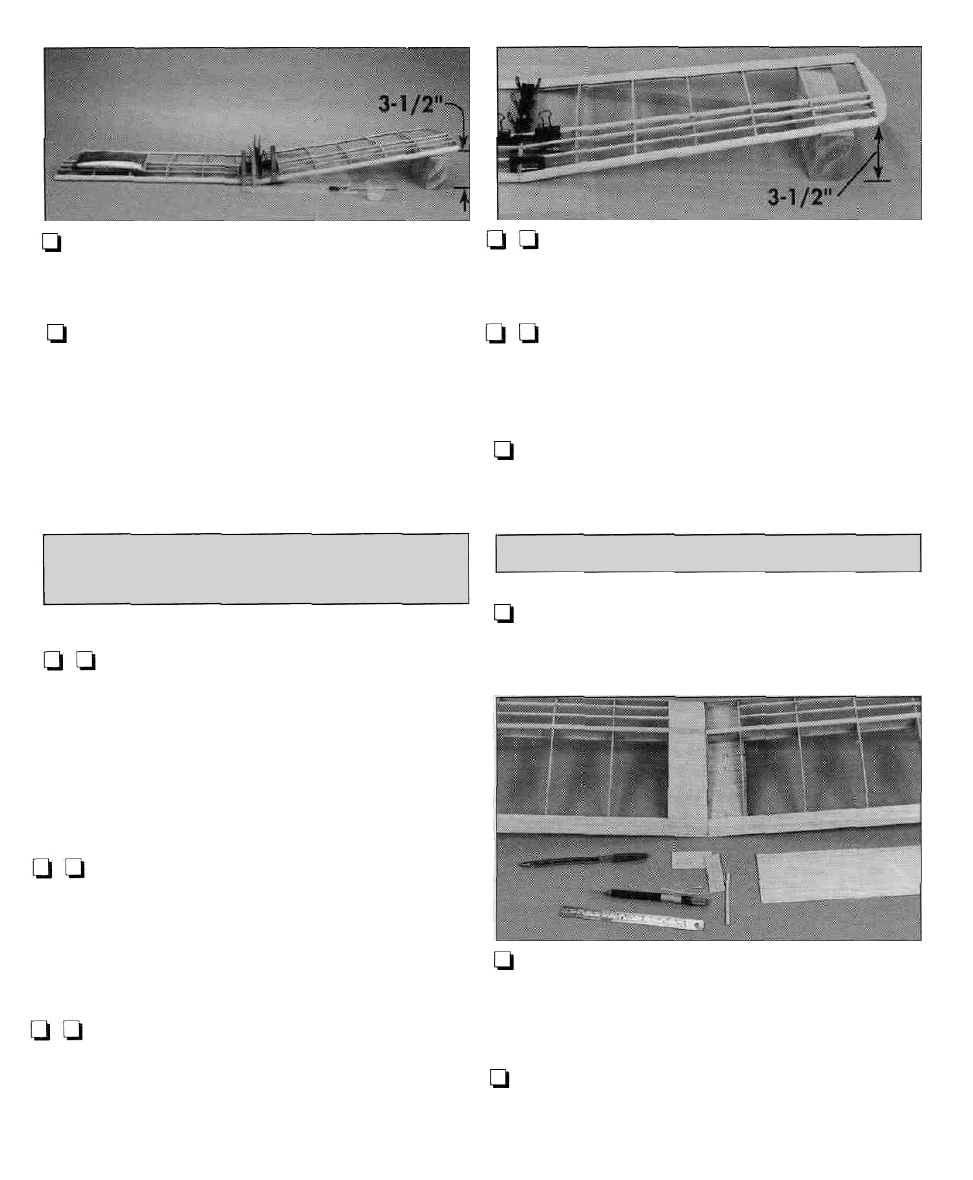
LJ 7. Clamp the wing halves together. Then prop up
one of the tips so it is 3-1/2" above your table.
1 8. Wipe away excess epoxy before it cures and do
not disturb the wing panel until the epoxy if fully cured.
Q Q 4. Clamp the wing halves together. Then prop
up the tip so it is 3-1 /2" above your table.
Q Q 5. Wipe away excess epoxy before it cures
and do not disturb the wing panel until the epoxy is
fully cured.
Q 6. Return to step 1 and join the panels of the
other wing half the same way.
JOIN THE OUTER AND INNER
Q Q 1. Test fit the left outer wing panel to the left
inner panel with DB1-A , DB-2 and the shear webs.
If needed, adjust the dihedral brace so they fit.
Temporarily clamp the panels together with C-
clamps, spring clips or clothespins and make sure
ribs W3-T align.
Q Q 2. After making any adjustments required so
the wing panels fit together and align, separate the
wing panels and remove the dihedral brace and the
shear webs.
Q 1. Final-sand the wings with your bar sander and
320-grit sandpaper and blend the LE's where they
meet at each panel joint.
FINISH THE WING
WINGPANELS
U U 3. Lay a piece of wax paper on your building
table. Mix a batch of 30-minute epoxy. Coat all the
joining surfaces with 30-minute epoxy, then join the
wing panels with the dihedral brace and install the
balsa shear webs.
Q 2. Use the remainder of the 1/16" x 3" x 30"
balsa sheet you used to sheet the bottom center
section of the inner panels to sheet the top center
section of the inner panels.
d 3. Use your bar sander and 220-grit sandpaper
to blend the top and bottom center section to the rest
of the wing.
19