1 installing the receipt paper – Toshiba TEC MA-1700 User Manual
Page 59
Attention! The text in this document has been recognized automatically. To view the original document, you can use the "Original mode".
EOl-11040
14. PAPER ROLL REPLACEMENT AND OTHER
MAINTENANCE OPERATIONS
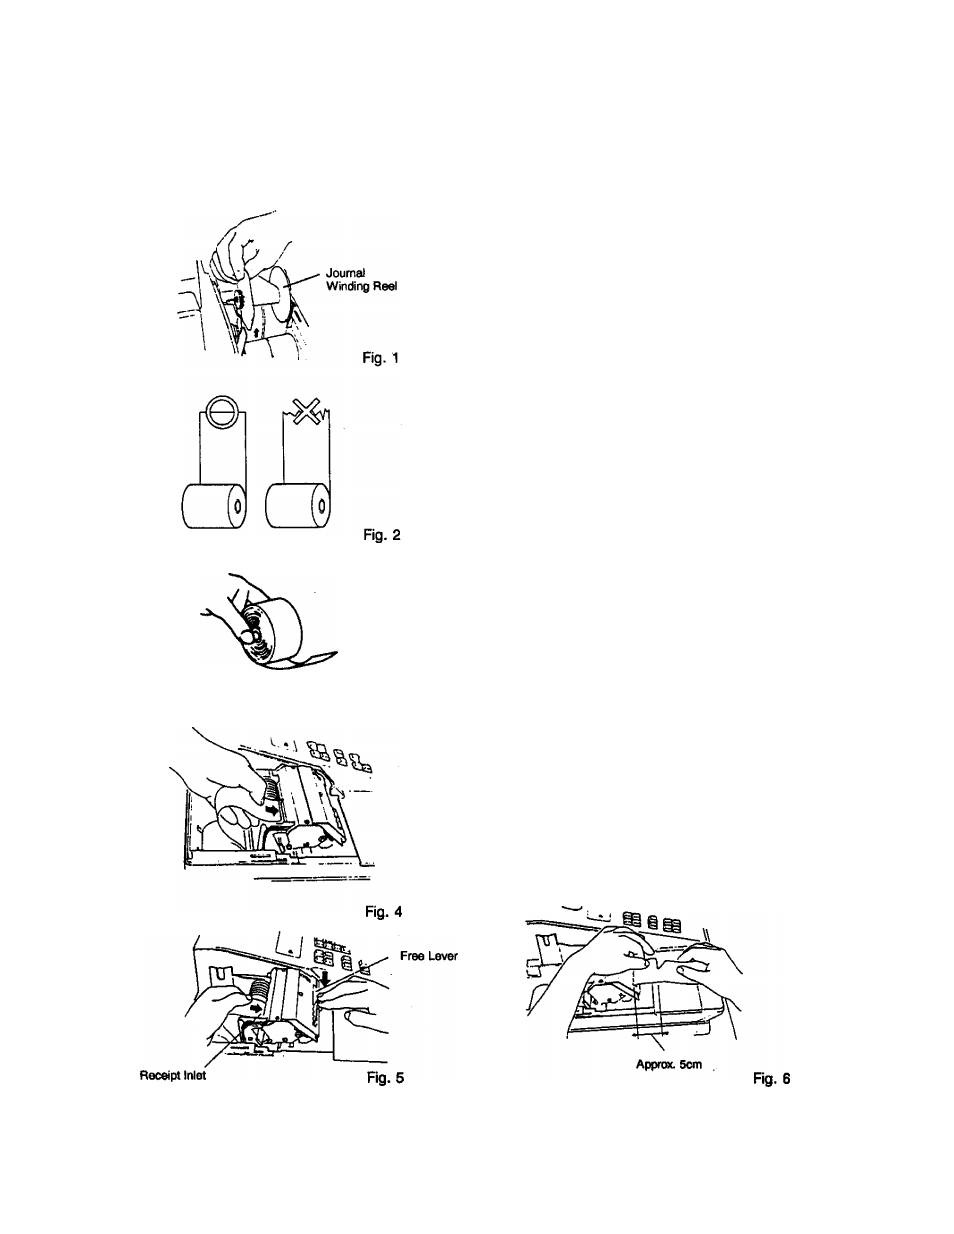
Fig. 3
14.1 INSTALLING THE RECEIPT
PAPER
1.
Turn the Mode Lock to the “REG” position with the
power ON.
2.
Remove the Paper Cover, and remove the Journal
Winding Reel (Fig. 1).
3.
Before you install a new paper roll, the paper end
should be cut with a knife or scissors for easy
insertion (Fig. 2).
4.
Hold a new paper roll in the direction shown in Fig. 3
so that the paper end will be fed from the bottom.
5.
Place the paper roll in the outer holder of the two roll
holders (Fig. 4).
6.
Insert the paper end into the Receipt Inlet, feed the
paper in while pressing down the Free Lever (or feed
the paper in while pressing the [RF] key). (Fig. 5)
7.
When the whole folded portion has come out, tear off
the unnecessary part with an appropriate end length
remaining (approx. 5 cm or 2 inches). (Fig. 6)
8.
Go on to INSTALLING THE JOURNAL PAPER steps
if necessary, or go on to Step 9 below if not.
9.
Attach the Paper Cover. Please note the paper end
must be seen outside the cover.
10. Press the [C] key to clear the paper-end condition,
and depress the [NS] key to issue a receipt to check
if the paper has been properly set.
NOTE:
The [RF] or [JFJ keys function only when both
receipt §Qd journal paper rolls have been placed
in their respective holders.
-
53
-