Seal the openings, 7} assemble surface burners, Installation instructions – GE C2S985SETSS User Manual
Page 50: Caution
Attention! The text in this document has been recognized automatically. To view the original document, you can use the "Original mode".
Installation Instructions
®
Seal the Openings
Seal any openings in the wall behind the range and in the
floor under the range when hookups ore completed.
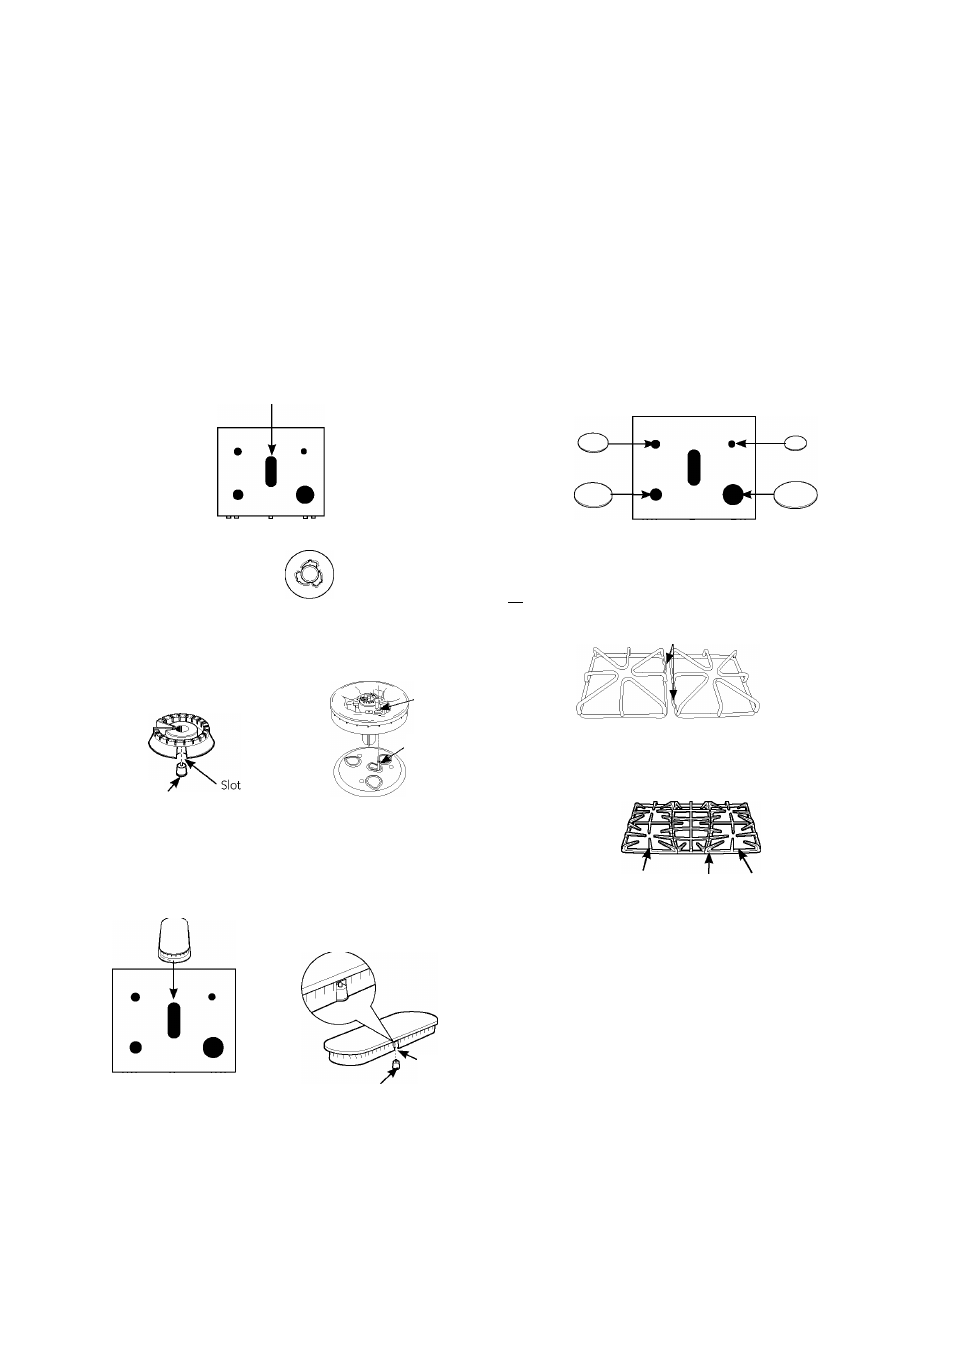
¡7} Assemble Surface Burners
\3\ Burner Heads (on some models)
Place burner heads over the electrodes on the cooktop, in the
correct locations according to their size. There is one small, one
medium, one large and one extra large burner head.
Oval
ion some
models!
Make sure the slot in the
burner head is positioned
over the electrode.
Triple Flame
Ion some
models)
Electrode
Hole
Electrode
^ Oval (Center) Burner Head/Cap Assembly
Place the oval (center) head/cap assembly over the electrode
on the cooktop.
Oval head and cap
assembly
Make sure the slot
in the burner head is
positioned over the
electrode.
Front of range
Slot
2]
Electrode
Place the matching size caps onto the burner bases or
heads.
Make sure that the heads and caps are replaced in the
correct locations.
Front of range
(on some models)
Tri-ring cap
O
(on some models)
D\ Grates
Single Grates
Locator Bumps
Single grates only fit one way. Locator bumps need
to face each other.
Double Grates
Left Front Center Right Front
Place the left, right and center grates on the cooktop.
These grates are position specific. The undersides of
the left and right grates are marked "LEFT FRONT"
and "RIGHT FRONT." On some models the underside
is labeled "OUTSIDE." Place the middle grate with its
bowed front (on some models) toward the front of the
range.
A
caution
without all burner parts in place.
Do not operate the burner
50