Mounting sr-500 series – KEYENCE SR-500 Series User Manual
Page 4
4
E SR-500-IM
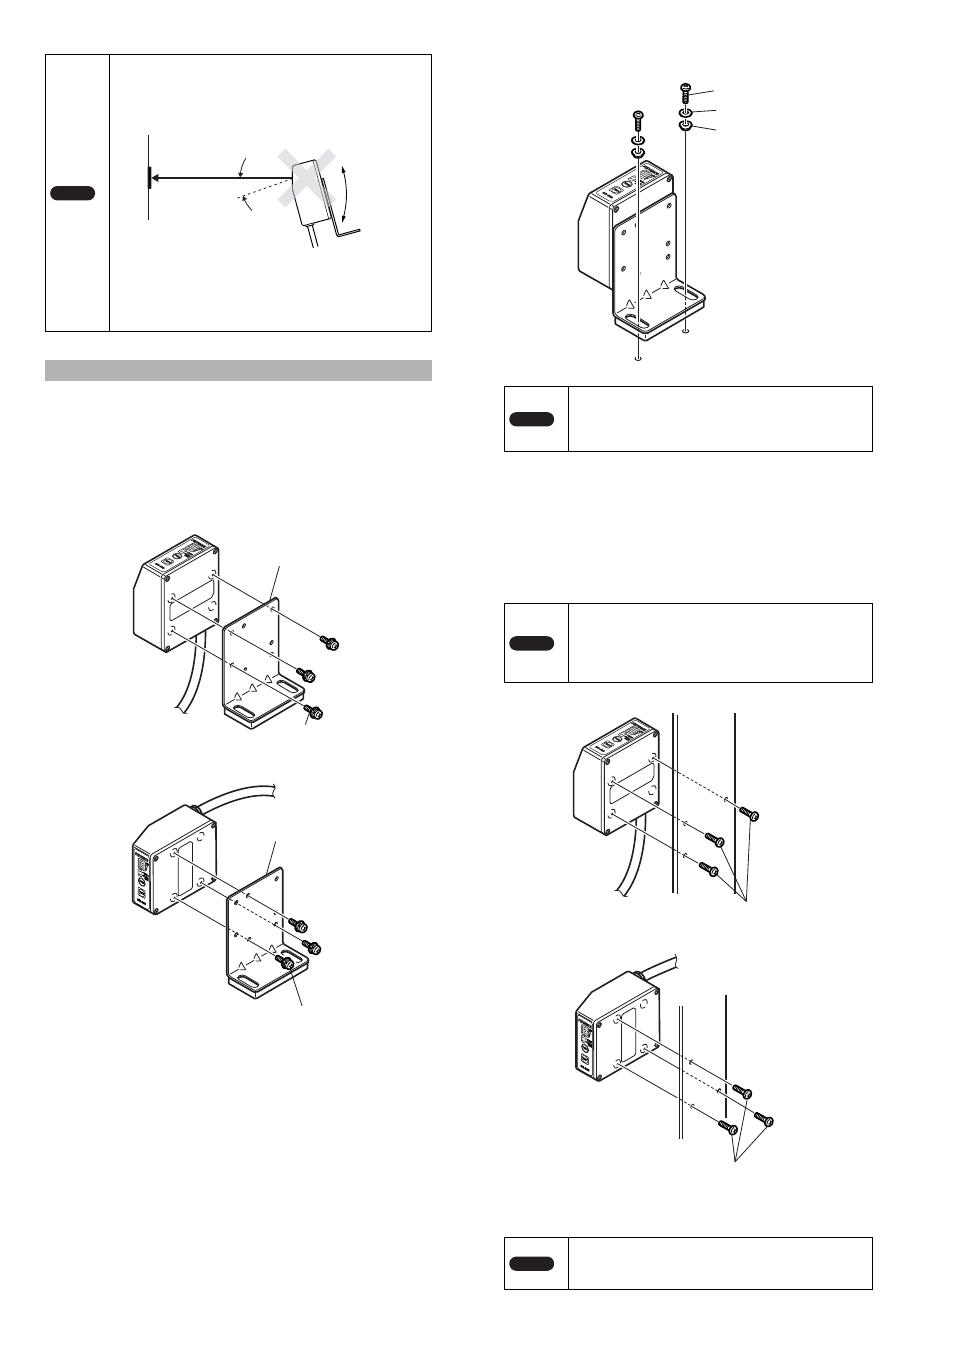
There are two methods for installation: using the mounting bracket, and not
using the mounting bracket.
Installing with the mounting bracket
1
The SR-500 Series can be mounted with the supplied mounting bracket.
The SR-500 Series can be installed in the directions shown in the diagrams
below. Choose a mounting direction that best fits your application.
Vertical (One direction)
Horizontal (Two directions)
The SR-500 Series can also be mounted with the cable pulled in either direction
horizontally.
2
Secure the mounting bracket in place.
Installing without the mounting bracket
Mount the SR-500 Series so that the scanner is tilted 20° from the 2D code or
barcode. For more information about the installation angle and distance, see
"Installing the SR-500 Series".
1
Secure the mounting position of the SR-500 series with three screws (M3).
The SR-500 Series can be installed in the directions shown in the diagrams
below. Choose a mounting direction that best fits your application.
Vertical (One direction)
Horizontal (Two directions)
The SR-500 Series can also be mounted with the cable pulled in either direction
horizontally.
Note
• Do not set the scanner at an angle where it is nearly
parallel with the 2D codes or barcodes. The reading
becomes unstable due to reflected light and misreading
may occur.
• The distances or angles that can be used for reading may
vary with the size or print quality of the 2D code or barcode
being read.
Use test mode to actually read the 2D code or barcode
during installation.
Mounting SR-500 Series
20°
Range of
±15° is not
usable
Included installation
screw M3x3
Mounting bracket
Included installation
screw M3x3
Mounting bracket
Note
• Purchase installation screws (M4) separately. (Use
screws that are 10mm or longer.)
• Be sure to use the insulating spacers on the side
closest to the mounting brackets to suppress noise.
Note
Purchase installation screws separately. The type of
screw required depends on factors such as the thickness
of the board where the SR-500 Series is mounted.
The effective depth of screws for the SR-500 Series is
4mm.
Note
Be sure to insulate the area between the mounting
surface to suppress noise.
Installation screw (M4)
Washer
Insulating spacer
Installation screw (M3)
Installation screw (M3)