Attachment, Mounting to a wall, Hanging on the hook – KEYENCE IV-M30 User Manual
Page 4: Mounting with the wall mounting adapter
4
IV Series (Monitor) - IM_E
5 Indicator light (SENSOR)
Indicates the connecting status to the sensor.
y
Green (ON) ...... Connected normally to the sensor.
y Green
(Slowly blinks)
... Linked normally but it is not properly
connected to the sensor.
y
(OFF) ............... It is not properly connected because it
did not link normally.
6 LCD monitor/Touch panel
Displays the operation screen and setup screen.
Operates by touching the screen with the stylus.
7 USB connecting connector
Connector for connecting the USB memory. Connector is
protected by a cover.
8 Stylus
Used to operate the touch-screen.
9 Stylus holder
Stores the stylus.
10 Strap holder
Holds the strap or hangs the stylus.
Attachment
Mounting to a wall
Use the wall mounting adapter (accessories or OP-87464).
Hang it on the hook with the wall mounting adapter mounted
to the monitor, or mount the monitor to the wall mounting
adapter mounted on the wall.
The monitor is shipped with the wall mounting
adapter mounted.
z
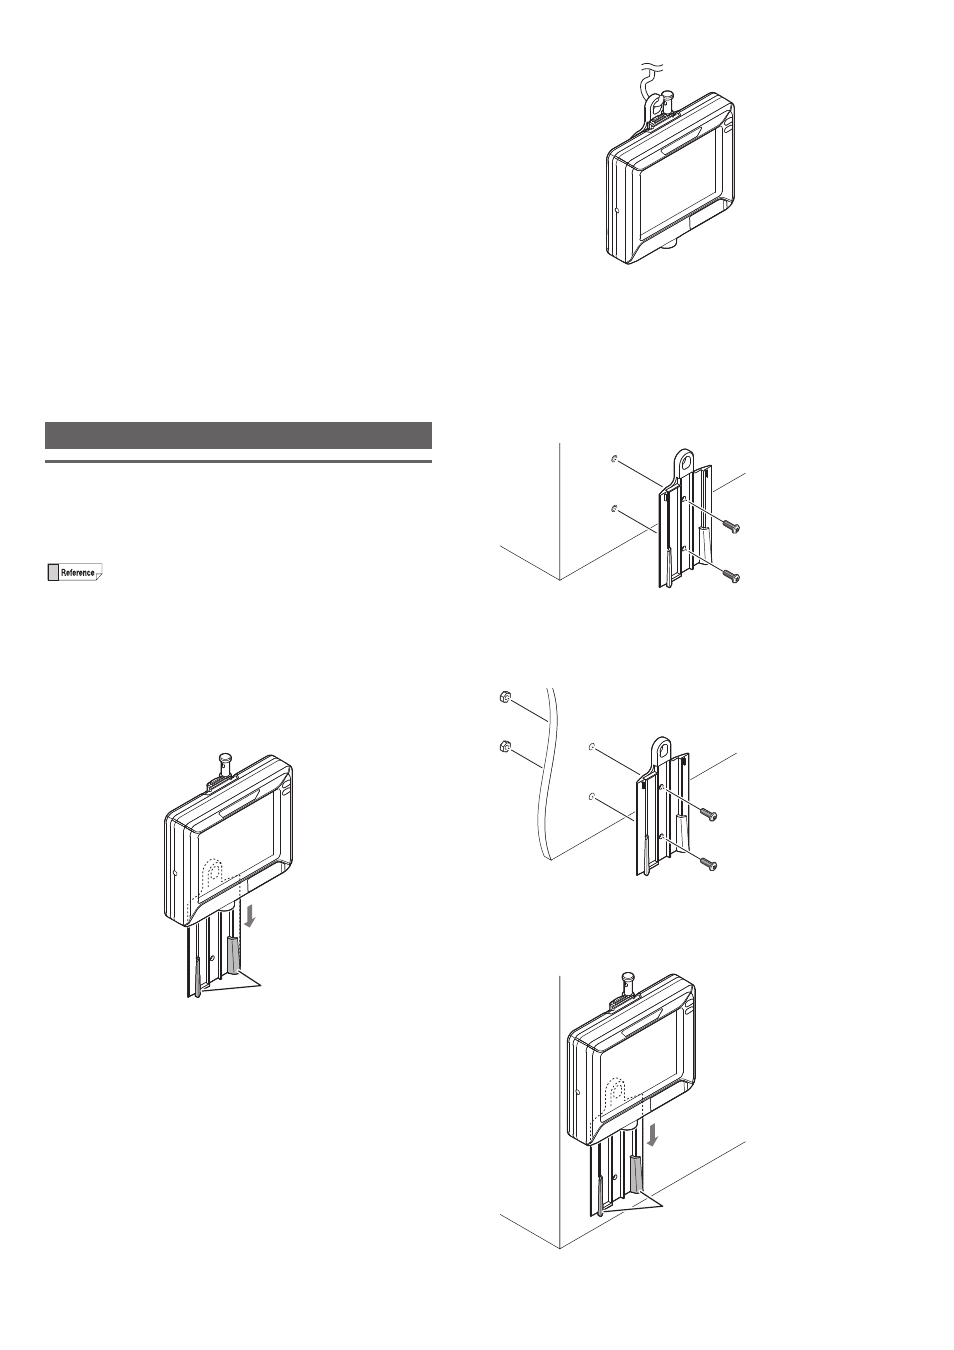
Hanging on the hook
For operation take the monitor from the hook and operate it
while holding it in your hands.
1
Mount the monitor to the wall mounting adapter
by aligning the stopper of the wall mounting
adapter to the groove on the rear monitor.
Slide the monitor down all the way, and confirm that the
monitor is locked.
Stopper
2
Hang the monitor on the hook.
z
Mounting with the wall mounting adapter
The monitor can be operated by the following methods.
y
Unhang to pick up the monitor from the hook and operate it.
y
Operate it while mounted on the wall.
1
Mount the wall mounting adapter to the wall.
z
z
Mounting by creating a screw hole in the wall
y
Screw : M3 x 2
Use commercially available screws.
y
Tightening torque : 0.27 to 0.33 N·m
z
z
Mounting by creating a plated through hole on the
panel
y
Screw : M3 x 2, Nut : M3 x 2
Use the attached screws and nuts.
y
Tightening torque : 0.27 to 0.33 N·m
2
Mount the monitor to the wall mounting adapter
by aligning the stopper of the wall mounting
adapter to the groove on the rear monitor.
Slide the monitor down all the way, and confirm that the
monitor is locked.
Stopper