KEYENCE CV-X Series User Manual
Page 4
KEYENCE CORPORATION. Vision System Division
‐ 4 ‐
www.keyence.com
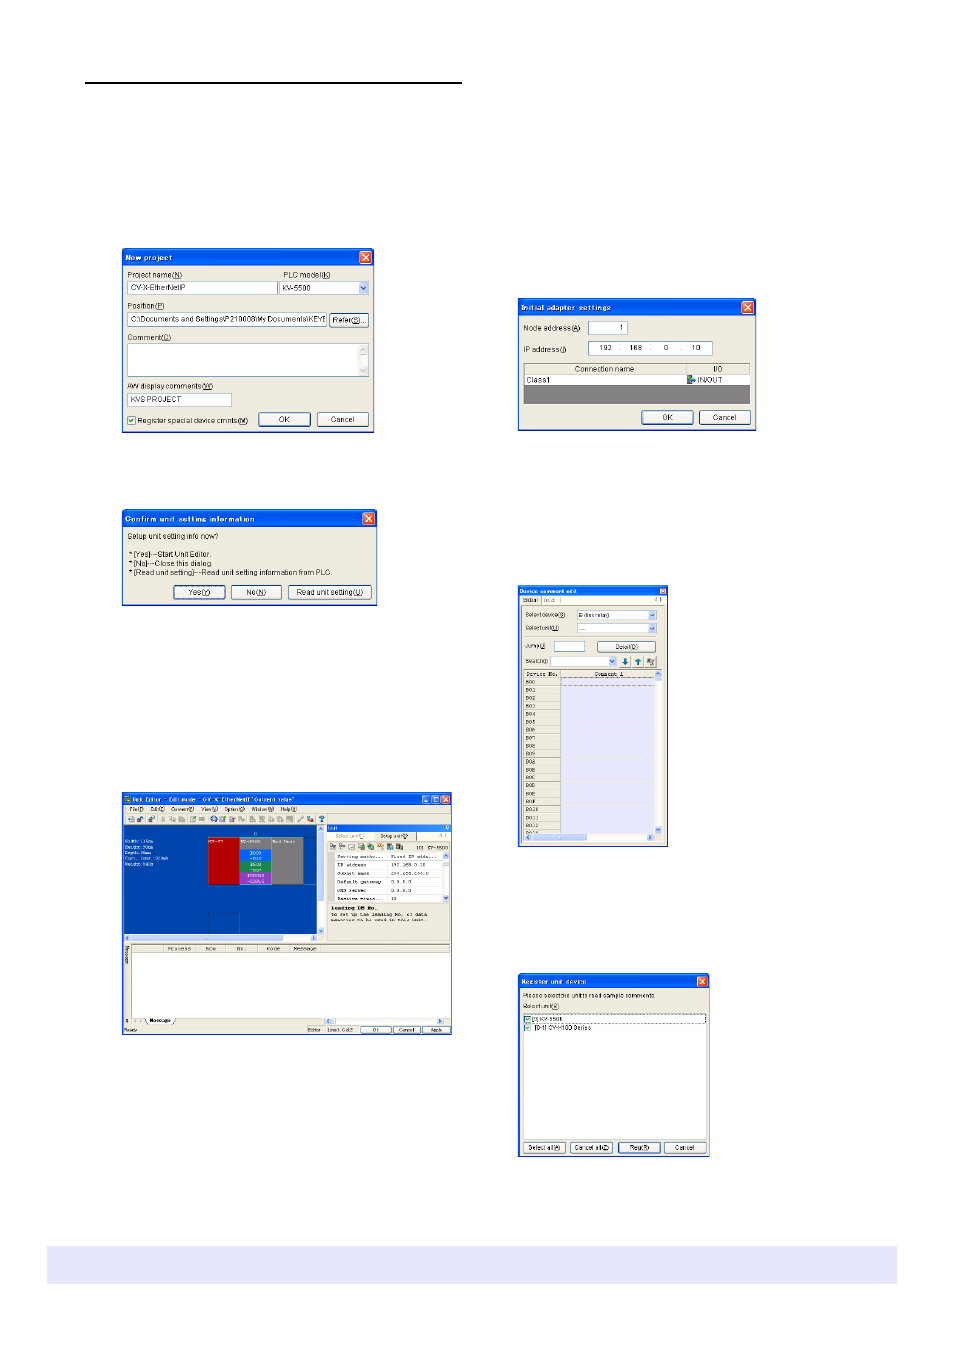
2. Changing the KV-Series settings
2
Enter the "Project name", select the "PLC model",
and then press "OK".
A "Confirm unit setting information" dialog appears.
3
Click "Read unit setting".
4
In the workspace, click the Ethernet/IP
communication unit or CPU unit that will be
connected to the CV-X100 Series to start "Unit
Editor". Set up the IP Address of the KV Series in
the "Setup unit (2)" tab.
•IP Address: 192.168.0.20
•Subnet Mask: 255.255.255.0
5
Select "Convert" - "Auto-assign relay/DM" in the
Unit Editor to allocate a device.
When automatically allocated, the bit device is
allocated to B (link relay) and the byte device is
allocated to W (link register).
6
Click the icon in "Setup unit (2)" to open
"EtherNet/IP settings". Configure the CV-X100
Series and EtherNet/IP communication settings.
•Drag "CV‐X100" from the "Unit list (1)" tab in
"EtherNet/IP settings" and drop it into the scan list
to add it.
•In the "Initial adapter settings" screen that is
displayed after start up, enter the CV‐100 Series
IP Address (192.168.0.10) that was set in the
CV‐X100 Series global settings.
7
Save the changes and exit the "EtherNet/IP
settings" and Unit Editor.
8
Select "Device comment edit window" from the
"Display" menu in KV STUDIO.
The "Device comment edit" screen appears.
9
Click "Details".
The "Register unit device" screen appears.
10
Confirm that the box for "CV-X100" is checked in
the "Select unit" list, and then click "Register".
Device comments regarding CV‐X100 are
automatically registered.
1
Start KV STUDIO with the PLC connected to the
computer, and select "New project" from the
"File" menu.