Installing/replacing recording paper – Panasonic Panafax UF-650 User Manual
Page 14
Attention! The text in this document has been recognized automatically. To view the original document, you can use the "Original mode".
Installing/Replacing
Recording Paper
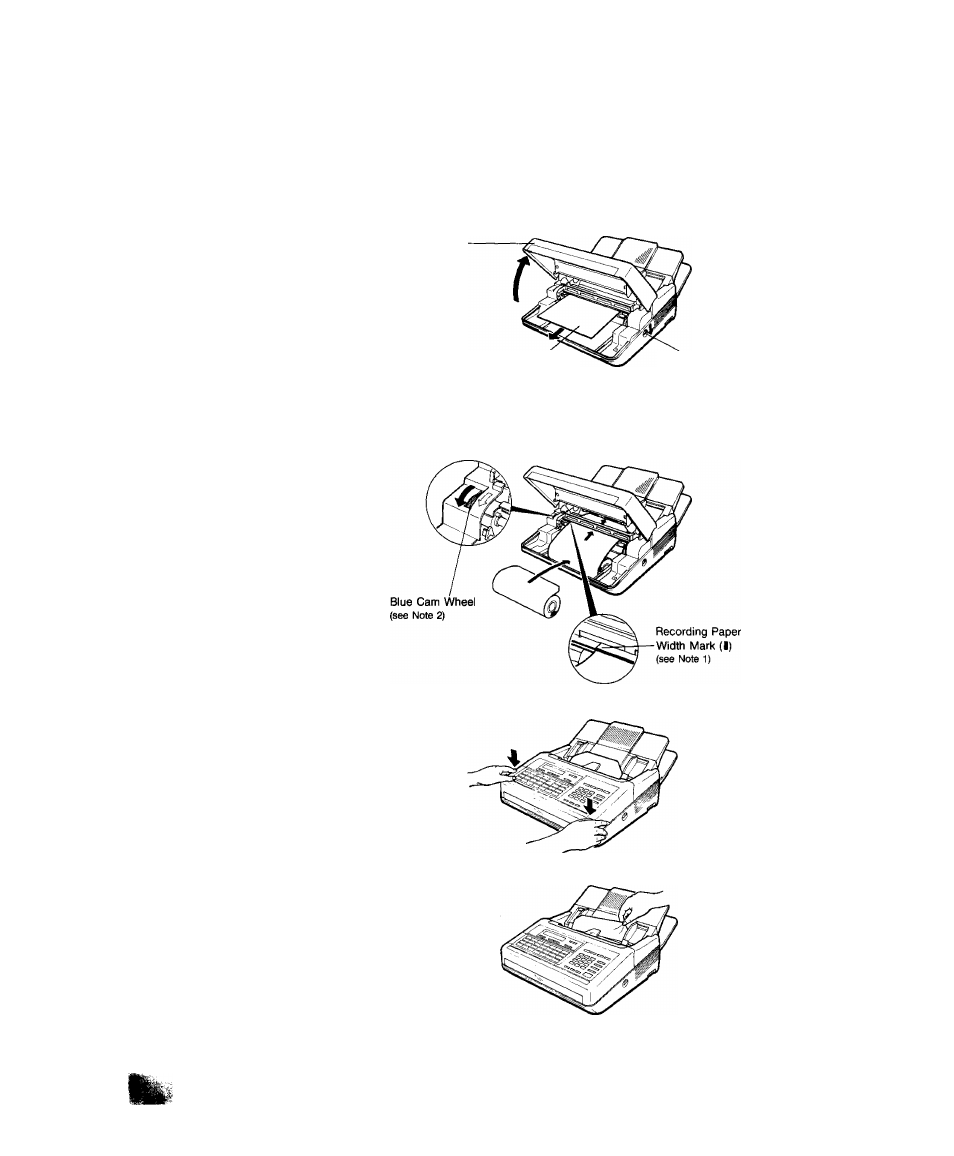
1. Press down on the latch button on the right side of the cover and open
the RCV Cover.
RCV Cover
Head Protective Sheet
Latch Button
.2, Set the recording paper into the unit and feed the leading edge of the
paper between the guide plates of the cutter unit until it projects out of
the unit Make sure that the recording paper is set correctly as shown
in the figure below. If it is set incorrectly, the machine will not
reproduce images.
3. Close the RCV Cover carefully by pressing both corners down until the
cover locks into position (you will hear a "click” sound).
4. Later, when you turn on the power, the recording paper projecting from
NOTE
7.
The top guide piste has mark indi
cating the width of the recording
paper. When instaiiing the recording
paper, be sure to aiign the paper
with the mark (t).
2. if the recording paper cannot pass
between the guide pistes, turn the
Blue Cam Wheel until you hear a
“click" sound in the direction of
arrow.