Adjustment, 1 head gap – Panasonic KX-P1150 User Manual
Page 10
Attention! The text in this document has been recognized automatically. To view the original document, you can use the "Original mode".
KX-P1150
5. Adjustment
(Head Gap Lever)
A c
H
E
A
D
G
A
P
V c
+
Single
Sheet
Position
(Paper Feed Selector)
□
0.45 mm Gauge^,^^ n
(does not pass)
0.40 mm Gauge\^ n
(does pass)
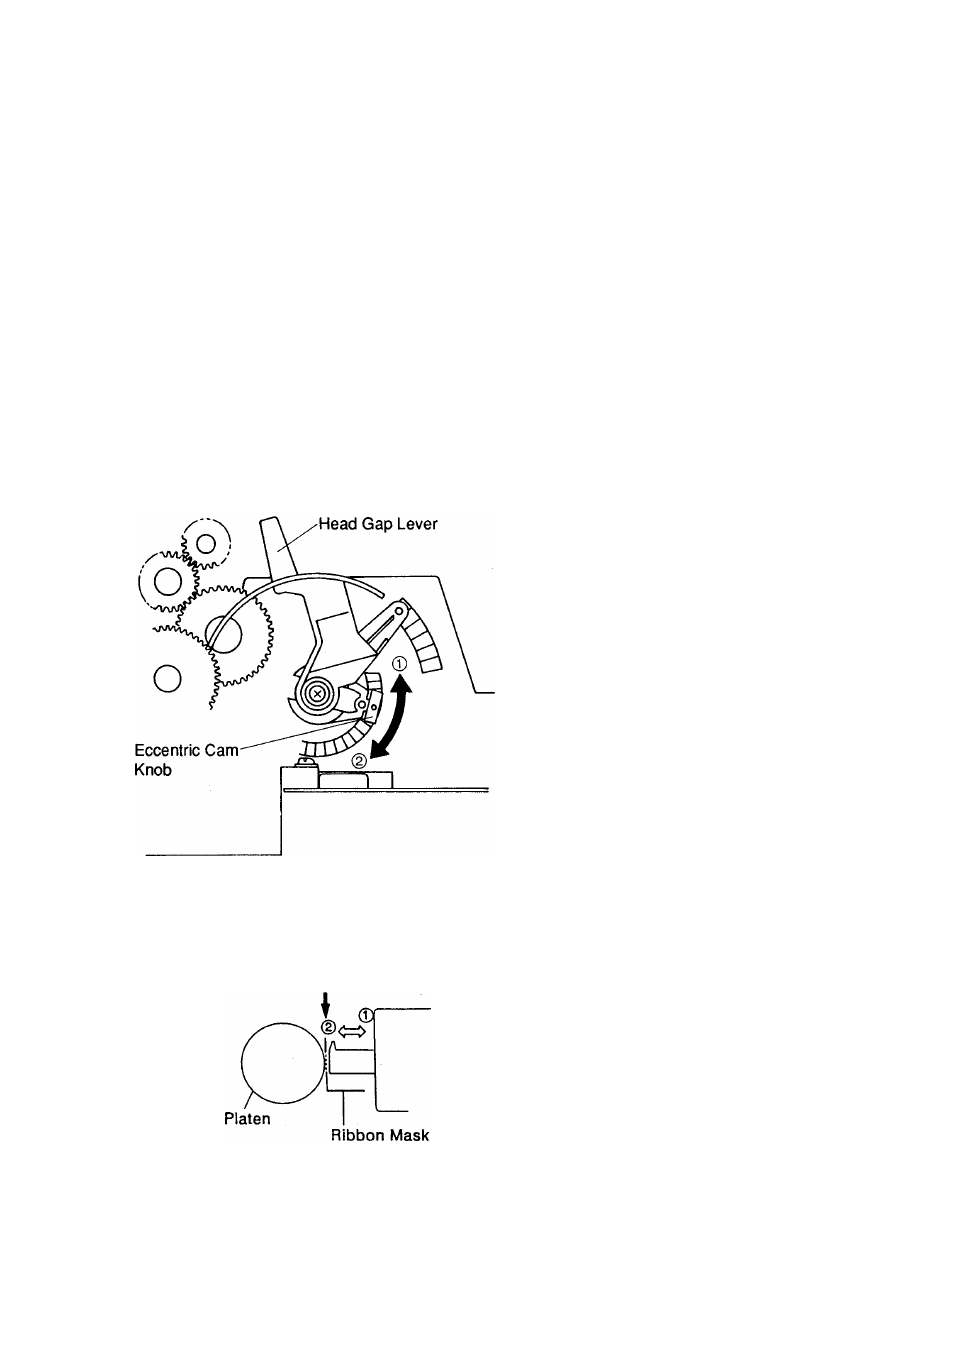
5.1 Head Gap
1. Set the head gap lever to the single sheet
position.
2. Set the paper feed selector to the position.
3. Ensure the printhead is firmly secured with 2
screws.
4. Move the carriage to the left side and adjust the
head gap between the platen and the printhead
for a clearance of 0.35mm-0.4mm by turning the
left eccentric cam.
5. Move the carriage to the right side and adjust the
gap as per step 4 above by turning the right
eccentric cam.
Note: The projection on the eccentric cam is
released from the adjustment hole by pulling
the knob. Turning the eccentric cam one step
causes 0.037mm ± 0.052mm head movement.
Note: Use only a round wire feeler gauge of the
specified dimension for this adjustment.
Note: The head gap adjustment is required when
replacing the head, platen, carriage, carriage
shaft or eccentric cams.
Note: Moving the head gap lever towards the®
position increases the head gap clearance,
and moving toward the(2)position decreases
the clearance.