1 press the [menu] button, 2 press > to open the setup menu, 3 press a/t to select [clock set], and then press – Panasonic DMC-LC43A User Manual
Page 25: 5 press a/v to select [m/d/y], [d/m/y] or [y/m/d, 6 press the [menu] button 2 times, Setting the date/time (clock set)
Attention! The text in this document has been recognized automatically. To view the original document, you can use the "Original mode".
Preparation
Setting the Date/Time (Clock Set)
4,5
If the message [PLEASE SET THE CLOCK]
appears, set the date and time.
You can go to the setup menu by pressing the
[MENU] button while the message is
displayed.
You can set the year from 2003 to 2099. The
24-hour system is used.
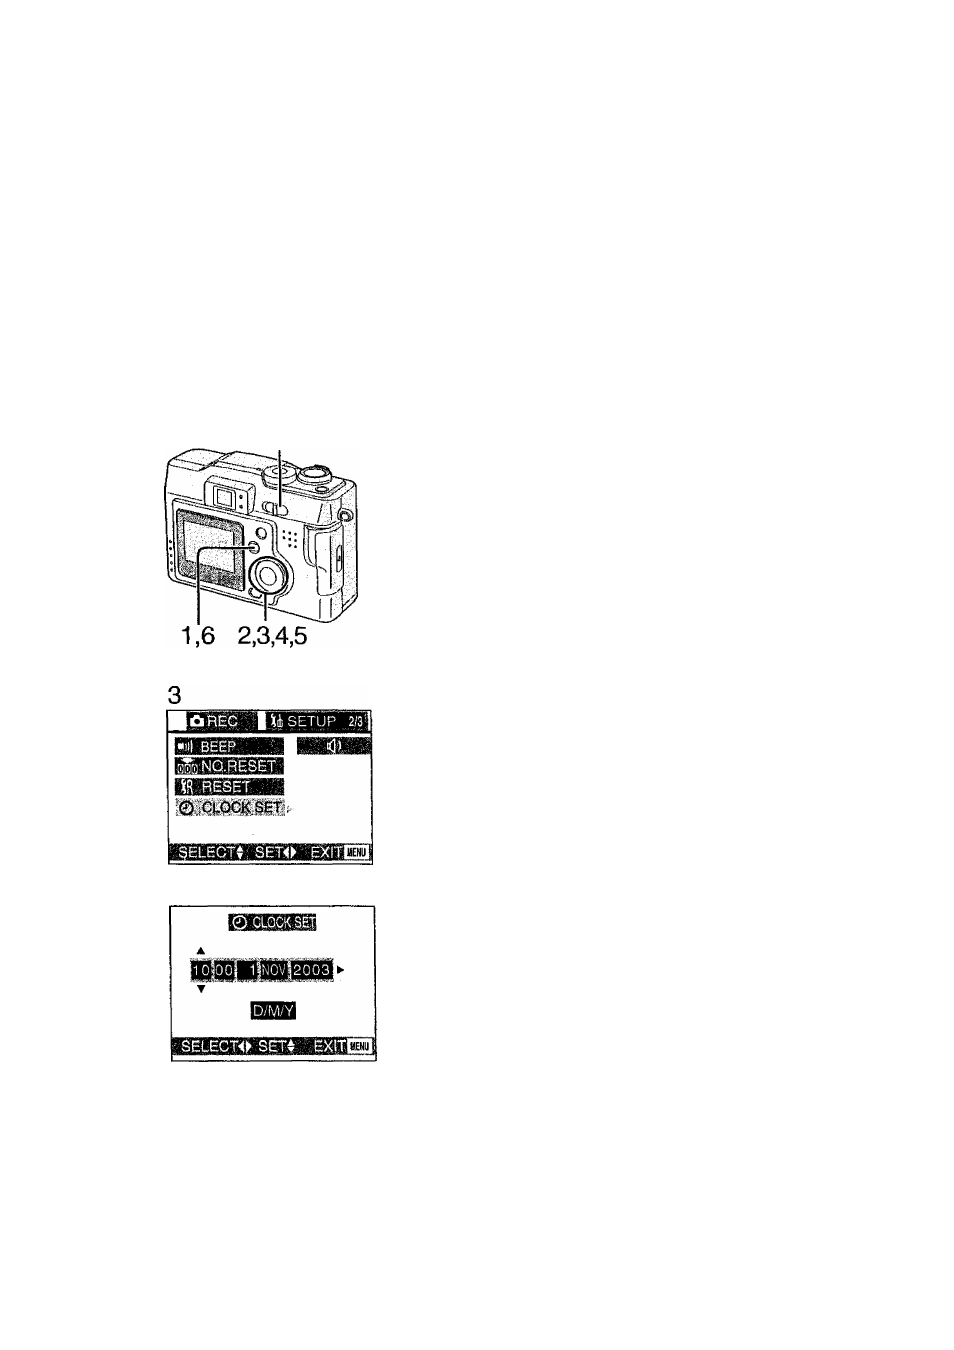
1
Press the [MENU] button.
2
Press
>
to open the setup menu.
• In simple mode, skip this step.
3
Press
A / T to select [CLOCK SET],
and then press
4
Press A/V/-^/^ to set date and time,
and then press ^.
5
Press A/V to select [M/D/Y], [D/M/Y] or
[Y/M/D].
6
Press the [MENU] button 2 times.
• The menu will disappear.
7
Check if the date/time setting is
displayed correctly, after turning the
camera [OFF] and [ON].
When the new batteries are inserted in the
camera for more than 3 hours, the time and
date will be held for approximately 3 months
if the battery is removed. If the batteries
were not new, the time may not be retained
properly. If the time/date setting is lost
please reset it.