Replacing the lamp unit – Panasonic TC-LT1 Series User Manual
Page 32
Attention! The text in this document has been recognized automatically. To view the original document, you can use the "Original mode".
Replacing the Lamp Unit
o
Follow the instructions on p. 11 {turning the power On and Off).
After turning off the main power, unplug the power cord, and make
sure that the surface around the Lamp Unit has cooled.
@
Use a screwdriver to turn the setting screw on the
Lamp Unit bay cover on the top of the projector until
the screw turns loosely and take off the cover.
Lamp Unit Bay
Cover
Lamp Unit Bay Cover
Setting Screw.
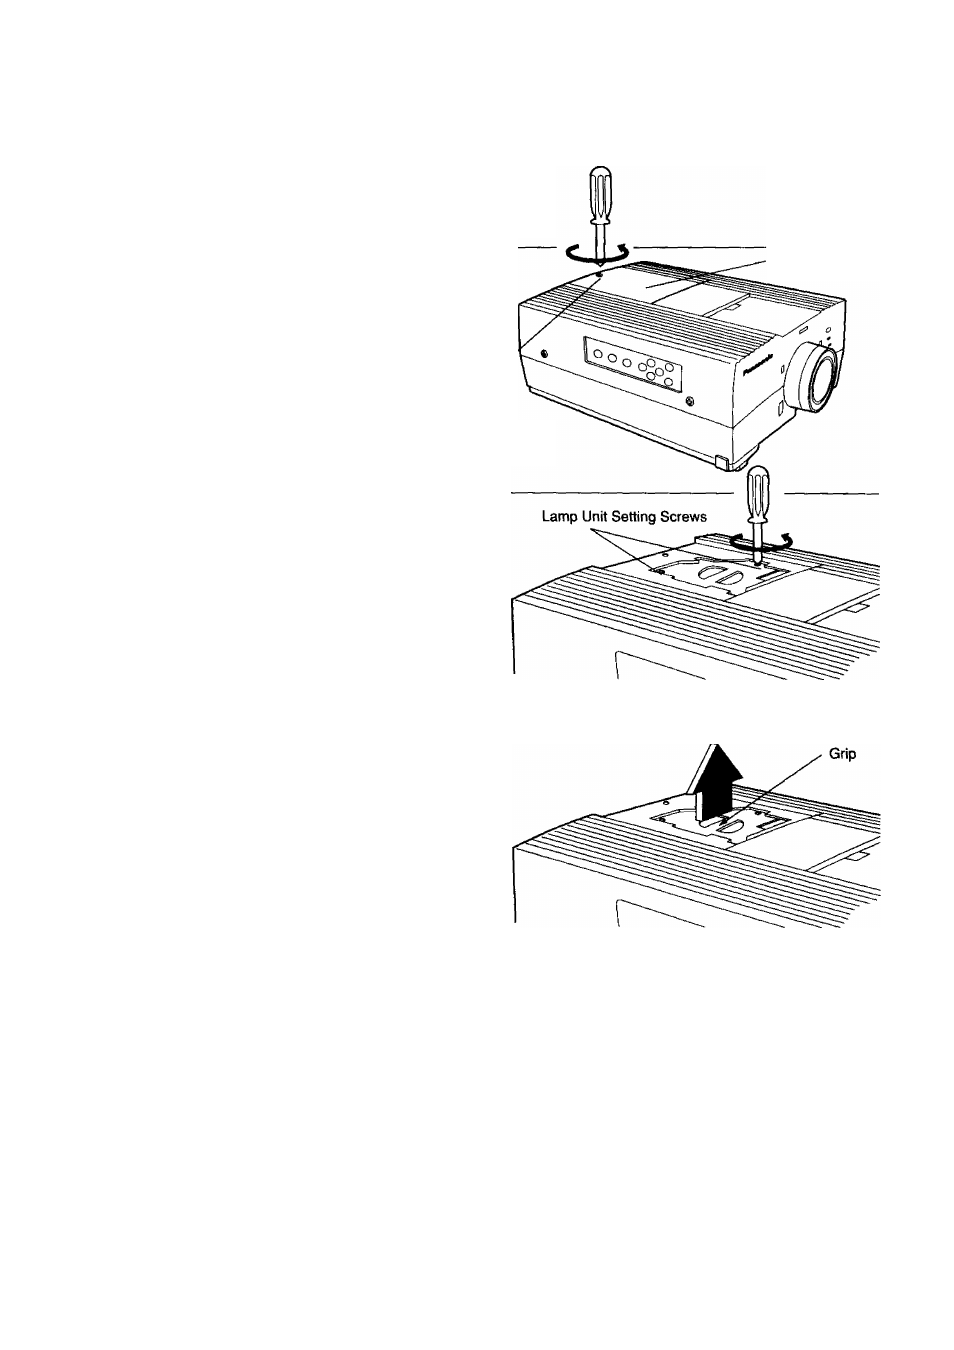
Unscrew the Lamp Unit’s setting screws (2 pcs.) with a
"+" screwdriver until the screws turn loosely.
O
Grasp the grip on the Lamp Unit, and slowly lift
the Lamp Unit out of the projector.
Lower the new Lamp Unit into the Projector, taking care that you are pressing in the right direction. Then tighten the
Lamp Unit setting screws firmly in place.
©
Reattach the Lamp Unit bay cover, and use a “+" screwdriver to tighten the setting screw for the bay cover firmly.
Please attach the Lamp Unit and the Lamp Unit Bay Cover firmly in place.
If the Lamp Unit or the Lamp Unit Bay Cover are not firmly attached, the protective circuit will be
activated, preventing the power from turning on.
32