V.I.O. POV.HD User Manual User Manual
Page 37
POV.HD User Manual
Tips and Guidelines
34
Loop
&
Forward
allows
you
to
record
using
the
Clip
method,
without
starting
the
clip
until
the
action
starts.
You
can
get
everything
set
up,
stow
the
recorder,
and
get
yourself
over
to
the
starting
line
without
the
need
to
record
fifteen
minutes
of
waiting
time
which
you’re
going
to
want
to
edit
out
later
anyway.
When
the
gun’s
about
to
sound,
hit
the
tag
key
on
the
remote
and
real
recording
starts.
Notice
that
when
you
do
start
to
capture
video,
some
of
the
preceding
action
is
captured
just
as
it
is
when
using
the
Loop
method.
This
helps
ensure
that
you
capture
all
the
action
even
if
you
don’t
remember
to
hit
Tag
until
right
after
the
start.
Just
remember
to
set
the
Loop
Record
Time
to
a
large
enough
interval
to
make
sure
you’re
covered.
NOTE:
Loop
and
forward
creates
two
clip
files,
one
for
the
segment
immediately
preceding
the
current
segment
and
one
for
the
current
segment
plus
all
of
the
remaining
video.
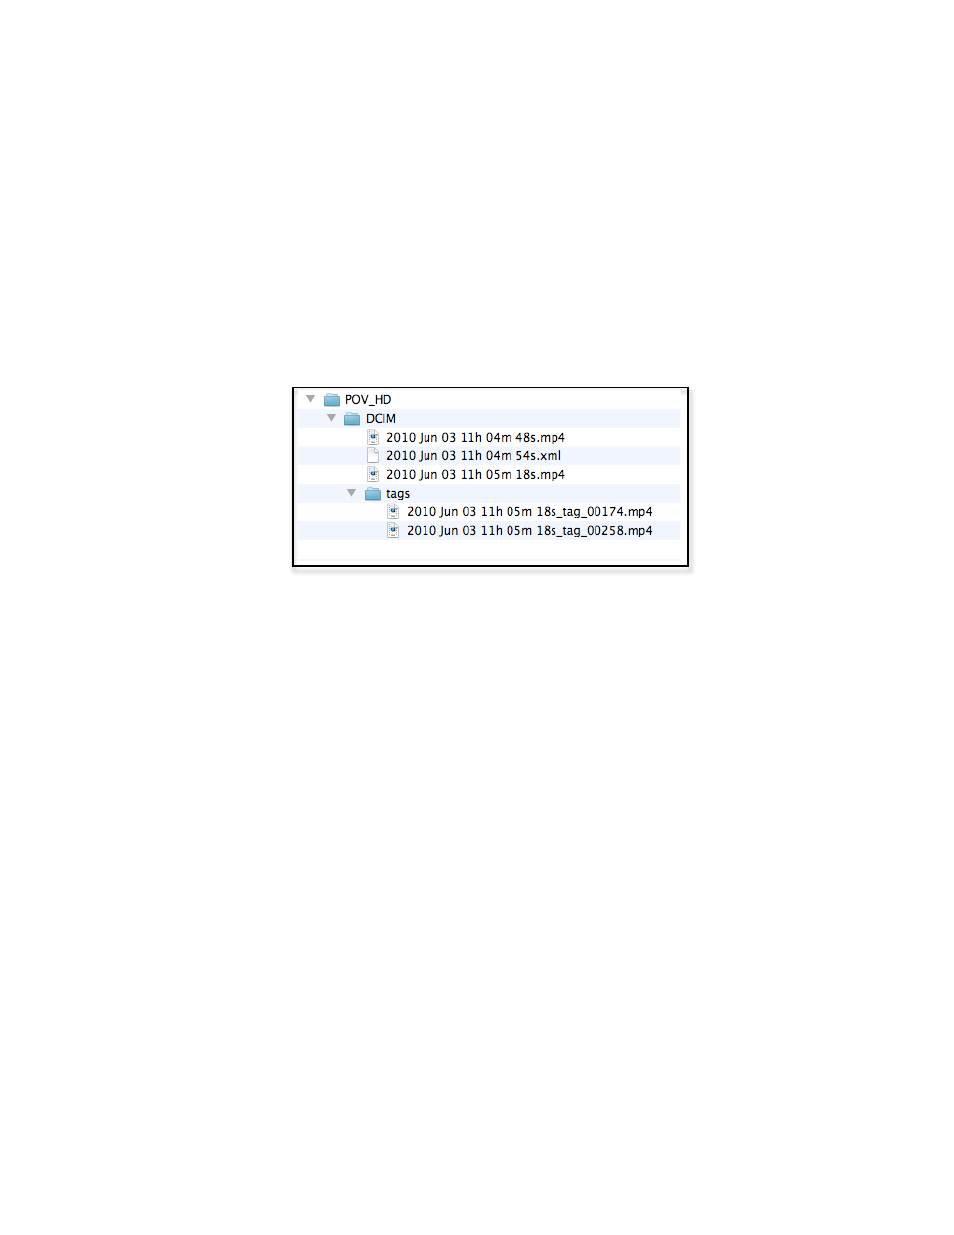
The
figure
below
shows
the
two
clip
files,
the
XML
tag
file,
and
the
two
tag
clip
files
that
result
from
the
example
in
the
Loop
&
Forward
illustration.
The
first
clip
file
in
the
DCIM
directory
is
the
segment
that
precedes
the
first
tag,
and
the
second
clip
file
which
starts
30
seconds
later
is
for
the
remainder
of
the
video.
Notice
that
there
are
two
tag
files.
The
first
time
TAG
was
pressed
it
started
the
storage
of
the
video
but
did
not
create
a
tag
clip.
The
second
and
third
presses
of
TAG
did
create
tag
clip
files
and
they
are
associated
with
the
second
main
clip
file.
All
three
of
the
tags
are
recorded
in
the
XML
tag
file.