V.I.O. POV.HD User Manual User Manual
Page 15
POV.HD User Manual
Using the Recorder
12
Record video
The basics
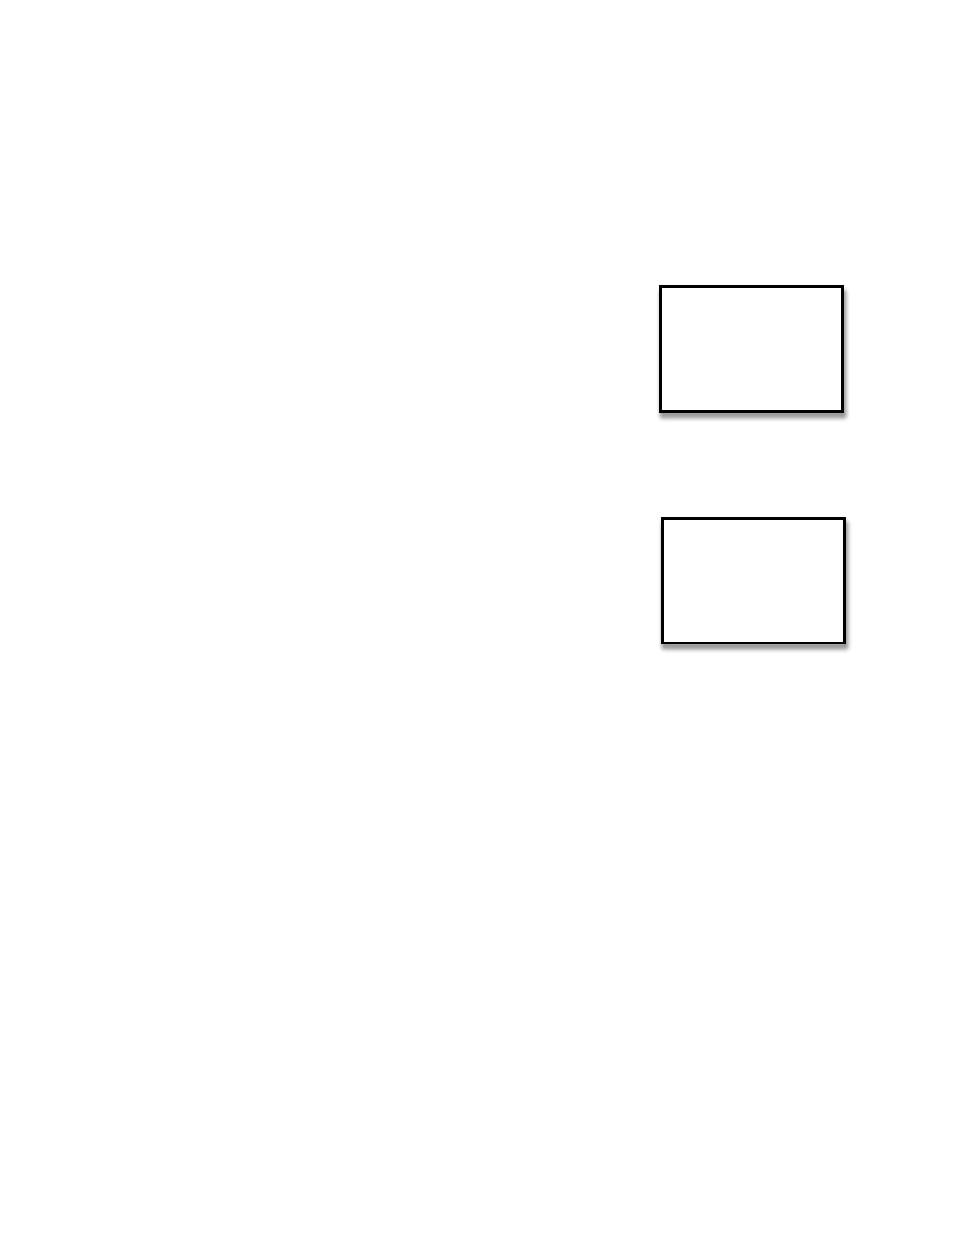
1. When the POV.HD boots up, it goes to Record Standby automatically. If you have been reviewing clips,
using
settings
or
for
some
other
reason
are
not
in
Record
Standby,
push
REC
once
to
get
to
Record
Standby.
The
LCD
will
show
a
preview
of
whatever
is
being
captured
by
the
camera
head,
with
this
overlay.
Standby
indicates
that
the
recorder
is
in
Record
Standby
mode.
Clip
indicates
that
the
Clip
Record
Method
will
be
used
for
recording.
See
Record Methods
below for more information about available
Record Methods.
49 min
is the estimated recording time remaining on the SDHC card
Keylock is used to lock the keypad. See
Keylock
above for more
information.
2. To begin recording, press the REC button on the recorder.
The
LCD
will
show
the
video
being
recorded.
The
Record
Method
being
used
for
this
recording
is
indicated
in
red
in
the
upper
left.
The
Clip
method
is
being
used
in
this
example.
See
Record Methods
below for more information.
The
upper
right
indicates
the
elapsed
time
of
the
recording.
The
Tag
soft
key,
indicated
by
the
label
in
the
bottom
center,
allows
you
to
add
a
tag
to
the
clip
being
recorded.
3. To tag the clip being recorded, press the Tag soft key.
A
tag
is
a
time
marker
on
a
clip,
similar
to
a
bookmark
in
a
document.
Tags
are
added
to
a
clip
by
pressing
the
Tag
soft
key
on
the
recorder,
or
the
REC/TAG
button
on
the
wireless
remote.
Tags
are
used
by
the
built-‐in
editing
software.
See
In-‐field Editing
, below for more information.
Record
methods
The
POV.HD
supports
4
Record
Methods.
A
complete
discussion
of
what
each
Record
Method
does
as
well
as
guidelines
for
selecting
the
right
Record
Method
is
provided
in
Understanding the POV.HD Video Record
Methods
, below
.
Clip
records
video
like
a
standard
video
recorder.
Once
you
start
recording,
video
is
captured
continuously
until
you
stop
recording
or
the
SDHC
card
is
full.
Loop
records
a
short
clip
every
time
you
press
TAG
(or
REC/TAG
on
the
remote).
The
saved
clip,
referred
to
as
a
loop,
includes
action
immediately
before
you
press
TAG,
as
well
as
action
immediately
following.
Loop
&
Forward
records
no
video
until
you
press
TAG
(or
REC/TAG
on
the
remote)
for
the
first
time.
Then
a
loop
is
captured
and
all
action
following
that
first
tag
is
captured
as
well.
Still
Photo
captures
digital
photos
as
JPEG's.
To
set
the
Record
Method,
use
the
Settings
menu.
When
you
use
the
Loop
or
Loop
&
Forward
methods,
Loop
Record
Time
determines
the
length
of
the
saved
video
loops.
The
actual
length
of
a
saved
loop
is
never
less
than
the
Loop
Record
Time,
but
it
can
be
longer.
Standby
Clip 00:49:00
Keylock
Clip
00:01:37
Tag