WEATHER GUARD Model 280-3-01 EZ-GLIDE® System, High-Roof User Manual
Page 13
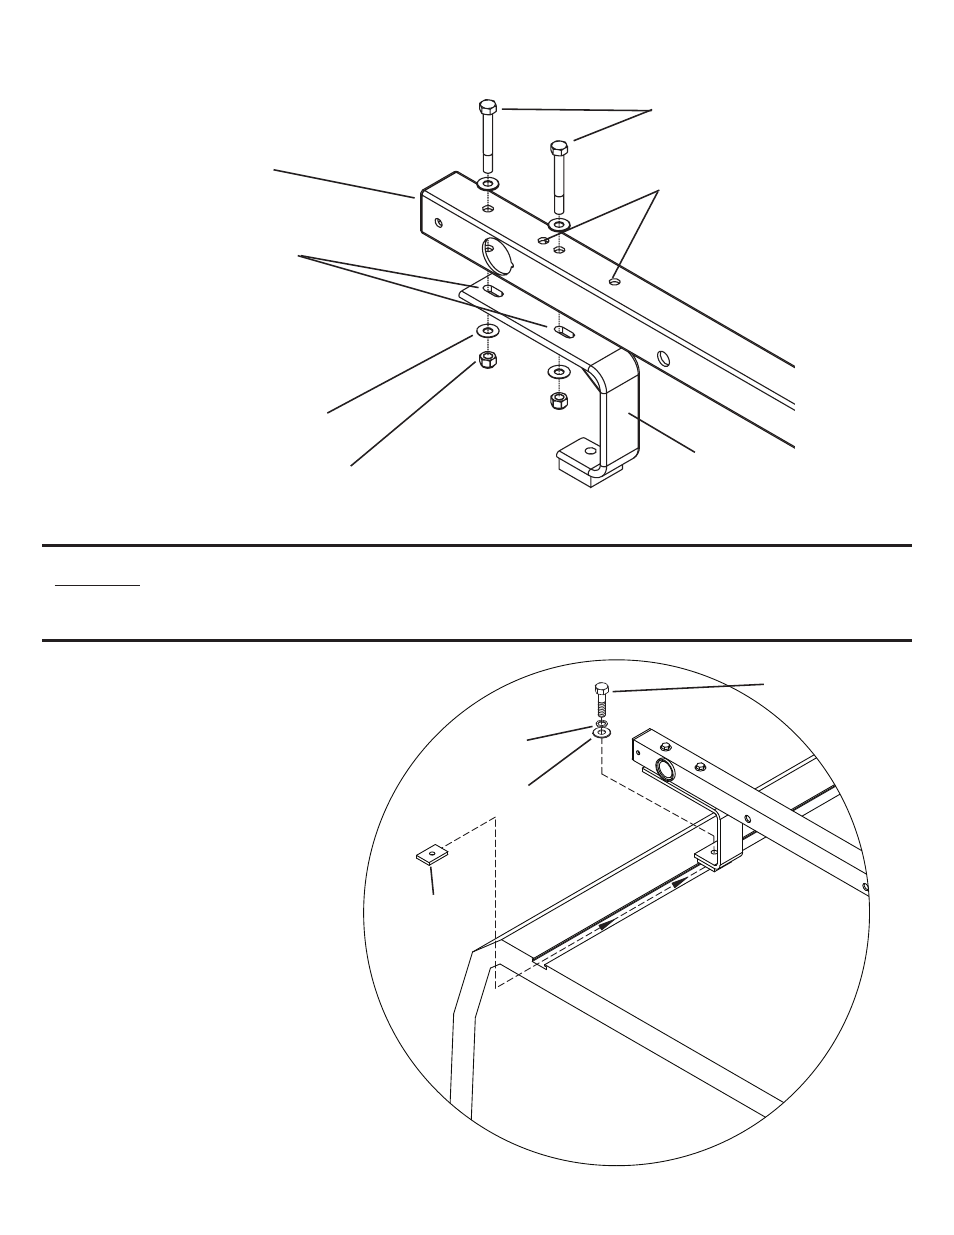
STEP 15 (4 Places)
Attach the Mounting Bracket (A) to the Cross-
Member (B)
(Drivers Side Shown) with the
5/16-18 Fasteners.
(B)
(A)
(2) 5/16-18
Nylon Lock Nut
(2) 5/16-18 x 2-1/2"
Hex Hd. Bolt
(4) 5/16-18
Flat Washer
STEP 16
WITH HELP! Place the ladder rack assembly on the vehicle on top of the factory installed roof channels. Insert Handle into
the Handle Receiver. Adjust placement of ladder rack assembly on the roof so the Handle clears the rear doors by 3”.
STEP 17
To attach the ladder rack assembly to the
Sprinter:
Insert two Strip Nuts into each of the fac-
tory installed roof channels from the rear
and place them directly below the four
mounting brackets. Fasten the Mounting
Bracket to the roof channel with the 5/16-
18 X 1-1/4” Hex Head Bolts, 5/16 Lock
Washers and 5/16 Flat Washers into the
Strip Nut in four places.
Important: Tighten all four 5/16-18
X 1-1/4” Hex Head Bolts to 150 inch-
pounds of torque.
These two holes not used in
the High Roof Application
(4) 5/16-18 x 1-1/4"
Hex Hd. Bolt
(4) 5/16-18
Lock Washer
(4) 5/16-18
Flat Washer
(4) Strip Nut
Note: Holes on top of Mounting
Brackets are OBROUND for ad-
justability when mounting Ladder
Rack Assembly to Sprinter. Hard-
ware my have to be loosened to
position the Mounting Bracket di-
rectly over the roof channels. Re-
tighten all hardware after Ladder
Rack Assembly is affixed to roof.