WEATHER GUARD Model 254 EZ-GLIDE® Clamp Kit, Universal, Driver Side User Manual
Page 6
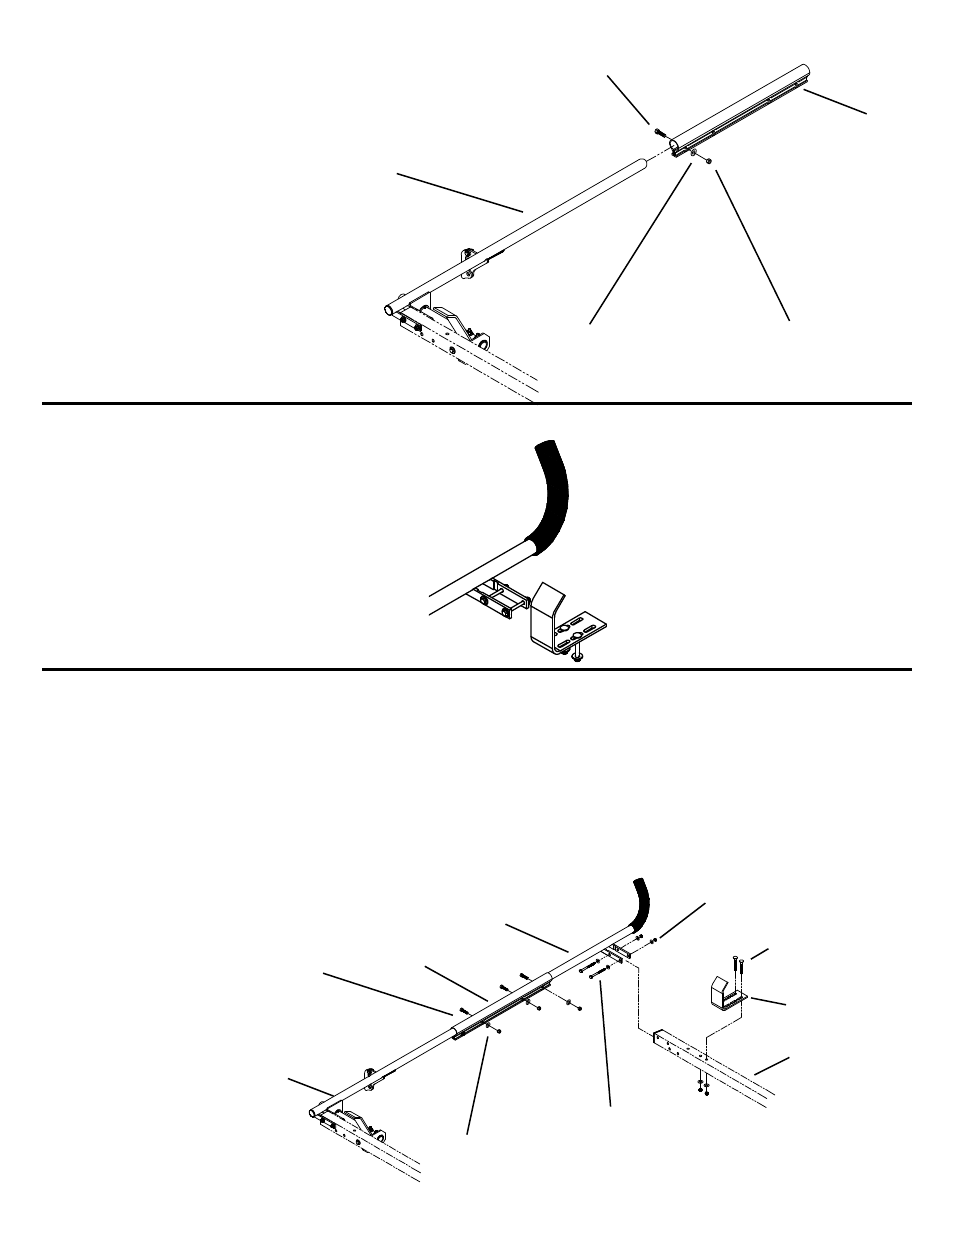
STEP 6
Slide the Rail Connector (A) over the end of the Rear Rail
(B) as shown. Install a 5/16-18 x 1" Fastener.
(Do not tighten at this time.)
(A)
(B)
5/16-18 x 1"
Hex Hd. Bolt
5/16" Flat
Washer
5/16-18 Nylon
Lock Nut
FRONT LADDER STOP ASSEMBLY
STEP 7
Insert the end of the Front Rail (A) into the Connector (B) and install the remaining three 5/16-18 x 1" Fasteners.(Do not
tighten at this time.) Adjust the overall length of (A), (B), and (C) to match the current distance between the cross-mem-
bers of the previously mounted passenger side ladder rack and/or accessory crossmember kit. Place the Connector (B)
over equal distances of the Front Rail (A) and the Rear Rail (C) and then tighten the four fasteners. (When mounting to
cross-members with a distance less then 7 feet apart, the Front Rail (A) and the Rear Rail (C) will have to be
equally cut down. Remove 6" from the Front Rail (A) and 6" from the Rear Rail (C) for a 6 foot distance and 12"
from the Front Rail (A) and 12" from the Rear Rail (C) for a 5 foot distance.) Attach the assembly (A), (B), and (C) to
the front cross-member with 5/16-18 x 2-3/4" Fasteners.
NOTE: The vehicle mounting
is not shown for clarity.
(D)
(E)
(A)
(B)
(5) 5/16-18
Nylon Lock Nut
(7) 5/16" Flat
Washer
(2) 5/16-18 x 2-3/4"
Hex Hd. Bolt
(3) 5/16-18 x 1"
Hex Hd. Bolt
(2) 5/16-18 x 2-1/2"
Carriage Bolt
Attach the Front Ladder Stop (D) to the Front Cross-Member (E)
with 5/16-18 x 2-1/2" Fasteners. Adjust the Ladder Stop position
to the location that best fits the ladder being carried.
(C)
6